Manuals

instruction manual for nostalgia popcorn maker

Welcome to the Nostalgia Popcorn Maker instruction manual! This guide helps you understand your appliance’s features, safety precautions, and proper usage. Explore recipes, troubleshooting, and maintenance tips.

Overview of the Nostalgia Popcorn Maker

The Nostalgia Popcorn Maker is a versatile kitchen appliance designed for easy and efficient popcorn making. Available in various models like the Coca-Cola 8-Cup Hot Air Popcorn Maker and the KPM200, these machines offer features such as hot air popping, stirring mechanisms, and vintage designs. They are perfect for home use, providing a fun and convenient way to enjoy fresh, theater-style popcorn.

Importance of Reading the Instruction Manual

Reading the instruction manual for your Nostalgia Popcorn Maker is crucial for safe and effective use. It provides essential details on assembly, operation, and maintenance. Understanding these guidelines ensures optimal performance and longevity of the appliance. Additionally, it helps prevent accidents and voiding the warranty. Always review the manual before first use to familiarize yourself with key features and safety precautions. This ensures a seamless and enjoyable popcorn-making experience.

Safety Precautions

Ensure safety while using your Nostalgia Popcorn Maker by following essential precautions, such as unplugging before cleaning, avoiding water exposure, and using non-abrasive materials only.

General Safety Guidelines

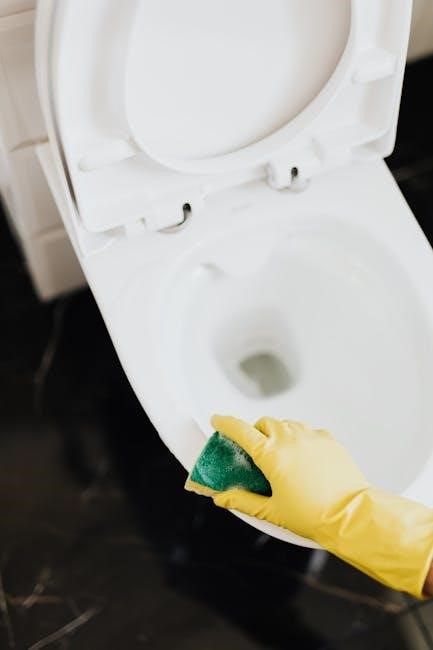
Always unplug the Nostalgia Popcorn Maker before cleaning or maintaining it. Avoid exposing the appliance to water or using abrasive materials, as this could damage the surface. Ensure the cord is kept away from water sources and heat. Never immerse the unit in water. Keep children away while operating. Follow these guidelines to ensure safe and optimal performance of your popcorn maker.

Specific Warnings and Cautions

Never use the Nostalgia Popcorn Maker near water or in humid environments, as this poses a risk of electrical shock. Avoid using abrasive sponges or scouring pads, which can damage the appliance. Do not leave the machine unattended during operation. Keep the cord away from heated surfaces and ensure it is not damaged. Always follow the recommended usage guidelines to prevent accidents.

Assembly and Setup

Properly unpack and identify all parts of your Nostalgia Popcorn Maker. Follow the step-by-step instructions to ensure correct assembly. This ensures safe and efficient operation.

Unpacking and Identifying Parts

Carefully unpack your Nostalgia Popcorn Maker to ensure no damage occurs. Locate the main unit, kettle, popping chamber, and power cord. Familiarize yourself with each component to understand its function. Check for any missing or damaged parts and contact customer support if issues arise. Proper identification ensures smooth assembly and operation. Always refer to the manual for detailed descriptions.

Step-by-Step Assembly Instructions

Begin by placing the popcorn maker on a flat surface. Attach the kettle to the main unit, ensuring it clicks securely. Connect the popping chamber and align the venting system properly. Plug in the power cord and test the appliance at low heat. Follow the manual’s visual guides for precise assembly. If unsure, refer to the troubleshooting section for common issues. Proper assembly ensures safe and efficient operation.

Operating the Popcorn Maker

Plug in the popcorn maker and preheat it for 2-3 minutes. Add 2-3 tablespoons of oil and 1/2 cup of kernels. Close the lid, and the machine will automatically pop the kernels. Once popping slows, turn it off. Serve immediately and enjoy theater-style popcorn at home.

Preparing for Use

Before first use, wash your hands and ensure the popcorn maker is clean. Place it on a flat, stable surface near an electrical outlet. Ensure the cord is away from water sources. Unplug the appliance when not in use. For optimal results, use 2-3 tablespoons of oil and 1/2 cup of popcorn kernels. Always follow the recommended measurements for best performance. Preheat the machine for 2-3 minutes before adding ingredients.

The Popcorn Making Process

The Nostalgia Popcorn Maker uses hot air to pop kernels efficiently. Add 1/2 cup of kernels and 2-3 tablespoons of oil to the kettle. Plug in the machine and turn it on. The hot air will circulate, popping the kernels within minutes. Once popping slows, turn off the machine. Pour the freshly popped popcorn into a bowl and season as desired. For best results, avoid leaving the machine unattended during operation and clean up any spilled popcorn immediately.

Cleaning and Maintenance

Regularly clean the Nostalgia Popcorn Maker by unplugging it and wiping surfaces with a damp cloth. Avoid abrasive cleaners or immersion in water to maintain performance and safety.

Post-Use Cleaning Tips

After each use, unplug the Nostalgia Popcorn Maker and allow it to cool. Wipe the exterior with a damp cloth to remove any oil or residue. For tougher stains, a mild soap solution can be used, but avoid harsh chemicals. Never submerge the appliance in water or use abrasive cleaners, as this may damage the finish or electrical components. Regular cleaning ensures optimal performance and longevity.

Regular Maintenance for Optimal Performance

To ensure your Nostalgia Popcorn Maker operates efficiently, perform regular checks. Clean the kettle and chute after each use to prevent residue buildup. Check the power cord for damage and ensure all connections are secure. Lubricate moving parts periodically to maintain smooth operation. Always store the appliance in a dry place to prevent rust or electrical issues. Regular maintenance enhances performance and extends the lifespan of your popcorn maker.

Troubleshooting Common Issues

Identify and resolve common problems with your Nostalgia Popcorn Maker to ensure smooth operation. Address issues like clogged kettles or uneven popping promptly for optimal performance.

Identifying and Resolving Common Problems

Common issues with your Nostalgia Popcorn Maker include clogged kettles or uneven popping. Ensure the appliance is unplugged before cleaning. Use a soft cloth to avoid damage. Check for blockages in the popping chamber. Avoid using abrasive materials that could scratch surfaces. For persistent issues, refer to the troubleshooting section or contact customer support for assistance. Regular maintenance helps prevent such problems.

When to Contact Customer Support

If you encounter issues not resolved by troubleshooting, contact Nostalgia Customer Support. This includes complex malfunctions, damaged parts, or unclear instructions. Provide your appliance’s model number and purchase details for assistance. Visit their official website or refer to the manual for contact information. Support is available to ensure optimal performance and address any concerns effectively.

Recipes and Flavor Enhancements

Discover delicious popcorn recipes and creative flavor ideas to enhance your snacking experience. From classic buttery flavors to gourmet seasonings, explore endless possibilities with your Nostalgia Popcorn Maker.

Classic Popcorn Recipes

Create timeless theater-style popcorn by combining kernels, oil, and salt. For a buttery twist, melt 2 tablespoons of butter and pour over freshly popped corn. Add a sprinkle of salt for enhanced flavor. Explore simple yet delicious recipes that bring the cinema experience home. Perfect for movie nights or family gatherings.

Creative Flavor Ideas

Elevate your popcorn with unique seasonings! Add a cheesy twist with grated Parmesan or cheddar powder. For a spicy kick, sprinkle chili powder or paprika. Try caramel drizzle for a sweet treat, or mix in chocolate chips for a dessert variation. Experiment with herbs like garlic powder or dill for savory options. Customize to your taste and enjoy endless flavor possibilities.

Understanding Your Popcorn Maker

Your Nostalgia Popcorn Maker features a compact design, easy controls, and interchangeable attachments for versatility. Learn about its components and settings to optimize performance.

Key Features and Components

The Nostalgia Popcorn Maker features a hot air popping mechanism, a transparent popping chamber, and a motorized stirring system for even cooking. Its compact design includes a power switch, a detachable kettle, and a non-stick surface for easy cleaning. Additional components may vary by model, such as interchangeable attachments or preset settings for different popping modes.

Customizing Your Popcorn Experience

Elevate your popcorn game with creative seasoning blends or drizzle with melted butter and chocolate. Experiment with herbs, spices, or cheese for unique flavors. For a theater-like experience, add a touch of salt and a drizzle of caramel. The Nostalgia Popcorn Maker allows you to tailor every batch to your taste preferences, making each snack a delightful treat.

Electrical Safety and Care

Always use the Nostalgia Popcorn Maker with a grounded power outlet. Avoid water exposure and keep cords away from heat sources to ensure safe operation and longevity.

Proper Electrical Usage

Always plug your Nostalgia Popcorn Maker into a grounded electrical outlet to prevent shocks. Keep the cord away from water and heat sources. Never use damaged cords or outlets. Unplug the appliance when not in use or before cleaning. Avoid overloading circuits, and ensure the voltage matches your appliance’s requirements for safe and efficient operation. This ensures longevity and prevents electrical hazards.

Storage and Handling Tips

Store your Nostalgia Popcorn Maker in a dry, cool place away from direct sunlight. Ensure all parts are clean and dry before storage to prevent damage or mold. Handle the appliance with care to avoid scratches or dents. When moving, secure the unit to prevent shifting. Keep it out of reach of children to ensure safety and longevity of the product. Regular checks before and after storage are recommended.

Warranty and Support Information

Your Nostalgia Popcorn Maker comes with a limited warranty covering manufacturing defects. For assistance, visit the Nostalgia website or contact customer support directly for help.

Understanding Your Warranty

Your Nostalgia Popcorn Maker is protected by a limited warranty covering manufacturing defects for a specified period. This warranty ensures repairs or replacements for faulty parts, excluding misuse or normal wear. Review the warranty terms in your manual for details on coverage duration and claim procedures. Proper registration and adherence to guidelines maximize warranty benefits and appliance longevity.

Reaching Customer Support

For assistance with your Nostalgia Popcorn Maker, contact customer support through their official website or phone. Provide your model number and detailed issue description for efficient help. Representatives are available to address inquiries, repair requests, and warranty claims. Visit the Nostalgia Electrics support page for contact information and resources to ensure timely resolution of any concerns you may have.

Final Tips for Enjoying Your Popcorn Maker

To maximize your Nostalgia Popcorn Maker experience, experiment with recipes, maintain cleanliness, and explore creative flavors. Regularly clean the machine to ensure optimal performance and longevity. Always follow safety guidelines and store the appliance properly when not in use. Enjoy the convenience and fun of making fresh, theater-style popcorn at home with minimal effort. Happy cooking!

Encouragement for Creative Use

Unleash your creativity with the Nostalgia Popcorn Maker! Beyond classic recipes, try unique flavor combinations like truffle oil, caramel, or spicy seasonings. Host movie nights or family gatherings with freshly made popcorn. Experiment with different kernel types and seasonings to create personalized treats. Let your imagination shine and make every popcorn batch a delightful experience tailored to your taste preferences.

Manuals

noco gbx45 manual

Welcome to the NOCO GBX45 manual, your comprehensive guide to understanding and using this advanced jump starter. This device is designed to safely and effectively jump-start vehicles, offering powerful features like USB-C Power Delivery and LED indicators. The manual ensures optimal performance and safety, covering everything from charging to troubleshooting. Read carefully to maximize your experience with the GBX45.

1.1 Overview of the NOCO GBX45 Device

The NOCO GBX45 is a portable lithium jump starter designed for reliable performance in various situations. It features USB-C Power Delivery, LED indicators for status monitoring, and advanced safety protections. With a 1250-amp capacity, it can jump-start cars, trucks, boats, and more. The device also serves as a powerful power bank, capable of charging smartphones and other electronics. Its compact design and user-friendly interface make it an essential tool for emergencies and everyday use, ensuring convenience and efficiency on the go.

1.2 Importance of the Manual for Safe and Effective Use

The NOCO GBX45 manual is essential for ensuring safe and effective operation of the device. It provides critical safety precautions, such as avoiding electrical shock and proper handling techniques, to prevent accidents. The manual also guides users through the device’s features, charging methods, and troubleshooting steps. By following the instructions, users can maximize the device’s performance, avoid potential hazards, and extend its lifespan. Reading and understanding the manual is crucial for a safe and optimal experience with the GBX45.

Safety Information and Precautions

This section outlines crucial safety guidelines for the NOCO GBX45, including warnings against electrical shock, sparks, and improper handling. Always follow safety precautions to avoid accidents.

2.1 General Safety Guidelines

Always follow safety guidelines when using the NOCO GBX45. Avoid sparks, open flames, or smoking near the device. Ensure the area is well-ventilated and free from flammable materials. Never modify the device or use damaged cables. Keep the GBX45 away from children and pets. Properly connect clamps to avoid short circuits. Use the device only for its intended purpose and follow all warnings to prevent injury or damage. Safe handling ensures reliable performance and longevity of the product.

2.2 Electrical Safety and Handling Precautions

Prevent electrical shock by avoiding contact with live circuits. Never disassemble the GBX45, as internal components can cause injury. Keep the device away from water and moisture. Use only approved chargers and cables to prevent damage. Avoid overcharging, as it may lead to battery degradation. Always follow the manufacturer’s charging instructions. Ensure proper ventilation during charging to prevent overheating. Handling the device with care reduces the risk of electrical hazards and ensures safe, reliable operation.

2.3 Warning Signs and Emergency Procedures

Be alert to warning signs such as unusual odors, excessive heat, or loud noises, which may indicate a malfunction. If the device overheats or emits smoke, immediately disconnect it and move to a well-ventilated area. In case of physical damage or exposure to liquids, stop use and contact NOCO support. For emergency situations, avoid sparks or open flames near the device. Keep it away from children and pets to prevent accidental harm. Always prioritize caution to ensure safe operation and prevent potential hazards.

Key Features of the NOCO GBX45

The NOCO GBX45 is a 1250-amp portable lithium jump starter with USB-C Power Delivery, LED indicators, and versatile charging capabilities for cars, boats, and trucks.

3.1 Technical Specifications and Capabilities

The NOCO GBX45 is a 1250-amp portable lithium jump starter, designed for jump-starting cars, boats, and trucks. It features USB-C Power Delivery, providing up to 60-watts for charging devices. The device includes LED indicators for status monitoring and offers multiple safety protections. With its compact design and advanced technology, the GBX45 delivers reliable performance for various applications, making it a versatile tool for emergency power needs on the go.

3.2 USB-C Power Delivery and Charging Options

The NOCO GBX45 features USB-C Power Delivery 3.0, delivering up to 60-watts of power for fast charging. This capability allows you to charge smartphones, tablets, and laptops efficiently. The USB-C port supports both input and output, making it versatile for powering devices. With its high-speed charging, the GBX45 is not only a jump starter but also a reliable power bank for everyday use, ensuring your devices stay charged on the go or in emergencies.

3.3 LED Indicators and Modes

The NOCO GBX45 features LED indicators that provide clear status updates. The LED flashes white when Manual Override is active, ensuring safe operation. A blue LED indicates system status and charging progress, while red signals errors or malfunctions. Additionally, the LED displays a steady green light when the battery is fully charged. These indicators, along with an SOS mode for emergencies, help users stay informed and in control of their device’s functions and battery status at all times.

Charging the NOCO GBX45

The GBX45 is best charged using the NOCO Auto Charger, ensuring fast and efficient power replenishment. Connect the charger to a power source and the device, with the vehicle turned on for optimal charging. Avoid extreme temperatures or flammable environments during charging to maintain safety and device longevity. Always follow the manual’s guidelines for proper charging procedures;

4.1 Recommended Charging Methods

The NOCO GBX45 is best charged using the NOCO Auto Charger, which provides fast and efficient power replenishment. For optimal charging, ensure the vehicle is turned on and in the “on” or “accessory” mode. Avoid charging in extreme temperatures or flammable environments. The Auto Charger is designed to safelycharge the GBX45’s internal battery, ensuring it is ready for jump-starting or power delivery when needed. Always follow the manual’s guidelines for proper charging procedures to maintain device performance and longevity.

4.2 Using the NOCO Auto Charger

The NOCO Auto Charger is the primary recommended method for charging the GBX45. Connect the charger to the device’s charging port and ensure the vehicle is in the “on” or “accessory” mode. The LED indicator will illuminate, showing the charging progress. Fast charging begins automatically when the vehicle’s system detects the connection. Always monitor the charging process and avoid interrupting it to ensure a full and stable charge. This method guarantees optimal battery health and performance for the GBX45.

4.3 Fast Charging and Power Delivery Activation

Fast charging on the NOCO GBX45 is activated when the device is connected to a vehicle with the ignition in the “on” position. The LED indicator will flash rapidly, signaling fast charging mode. USB-C Power Delivery 3.0 is enabled automatically, providing up to 60 watts of power for charging external devices. Ensure the device is powered off after reaching full charge to maintain battery health. Always follow safety guidelines to avoid overcharging or electrical issues. Proper activation ensures efficient and safe charging for both the GBX45 and connected devices.

Using the NOCO GBX45 for Jump Starting

The NOCO GBX45 simplifies jump starting with its advanced features. Connect the clamps to the battery, start the vehicle within 60 seconds, and power off the device afterward for safe operation and optimal performance.

5.1 Step-by-Step Jump Starting Instructions

  1. Ensure the GBX45 is fully charged and free from damage.
  2. Connect the positive (red) clamp to the dead battery’s positive terminal.
  3. Attach the negative (black) clamp to a grounded metal surface or the negative terminal.
  4. Press the power button to activate the device.
  5. Start the vehicle within 60 seconds of activation.
  6. Once the engine runs, turn off the GBX45 and remove the clamps in reverse order.

Always follow safety guidelines to avoid electrical shock or damage.

5.2 Manual Override Feature and Usage

The Manual Override feature allows starting vehicles with high battery resistance or non-standard systems. Activate it by holding the power button for 3 seconds until the LED flashes white. Ensure the device is connected correctly and the vehicle’s ignition is on. Use this mode cautiously, as it bypasses automatic safety checks. The LED will remain white during override. Only use Manual Override if the device doesn’t detect a battery. Always consult the manual for specific instructions to avoid risks.

5.3 Post-Jump Starting Procedures

After successfully jump-starting, disconnect the GBX45 immediately. Turn off the device and remove the clamps from the battery terminals. Start the vehicle’s engine and let it run for a few minutes to recharge the battery. The GBX45 will automatically shut down after 60 seconds if no load is detected. Check the LED indicator for battery level status. If necessary, recharge the device using the recommended charger. Store the GBX45 in a cool, dry place to maintain performance. Always refer to the manual for detailed care instructions.

Troubleshooting Common Issues

Identify and resolve issues with the GBX45 by checking LED indicators, battery levels, and connections. Restart the device or reset it if necessary. Consult the manual for detailed solutions to common problems like activation issues or charging errors. Ensure proper usage and maintenance for optimal performance.

6.1 Diagnosing Battery and Connection Problems

To diagnose battery and connection issues, start by checking the LED indicators on the GBX45. A flashing red light may indicate a low battery, while a solid red light signals a charging error. Ensure all cables are securely connected and free from damage. If the device fails to power on, verify the internal battery level and charge it using the recommended Auto Charger. Consult the manual for detailed diagnostic steps to address specific problems effectively.

6.2 Resolving LED Flashing or Activation Issues

If the LED on your GBX45 is flashing or not activating, check the battery level and ensure proper connections. A white flashing LED indicates manual override mode, while red flashes may signal errors. Restart the device by turning it off and on. If issues persist, reset the GBX45 by holding the power button for 10 seconds. Consult the manual for specific LED patterns and their meanings to address the problem effectively and restore normal functionality.

6.3 Resetting the Device

To reset the NOCO GBX45, press and hold the power button for 10 seconds until the LED turns off. Release the button and wait for the device to restart. This process resets all settings to factory defaults but does not erase saved preferences. Ensure the device is fully charged before performing a reset. If issues persist after resetting, contact NOCO customer support for further assistance. Resetting is a useful troubleshooting step for resolving persistent operational issues.

Warranty and Support Information

NOCO warrants the GBX45 against manufacturing defects for a specified period. For inquiries or claims, contact NOCO customer support via their official website or provided contact details.

7.1 Warranty Terms and Conditions

The NOCO GBX45 is covered under a limited warranty that protects against manufacturing defects. The warranty period begins from the date of purchase and varies based on product registration. Coverage includes repairs or replacements at NOCO’s discretion. Damages from misuse, neglect, or unauthorized modifications are excluded. For full details, refer to the warranty section in the manual or visit NOCO’s official website. Proper registration ensures eligibility for warranty benefits.

7.2 Contacting NOCO Customer Support

For assistance with the NOCO GBX45, visit the official NOCO website at no.co/support. Here, you can submit a support ticket, browse FAQs, or find contact information. Customer support is available to address inquiries, troubleshooting, and warranty-related issues. Representatives are trained to provide detailed assistance and ensure a positive experience. For faster service, have your product serial number and purchase details ready when reaching out. NOCO’s support team is committed to resolving issues promptly and efficiently.

8.1 Summary of Key Points

The NOCO GBX45 manual provides essential guidance for safe and effective use. Key points include following safety precautions, understanding LED indicators, and proper charging methods. The device offers powerful jump-starting capabilities, USB-C Power Delivery, and troubleshooting solutions. Always refer to the manual for detailed instructions and warranty information to ensure optimal performance and longevity of your GBX45.

8.2 Final Tips for Optimal Use

For optimal use of the NOCO GBX45, always check the battery level before jump-starting. Store the device in a cool, dry place to maintain performance. Regularly update the firmware and use original NOCO accessories for compatibility. Avoid overcharging and ensure proper connections to prevent damage. Use the manual override feature only when necessary and follow safety guidelines strictly. Keep the device clean and inspect cables for wear. By following these tips, you’ll extend the lifespan and ensure reliable operation of your GBX45;

PDF

i’ll be home for christmas sheet music pdf free

This timeless Christmas classic, written by Walter Kent, Kim Gannon, and Buck Ram, has become a beloved holiday standard. Originally composed during World War II, it resonates with emotional depth, expressing longing for home. The sheet music is widely available for instruments like piano, guitar, and flute, catering to both beginners and advanced musicians.

1.1 Overview of the Song and Its Popularity

“I’ll Be Home for Christmas” is a timeless holiday classic, resonating with emotional depth and nostalgic longing. Written during World War II, the song became an anthem for those separated from loved ones. Popularized by Bing Crosby, it has remained a beloved standard, evoking feelings of warmth and hope. Its enduring appeal lies in its universal message, making it a cherished piece for performers and audiences alike during the festive season.

1.2 Importance of Sheet Music for Musicians and Performers

Sheet music serves as a vital tool for musicians and performers, providing precise notation and structure for accurate performance. For “I’ll Be Home for Christmas”, it allows artists to interpret the song’s emotional nuances, ensuring authenticity. Access to free PDF downloads fosters creativity and learning, enabling musicians to practice and refine their renditions. This resource is invaluable for both professional and amateur performers seeking to master the piece.

Where to Find Free “I’ll Be Home for Christmas” Sheet Music PDF

Access free I’ll Be Home for Christmas sheet music PDFs through reputable websites like Musicnotes, PraiseCharts, and sheet music-sharing communities. Download easily and instantly.

2.1 Popular Websites for Free Sheet Music Downloads

Popular websites like Musicnotes, PraiseCharts, and sheetsfree.com offer free PDF downloads of “I’ll Be Home for Christmas” sheet music. These platforms provide easy access to various arrangements, including piano, guitar, and vocal scores. Users can download and print instantly, making it convenient for personal or educational use. These sites are trusted sources for high-quality sheet music, catering to diverse musical preferences and skill levels.

2.2 Tips for Identifying Reliable Sources

When searching for free sheet music, ensure websites are reputable by checking for secure connections (https) and clear copyright notices. Look for platforms with user reviews and ratings, as they often indicate quality. Verify that the sheet music is attributed to the correct composers, such as Walter Kent and Kim Gannon. Additionally, websites like Musicnotes and PraiseCharts are well-known for providing accurate and legal sheet music downloads.

Different Arrangements and Versions of the Song

The song offers various arrangements, including piano, guitar, and flute versions, suitable for both beginners and advanced musicians. Vocal and instrumental versions are also available.

3.1 Piano Sheet Music for Beginners and Advanced Players

Piano sheet music for “I’ll Be Home for Christmas” is widely available, catering to both beginners and advanced players. Beginners can start with simplified versions featuring basic melodies and chords, while advanced pianists can explore intricate arrangements with complex harmonies. Many PDF versions include optional vocal accompaniment, making it versatile for solo or collaborative performances. These sheets are ideal for personal practice or holiday recitals, ensuring a joyful musical experience for all skill levels.

3.2 Guitar and Vocal Arrangements

Guitar and vocal arrangements of “I’ll Be Home for Christmas” offer a charming blend of simplicity and emotion. These arrangements often include chord progressions, strumming patterns, and vocal melodies, making them accessible for both amateur and experienced musicians. Many PDF downloads provide lyrics and tablature, allowing guitarists to accompany vocalists seamlessly. This format is ideal for intimate performances or holiday gatherings, ensuring a heartfelt rendition every time.

3.3 Instrumental Versions for Flute, Clarinet, and Other Instruments

Instrumental versions of “I’ll Be Home for Christmas” are available for flute, clarinet, and other instruments, offering a beautiful way to enjoy the song without vocals. These arrangements maintain the song’s emotional depth while showcasing instrumental nuances. Many PDF downloads include solo and ensemble parts, making them versatile for performances. Whether for flute solos or clarinet duets, these versions provide a touching way to celebrate the holiday spirit musically.

Historical Background of “I’ll Be Home for Christmas”

Written by Walter Kent, Kim Gannon, and Buck Ram, this song was copyrighted in 1943 and became a WWII anthem, resonating with soldiers and families. Its heartfelt lyrics captured the longing for home, making it a timeless holiday classic that continues to evoke emotional connections across generations.

4.1 The Songwriters: Kim Gannon and Walter Kent

Kim Gannon and Walter Kent, renowned lyricist and composer, collaborated on this iconic piece. Gannon’s heartfelt lyrics paired with Kent’s melodic composition created a timeless holiday standard. Their work, copyrighted in 1943, resonated deeply during WWII, becoming a symbol of longing and hope for soldiers and families alike. This partnership marked a significant contribution to Christmas music, leaving a lasting legacy in the genre.

4.2 The Song’s Role in WWII and Its Cultural Significance

“I’ll Be Home for Christmas” became an anthem during WWII, resonating with soldiers abroad and families at home. Its emotional lyrics captured the longing for loved ones and the hope of reunions. Bing Crosby’s rendition further popularized the song, making it a cultural touchstone. It transcended mere entertainment, offering comfort and unity during a tumultuous era, leaving a lasting impact on holiday traditions and collective memory.

How to Use and Print the Sheet Music

Downloading the PDF is easy. Print it for personal or educational use. Adjust as needed for the best performance. Ensure clarity and quality for optimal results.

5.1 Step-by-Step Guide to Downloading and Printing PDF Files

Locate the PDF file on a reliable website. 2. Click the download button to save it. 3. Open the file using a PDF reader. 4. Select the print option and choose your printer. 5. Adjust settings like orientation and margins for clarity. 6. Print the sheet music on high-quality paper for optimal results. Ensure the file is free of errors before printing;

5.2 Adjusting the Sheet Music for Personal or Educational Use

Modify the sheet music to suit your needs by transposing keys or adjusting tempos. Use software like MuseScore or Adobe Acrobat to edit PDFs. For educational purposes, simplify complex sections for students. Add annotations or highlights for clearer instruction. Resize the layout for better readability on devices. These adjustments enhance personal practice and teaching, ensuring the music remains accessible and engaging for all skill levels.

Legal Considerations for Free Sheet Music

Respecting copyright laws is crucial when using free sheet music. Ensure you have proper permissions for public performance or distribution to avoid legal issues.

6.1 Copyright Laws and Fair Use Policies

Understanding copyright laws is essential when using “I’ll Be Home for Christmas” sheet music. The song, copyrighted in 1943 by Gannon & Kent Music Co., requires permission for commercial use. Fair use policies allow limited use for education or personal purposes. Always verify the source’s licensing terms to ensure compliance and avoid infringement issues.

6.2 Permissions for Public Performance or Distribution

Public performance or distribution of “I’ll Be Home for Christmas” requires proper permissions. For commercial use, arrangements, or public events, obtain licensing from the copyright holder or organizations like ASCAP or BMI. Free downloads are typically for personal or educational use. Ensure compliance by contacting the rights holder or a licensing agent to avoid legal issues.

User Reviews and Recommendations

Users and educators highly recommend the free PDF sheet music for its clarity and versatility. Many praise the ease of access and quality for both personal and educational use.

7.1 Feedback from Musicians and Music Teachers

Musicians and educators praise the free PDF sheet music for its clarity and versatility. Many highlight its suitability for various skill levels, from beginners to advanced players. The piano arrangements are particularly popular, offering a beautiful blend of melody and harmony. Music teachers appreciate its educational value, making it an excellent resource for classroom use. The sheet music’s accessibility has earned positive reviews across music communities and forums.

7.2 Popular Platforms for Sharing Sheet Music Experiences

Platforms like MuseScore, Musicnotes, and PraiseCharts are hubs for sharing and discussing sheet music. Musicians often post reviews, ratings, and performance tips. These sites foster a sense of community, allowing users to exchange ideas and learn from one another. Many also feature forums where teachers and performers share their experiences, making them invaluable resources for both learning and collaboration. These platforms help musicians connect and enhance their musical journeys.

Additional Resources for Learning the Song

Online tutorials, video guides, and sheet music apps provide comprehensive support for mastering the song. Platforms like YouTube offer instrumental covers and step-by-step lessons, while apps like MuseScore simplify access and organization of sheet music, making practice more efficient and enjoyable for musicians of all skill levels.

8.1 Tutorials and Video Guides for Practicing

Video guides on YouTube and other platforms offer step-by-step lessons for mastering the song. Tutorials cover piano, guitar, and vocal arrangements, with detailed chord progressions and lyrics. Channels like “nginitboi8747” provide instrumental versions, while websites like sheetsfree.com offer free sheet music with accompanying tutorials. These resources help musicians of all skill levels practice efficiently, ensuring a polished performance for holiday gatherings or personal enjoyment.

8.2 Sheet Music Apps for Easy Access and Organization

Apps like Musicnotes and forScore offer easy access to “I’ll Be Home for Christmas” sheet music PDFs. These platforms allow users to store, organize, and annotate their music digitally. Features include search functionality, set lists, and offline access, making practice and performance seamless. Apps like piaScore also enable sharing and collaboration, perfect for musicians and educators seeking convenient sheet music management tools.

The Value of Free Sheet Music for Education

Free sheet music, like “I’ll Be Home for Christmas,” supports music education by providing accessible resources for students and teachers, fostering creativity and skill development universally.

9.1 How Free Resources Support Music Education

Free sheet music, such as “I’ll Be Home for Christmas,” offers accessible resources for music education. It enables educators to assign pieces without financial barriers, allowing students to practice and perform. Available for various instruments and skill levels, it supports diverse learning needs. This accessibility fosters creativity and skill development, making music education inclusive and enriching for all students.

9.2 Encouraging Creativity and Skill Development

Free sheet music resources like “I’ll Be Home for Christmas” encourage creativity by allowing musicians to explore various arrangements and interpretations. Students can experiment with different instruments and styles, fostering innovation. These resources also support skill development by providing accessible materials for practice, enabling learners to refine their techniques. This accessibility promotes a creative and skill-enhancing learning environment for musicians of all levels.

Accessing “I’ll Be Home for Christmas” sheet music for free is a convenient way to enjoy and share the song, supporting musicians and educators alike.

10.1 Final Thoughts on Accessing and Using “I’ll Be Home for Christmas” Sheet Music

Accessing “I’ll Be Home for Christmas” sheet music is straightforward, with numerous free PDF options available online; Whether for personal enjoyment or educational purposes, the sheet music caters to various skill levels and instruments, ensuring everyone can enjoy this timeless classic. Musicians and educators alike benefit from its availability, making it a valuable resource for holiday performances and practices.

10.2 Encouragement to Explore More Holiday Sheet Music

Exploring holiday sheet music beyond “I’ll Be Home for Christmas” offers a wealth of festive favorites. From timeless classics like “Silent Night” and “Jingle Bells” to modern arrangements, there’s something for every musician. Websites provide free PDF downloads for various instruments, ensuring endless inspiration and joy during the holiday season. Dive into the diverse world of Christmas music and discover new pieces to enrich your repertoire.

PDF

york rite ritual book pdf

The York Rite Ritual Book is a comprehensive guide detailing the ceremonies‚ rituals‚ and symbolism of the York Rite of Freemasonry․ It serves as an essential resource for members‚ offering insights into the degrees and traditions of this Masonic tradition․ Available in PDF formats‚ the book includes historical context‚ degree explanations‚ and ceremonial practices‚ making it a valuable tool for both new and experienced Masons․

Overview of the York Rite of Freemasonry

The York Rite of Freemasonry is a system of degrees and orders that expands on the teachings of the Blue Lodge‚ offering deeper insights into Masonic philosophy and symbolism․ It is often referred to as the American Rite and includes degrees such as the Royal Arch‚ Council of Royal and Select Masters‚ and Knights Templar․ The York Rite is not merely an appendant body but an integral part of Freemasonry‚ providing a framework for moral and spiritual growth․ Its rituals and ceremonies are rooted in history‚ drawing from biblical and chivalric themes․ The York Rite is practiced widely across North America and is known for its rich traditions and significance in the Masonic journey․

Importance of Ritual Books in Freemasonry

Ritual books are foundational to Freemasonry‚ serving as guides for ceremonies and preserving the order’s traditions․ They provide detailed instructions for initiations‚ degrees‚ and symbolic teachings‚ ensuring consistency across lodges․ These texts are vital for educating new members and refreshing seasoned Masons on rituals and principles․ The York Rite Ritual Book‚ in particular‚ offers a comprehensive overview of its specific degrees‚ enhancing understanding of Masonic history and philosophy․ By adhering to these texts‚ Freemasons maintain the integrity and continuity of their practices‚ fostering unity and shared knowledge within the fraternity․

Historical Background of the York Rite

The York Rite traces its origins to York‚ England‚ evolving over centuries․ It incorporates ancient Masonic traditions and has been influenced by notable historical figures․

Origins and Evolution of the York Rite

The York Rite’s origins trace back to medieval stonemasons in York‚ England‚ with roots in the 10th century․ Over centuries‚ it evolved‚ incorporating elements from various Masonic traditions․ By the 18th century‚ the Rite had formalized its structure‚ blending degrees from the Blue Lodge‚ Royal Arch‚ Council of Royal and Select Masters‚ and Knights Templar․ This blend created a cohesive system reflecting both practical craftsmanship and spiritual symbolism․ The York Rite spread globally‚ particularly in North America‚ where it became known as the “American Rite‚” adapting to cultural contexts while preserving its historical essence․ Its evolution is documented in ritual books‚ offering insights into its rich legacy and continued relevance․

Key Figures and Influences in York Rite History

The York Rite’s history is shaped by influential figures who contributed to its development and preservation․ Frederick G․ Speidel‚ a prominent Masonic historian‚ authored works that detailed the Rite’s evolution and significance․ Malcolm C․ Duncan’s 19th-century ritual book remains a cornerstone‚ outlining degrees and ceremonies․ Knights Templar traditions and Royal Arch Masonry also played pivotal roles‚ blending historical and symbolic elements․ These figures and groups have ensured the Rite’s continuity‚ adapting its rituals while maintaining its core principles․ Their contributions are documented in various PDF resources‚ providing insights into the Rite’s rich history and its enduring impact on Freemasonry․

Structure and Degrees of the York Rite

The York Rite includes four main bodies: Lodge‚ Chapter‚ Council‚ and Commandery․ It offers advanced degrees like Royal Master‚ Select Master‚ and Knights Templar‚ providing deeper Masonic insights․

The Degrees of the Royal Arch

The Royal Arch degrees‚ part of the York Rite‚ include Mark Master‚ Past Master‚ Most Excellent Master‚ and Royal Arch Mason․ These degrees emphasize moral and ethical lessons‚ expanding on the Blue Lodge teachings․ The Mark Master degree focuses on the importance of labor and integrity‚ while the Most Excellent Master highlights perseverance and patience․ The Royal Arch Mason degree reveals the lost Master’s word‚ symbolizing enlightenment and the completion of the Master Mason’s journey․ These degrees are foundational for advancing in the York Rite and prepare candidates for the Knights Templar and other higher orders‚ offering profound insights into Masonic symbolism and history․

The Degrees of the Council of Royal and Select Masters

The Council of Royal and Select Masters comprises two degrees: the Degree of Royal Master and the Degree of Select Master․ These degrees delve into the completion and dedication of King Solomon’s Temple‚ offering moral and philosophical teachings․ The Royal Master degree explores the challenges faced during the temple’s construction‚ emphasizing fidelity and integrity․ The Select Master degree focuses on the preservation of sacred knowledge and the importance of secrecy․ Together‚ these degrees provide deeper insights into Masonic principles and prepare candidates for the Knights Templar‚ enriching their understanding of the craft’s history and symbolism through profound lessons and rituals․

The Degrees of the Knights Templar

The Knights Templar degrees within the York Rite include the Order of the Red Cross‚ Order of the Knights of Malta‚ and the Order of the Temple․ These degrees emphasize chivalric ideals‚ moral development‚ and spiritual growth․ The Order of the Red Cross teaches the importance of Christian faith and justice‚ while the Knights of Malta focus on loyalty and self-sacrifice․ The Temple degree culminates in the Knight’s obligation‚ symbolizing a commitment to defend the Christian faith and uphold moral standards․ These degrees draw inspiration from the historical Knights Templar‚ offering profound lessons on honor‚ duty‚ and service‚ and are integral to the York Rite’s progression․

Rituals and Ceremonies in the York Rite

The York Rite’s rituals and ceremonies are deeply symbolic‚ emphasizing moral and spiritual growth․ Initiation rituals‚ such as the Order of the Red Cross‚ are rich in meaning‚ guiding members through transformative experiences that reflect the Rite’s historical and philosophical foundations․

Initiation Rituals and Their Significance

Initiation rituals in the York Rite are pivotal‚ marking a candidate’s entrance into the fraternity․ These ceremonies are designed to impart profound moral and spiritual lessons‚ fostering personal growth and a deeper understanding of Masonic principles․ Drawing from biblical and historical narratives‚ rituals such as the Order of the Red Cross and the Knights Templar degrees use symbolism to convey timeless truths․ The significance lies in their ability to transform individuals‚ creating a sense of brotherhood and shared purpose․ These rituals are meticulously detailed in the York Rite Ritual Book‚ ensuring their preservation and proper execution across generations․

The Role of Symbolism in York Rite Rituals

Symbolism plays a central role in York Rite rituals‚ serving as a cornerstone for conveying moral and spiritual truths․ Rituals are rich with symbols such as the All-Seeing Eye‚ the Square and Compasses‚ and the Temple of Jerusalem‚ each carrying profound meanings․ These symbols guide candidates through lessons of divine oversight‚ moral rectitude‚ and the pursuit of wisdom․ The York Rite Ritual Book details these symbols‚ ensuring their significance is preserved and understood․ Through symbolic gestures and regalia‚ rituals create a vivid experience‚ reinforcing Masonic principles and fostering personal reflection․ Duncan’s Ritual and other handbooks provide detailed explanations‚ making symbolism accessible to both new and experienced Masons․

Ceremonial Practices and Their Meaning

Ceremonial practices in the York Rite are deeply meaningful‚ designed to convey moral and spiritual lessons through structured rituals․ These practices include initiation ceremonies‚ degree conferrals‚ and symbolic reenactments‚ such as the reconstruction of the Temple of Jerusalem․ The use of regalia‚ gestures‚ and scripted dialogues creates an immersive experience‚ reinforcing Masonic principles like brotherly love‚ relief‚ and truth․ Rituals such as the Mark Master and Most Excellent Master degrees emphasize the importance of integrity and leadership․ The York Rite Ritual Book details these practices‚ ensuring their continuity and proper execution․ By participating in these ceremonies‚ members deepen their understanding of Freemasonry’s teachings and their personal journey of self-improvement․

Key York Rite Ritual Books and Resources

Essential texts include Duncan’s Ritual‚ the Royal Arch Ritual Handbook‚ and modern guides‚ providing detailed insights into ceremonies‚ symbolism‚ and degree work within the York Rite tradition․

Duncan’s Ritual and Its Contents

Duncan’s Ritual‚ authored by Malcolm C․ Duncan‚ is a foundational text for York Rite Freemasonry․ First published in the 19th century‚ it outlines the three basic degrees of the Ancient York Rite and four advanced degrees․ The book includes detailed descriptions of Masonic initiation rituals‚ along with grips‚ passwords‚ and regalia․ It also features over a hundred illustrations that depict key gestures and symbolic imagery‚ providing visual context for the rituals․ Duncan’s Ritual is notable for its careful documentation of variations in practices‚ making it a valuable resource for both beginning and experienced Masons․ This text has been republished numerous times and remains a cornerstone for understanding York Rite traditions and ceremonies․

The Royal Arch Ritual Handbook

The Royal Arch Ritual Handbook is a detailed guide for the Royal Arch degree within the York Rite of Freemasonry․ Published in 1977‚ it provides a structured framework for conducting rituals‚ outlining the ceremonies and symbolism associated with the four degrees of the Royal Arch: Mark Master‚ Past Master‚ Most Excellent Master‚ and Royal Arch Mason․ The handbook serves as a practical reference for Masons‚ offering insights into the historical and philosophical underpinnings of these degrees․ It also includes instructions for ceremonial practices‚ ensuring consistency in performances․ As a key resource‚ the Royal Arch Ritual Handbook is widely used by Chapters to preserve the integrity and meaning of these ancient rituals‚ making it an indispensable tool for both officers and members․

Modern Publications and Guides

Modern publications and guides within the York Rite Ritual Book offer contemporary perspectives and updated practices‚ ensuring relevance for today’s Masons․ These resources often include revised rituals‚ updated ceremonial protocols‚ and new interpretations of traditional symbolism․ Designed to complement classic texts like Duncan’s Ritual‚ these guides cater to both new and experienced members‚ providing clarity and depth․ They frequently incorporate digital formats‚ such as PDFs‚ for easy access and reference․ Additionally‚ modern guides may address current challenges and opportunities within Freemasonry‚ fostering a deeper understanding of the York Rite’s principles and their application in modern life․ These publications serve as valuable tools for enhancing ritual performance and member education․

Manuals

rii i8 mini keyboard manual

The Rii i8 Mini Keyboard is a compact, wireless keyboard designed for convenience and portability, featuring a built-in touchpad for intuitive navigation and control across devices.

Overview of the Rii i8 Mini Keyboard

The Rii i8 Mini Keyboard is a versatile, 2.4GHz wireless keyboard with a built-in touchpad, designed for compact and efficient operation. It combines a QWERTY keyboard layout with a sensitive touchpad, enabling seamless navigation and control. The keyboard is lightweight and portable, making it ideal for use with PCs, projectors, smart TVs, and other devices. It features a rechargeable battery and comes with a USB receiver for easy wireless connectivity. The i8 also includes a backlit LED feature for use in low-light environments and supports multiple device connections, enhancing its functionality for both home and professional settings.

Key Features and Benefits

The Rii i8 Mini Keyboard offers a range of features that enhance user experience. Its compact design makes it portable and easy to use in various settings. The built-in touchpad allows for intuitive navigation, eliminating the need for a separate mouse. The keyboard supports wireless connectivity via a 2.4GHz USB receiver, ensuring reliable and stable connections. Additionally, the backlit LED feature provides visibility in low-light environments, while the rechargeable battery offers extended usage. The i8 is compatible with multiple devices, making it a versatile tool for both entertainment and productivity. Its ergonomic design and responsive keys ensure comfortable typing and efficient control, making it a practical choice for users seeking a compact, all-in-one solution.

Physical Features and Components

The Rii i8 Mini Keyboard is sleek and lightweight, designed for portability. It includes a USB receiver, charging cable, and user manual for easy setup and use.

Keyboard Layout and Design

The Rii i8 Mini Keyboard features a compact, ergonomic design with a QWERTY layout, offering a smooth typing experience despite its small size. The keys are spaced optimally for comfort, and the keyboard includes a range of shortcut keys for media control, volume adjustment, and screen brightness. The backlit LED feature enhances visibility in low-light environments, with options to toggle the backlight on/off. The design is lightweight and durable, making it easy to carry and use across various settings. The keyboard also supports multiple devices, ensuring versatility for different applications. Its sleek and modern aesthetic complements any workspace or entertainment setup.

Touchpad Functionality

The Rii i8 Mini Keyboard features a built-in touchpad, enabling intuitive navigation and control without the need for a separate mouse. The touchpad supports multi-touch gestures, allowing users to scroll, zoom, and navigate seamlessly. It also includes a mouse-like cursor control, making it ideal for presentations, media playback, and general computing tasks. The touchpad’s responsiveness ensures precise movements, while its compact design maintains the keyboard’s portability. Users can customize touchpad sensitivity and gestures through software settings, enhancing their overall experience. This feature makes the Rii i8 a versatile tool for both productivity and entertainment, offering a mouse-free solution for various devices and applications. Proper calibration ensures optimal performance across different surfaces. The touchpad’s functionality is further complemented by its compatibility with multiple operating systems, making it a reliable choice for diverse user needs.

Included Accessories

The Rii i8 Mini Keyboard comes with essential accessories to ensure a seamless experience. It includes a wireless USB receiver for easy connectivity, a charging/data cable for powering the keyboard, and a user manual to guide setup and usage. Additionally, some packages may include a USB extension cable for improved receiver placement. These accessories are designed to provide everything needed to start using the keyboard right out of the box. The compact design of the included items ensures portability, making it easy to carry the keyboard and its accessories wherever you go. This comprehensive package enhances the overall convenience and functionality of the Rii i8 Mini Keyboard. Properly utilizing these accessories ensures optimal performance and user satisfaction.

Installation and Setup

Setting up the Rii i8 Mini Keyboard involves connecting the wireless receiver, pairing the device, and optionally installing drivers for enhanced functionality.

Connecting the Keyboard to Your Device

To connect the Rii i8 Mini Keyboard, first ensure the device is turned on. Place the keyboard near your computer and press and hold the power button for approximately 3 seconds. The power indicator light will begin to flash blue, signaling that the keyboard is in pairing mode. Next, insert the provided USB receiver into an available USB port on your computer. The connection should establish automatically within a few seconds. If prompted, follow any on-screen instructions to complete the pairing process. Once connected, the blue light will stop flashing, indicating successful pairing.

Pairing the Wireless Receiver

To pair the Rii i8 Mini Keyboard, ensure the keyboard is turned off. Press and hold the F1 key while powering on the keyboard, then release F1 immediately. Plug the USB receiver into your device’s USB port. The keyboard will automatically enter pairing mode, and the connection should establish within a few seconds. Ensure your device is compatible with the receiver. Once paired, the keyboard is ready for use. No additional drivers are needed for most systems. This process ensures a secure and stable wireless connection, allowing you to operate your device effortlessly with the Rii i8 Mini Keyboard.

Installing Drivers or Software

Installation of drivers or software for the Rii i8 Mini Keyboard is typically straightforward. Most systems automatically recognize the device upon plugging in the wireless receiver, requiring no additional software. However, if drivers are needed, they may be included on a CD packaged with the keyboard or available for download from the manufacturer’s official website. Ensure you only install drivers from trusted sources to avoid security risks. Once installed, the keyboard should function seamlessly with your device. If issues arise, refer to the user manual or contact customer support for assistance. Proper installation ensures optimal performance and compatibility with your system.

Using the Rii i8 Mini Keyboard

The Rii i8 Mini Keyboard offers a seamless user experience with its wireless connectivity and built-in touchpad, allowing users to navigate, type, and control devices efficiently anywhere.

Navigating with the Touchpad

Navigating with the Rii i8 Mini Keyboard’s touchpad is intuitive and efficient. The touchpad supports multi-touch gestures, allowing users to scroll, zoom, and switch between applications seamlessly. To move the cursor, simply glide your finger across the touchpad surface. Tapping on the touchpad acts as a left-click, while tapping with two fingers performs a right-click; Pinching or stretching with two fingers adjusts zoom levels, making it easy to navigate through documents or web pages. The touchpad’s sensitivity can be adjusted through the keyboard settings, ensuring a personalized experience for every user.

Customizing Keyboard Settings

The Rii i8 Mini Keyboard allows users to customize various settings to enhance their typing and navigation experience; The keyboard offers adjustable key sensitivity and backlight brightness, which can be controlled manually or through software. Users can enable or disable the backlit LED feature by pressing specific key combinations, providing flexibility in different lighting conditions. Additionally, the touchpad sensitivity can be fine-tuned to suit individual preferences. Customization options ensure that users can tailor the keyboard’s performance to their specific needs, whether for productivity, entertainment, or presentations. These settings can be accessed via the device’s settings menu or through dedicated software provided with the keyboard.

Using the Backlit LED Feature

The Rii i8 Mini Keyboard features a backlit LED system, designed to enhance visibility and usability in low-light environments. This feature is available on specific models, such as the i8 A/B versions. To activate the backlight, users can press and hold the F1 key while powering on the keyboard. Once enabled, the LEDs illuminate the keys, making typing easier in dim settings. The backlight can be adjusted manually or through software, offering two control modes: Software Control and Manual Control. This feature adds convenience for users working in various lighting conditions, ensuring optimal productivity and comfort during late-night tasks or presentations. The LED backlighting is both stylish and functional, complementing the keyboard’s compact design.

Troubleshooting Common Issues

Common issues with the Rii i8 Mini Keyboard include connectivity problems, unresponsive keys, and touchpad malfunctions. These can often be resolved with a factory reset or driver updates.

Resolving Connectivity Problems

To resolve connectivity issues with the Rii i8 Mini Keyboard, ensure the wireless receiver is properly plugged into your device’s USB port. Turn the keyboard off, then on again, and press the power button for 3 seconds until the blue light flashes, indicating pairing mode. If the connection fails, restart both the keyboard and your device. Check for interference from other wireless devices and ensure the receiver is not damaged. If issues persist, try pairing the keyboard with a different USB port or restart the pairing process by pressing and holding the power button for 5 seconds. Ensure the keyboard is fully charged and drivers are up to date for optimal performance.

Fixing Unresponsive Keys or Touchpad

If the keys or touchpad on your Rii i8 Mini Keyboard are unresponsive, start by ensuring the keyboard is fully charged and the USB receiver is securely connected. Restart the keyboard by turning it off, waiting a few seconds, and turning it back on. If the issue persists, clean the keys and touchpad with a soft cloth to remove dirt or debris. For the touchpad, press and hold the power button for 5 seconds to reset it. If individual keys are unresponsive, try pressing them firmly to ensure proper contact. If the problem continues, perform a factory reset by pressing and holding the F1 key while powering on the keyboard. This should restore functionality to all keys and the touchpad.

Performing a Factory Reset

To perform a factory reset on the Rii i8 Mini Keyboard, press and hold the F1 key while powering on the keyboard. This restores all settings to their default state.

Instructions

setup instructions kf 50.0009 ptz cam

PTZ (Pan-Tilt-Zoom) cameras are versatile surveillance tools offering precise control over camera movements, enabling wide-area coverage with high zoom capabilities․ They enhance security monitoring by providing clear, detailed footage in real-time, making them essential for modern security systems․

Why Use a PTZ Camera?

PTZ cameras are widely adopted due to their flexibility, cost-effectiveness, and advanced features․ They allow remote control of pan, tilt, and zoom functions, enabling comprehensive surveillance coverage with minimal equipment․ These cameras are ideal for monitoring large areas, reducing the need for multiple static cameras․ Their ability to zoom in on details makes them perfect for capturing high-quality video evidence․ Additionally, PTZ cameras are adaptable to various environments, from indoor security systems to outdoor surveillance, offering scalability and reliability․ Their remote operation and preset capabilities enhance monitoring efficiency, making them a valuable asset for both residential and commercial security needs․

Overview of the KF 50․0009 PTZ Camera

The KF 50․0009 PTZ camera is a high-performance surveillance device designed for efficient monitoring․ It features advanced pan, tilt, and zoom capabilities, allowing precise control over camera movements; The camera is equipped with high-quality components, including a robust lens and image sensor, ensuring clear and detailed video capture․ Its durable housing makes it suitable for both indoor and outdoor installations․ The KF 50․0009 is user-friendly and integrates seamlessly with network systems, offering remote accessibility and configuration․ This camera is an ideal choice for security applications requiring flexibility, reliability, and superior video quality, making it a valuable addition to any surveillance setup․

Hardware Requirements for the KF 50․0009 PTZ Cam

The KF 50․0009 PTZ Cam requires a stable power supply and a high-speed network cable for optimal performance, ensuring reliable operation and clear video transmission always․

Essential Components and Accessories

The KF 50․0009 PTZ Cam comes with essential components, including a power supply, network cable, and metal bracket for secure installation․ Additional accessories like a remote controller and joystick enhance functionality․ The camera features a high-quality image sensor and lens for crisp video capture․ Ensure all components are included for proper setup and optimal performance․ These accessories are designed to provide durability and reliability, making the camera a robust solution for surveillance needs․

Power Supply and Network Cable Requirements

The KF 50․0009 PTZ Cam requires a stable power supply, typically 12V DC, to ensure consistent operation․ A high-quality network cable, such as CAT5 or CAT6, is essential for reliable connectivity․ For optimal performance, use a cable with minimal interference and sufficient bandwidth․ Ensure the power supply meets the camera’s specifications to avoid damage․ Proper wiring and connections are critical for both power and network stability․ Additionally, PoE (Power over Ethernet) compatibility simplifies installation by delivering power and data through a single cable, reducing clutter and setup complexity․

Step-by-Step Setup Instructions for the KF 50․0009 PTZ Cam

Follow these organized steps to set up your KF 50․0009 PTZ Cam: gather equipment, install physically, connect to the network, configure settings, and test functionality․

Step 1: Gather Your Equipment

To begin setting up your KF 50․0009 PTZ Cam, ensure you have all necessary components․ This includes the camera unit, power supply, network cable, mounting hardware (screws and brackets), and the user manual․ Additionally, a remote controller or joystick may be provided for easier operation․ Verify that all accessories are included in the package to avoid delays․ It’s also recommended to have a drill and screwdriver handy for installation․ Organize your equipment beforehand to streamline the process and ensure a smooth setup experience․ Proper preparation now will save time and effort later․

Step 2: Physical Installation of the Camera

Begin by attaching the metal bracket to a wall using a power drill and screws․ Ensure the installation height is between 8-10 feet (2․4m-3m) for optimal coverage․ Secure the camera to the bracket using the provided thumb screws․ Tighten firmly to prevent movement or vibration․ Make sure the camera is level and evenly positioned for balanced operation․ Avoid installing near heat sources or obstructions that could interfere with performance․ Double-check the bracket’s stability to ensure the camera remains securely in place․ Proper physical installation is crucial for reliable operation and clear video capture․ Follow the manufacturer’s guidelines for precise alignment and placement․

Step 3: Connect Your Camera to Your Network

Connect the camera to your network using an Ethernet cable for a stable wired connection or via Wi-Fi for wireless setup․ Ensure the network cable is securely plugged into both the camera and your router․ For Wi-Fi, access the camera’s setup interface through a computer or mobile app․ Log in using the admin credentials provided in the user manual․ Once connected, the camera will obtain an IP address automatically․ Ensure the network connection is stable to avoid interruptions․ If using a wireless connection, verify the signal strength and proximity to the router․ A reliable network connection is essential for smooth operation and remote access․

Step 4: Configure Your Camera’s Network Settings

Access the camera’s web interface or dedicated app to configure network settings․ Set a static IP address if required, or use DHCP for automatic assignment․ Configure port forwarding for remote access and enable DDNS if needed․ Ensure the camera’s firmware is updated for optimal performance․ Secure the camera by changing default admin credentials and enabling WPA2 encryption․ Test the connection by pinging the camera’s IP address or accessing it remotely․ Verify all settings are saved and the camera operates smoothly across your network․ Proper network configuration ensures reliable performance and remote accessibility․

Step 5: Test Your Camera’s Functionality

Once connected, test the camera’s functionality to ensure proper operation․ Check the live feed to confirm video quality and adjust settings if needed․ Test pan, tilt, and zoom controls to verify smooth movement and accuracy․ Ensure night vision or low-light settings activate correctly and provide clear footage․ Test motion detection alerts and any preset patrols or tours․ Verify network connectivity by accessing the camera remotely․ Use the app or software to confirm all features work seamlessly․ Finally, ensure firmware is up-to-date for optimal performance․ Successful testing confirms the camera is ready for reliable monitoring and security operations․

Configuring the Camera’s Software and Settings

Configure your PTZ camera’s software using the dedicated app․ Access settings for video quality, motion detection, and preset points․ Regularly update firmware for optimal performance․

Using the Dedicated Mobile App for Setup

Download and install the dedicated mobile app for your PTZ camera setup․ Open the app and follow the in-app instructions to connect your camera to your network․ Ensure your camera and mobile device are on the same Wi-Fi network․ Use the app to configure basic settings, such as IP address, username, and password․ The app may also allow you to test camera functionality, adjust video quality, and set up motion detection․ Some apps offer features like QR code scanning to streamline the setup process․ Once connected, use the app to monitor live footage and control camera movements remotely․

Configuring Preset Points and Patrol Settings

Access the camera’s settings through the web interface or mobile app․ Define preset points by positioning the camera at desired locations and saving them․ Set patrol routes by selecting multiple preset points and adjusting the dwell time (minimum 15 seconds)․ Enable the patrol function to allow the camera to automatically cycle through the selected points․ Use the app or controller to test the patrol route and ensure smooth transitions․ Configure intervals and schedules for automatic patrols, enhancing monitoring efficiency․ This feature is ideal for covering large areas or focusing on critical zones, ensuring comprehensive surveillance with minimal manual intervention․

Optimizing Video Quality and Performance

To ensure the best video quality, adjust the camera’s resolution and bitrate settings according to your network capabilities․ Enable compression to reduce bandwidth usage without compromising clarity․ Position the camera in a well-lit area to minimize grain and maximize detail․ Regularly clean the lens to avoid smudges or debris obstructing the view․ For smooth operation, maintain a stable network connection and avoid interference from other devices․ Update the camera’s firmware to benefit from performance improvements and new features․ These steps ensure optimal video quality, reliability, and longevity of your KF 50․0009 PTZ camera setup․

Tips for Optimizing Your PTZ Camera Setup

Position the camera strategically for maximum coverage, ensure stable network connectivity, and regularly update software for enhanced performance and security capabilities;

Best Practices for Placement and Installation

For optimal performance, install the KF 50․0009 PTZ camera at a height of 8-10 feet to minimize tampering and ensure wide coverage․ Use a sturdy metal bracket to secure the camera firmly to the wall, ensuring it remains stable in various conditions․ Position the camera in an area with a strong Wi-Fi signal to avoid connectivity issues․ Avoid placing it near heat sources like radiators or stoves to prevent overheating․ Ensure the power supply and network cables are neatly organized and protected from damage․ Proper installation ensures reliability, video clarity, and long-term functionality of the camera․

Enhancing Security and Monitoring Capabilities

PTZ cameras like the KF 50․0009 significantly enhance security by offering remote control over pan, tilt, and zoom functions, allowing detailed monitoring of vast areas․ Preset points and patrol routes enable automated surveillance, ensuring consistent coverage without manual intervention․ High zoom capabilities capture precise details, while night vision ensures clarity in low-light conditions․ Integrating the camera with existing security systems amplifies its effectiveness․ Regular software updates and maintenance further optimize performance, ensuring robust monitoring and reliability․ These features make PTZ cameras indispensable for modern security needs, providing advanced tools to deter and respond to potential threats effectively․

Troubleshooting Common Issues

Address network connectivity problems by checking cables and settings․ Resolve software glitches through updates․ Ensure stable power supply and restart the camera if issues persist․

Resolving Network Connectivity Problems

Network issues with the KF 50․0009 PTZ camera often arise from incorrect IP configurations or loose connections․ Ensure the Ethernet cable is securely plugged into both the camera and the router․ Check the network settings in the camera’s web interface to confirm the IP address and subnet mask are correctly assigned․ If using DHCP, ensure the feature is enabled to automatically obtain an IP address․ Restart the camera and router if issues persist․ Additionally, verify that the network cable is free from damage and that all ports are functioning properly․ This will help restore connectivity efficiently․

Fixing Mechanical or Software Malfunctions

Mechanical issues with the KF 50․0009 PTZ camera, such as faulty pan-tilt or zoom functions, may require lubrication or replacement of worn parts․ For software malfunctions, updating the firmware via the web interface often resolves issues․ Restart the camera after updates to ensure proper installation․ If the camera freezes or fails to respond, perform a factory reset using the reset button․ Always consult the user manual for specific instructions․ Regular maintenance, such as cleaning the lens and updating software, can prevent malfunctions and ensure optimal performance․ Addressing these issues promptly helps maintain reliable camera operation․

Best Practices for Using Your PTZ Camera

Regular updates, optimal placement, and testing ensure the camera performs at its best, providing reliable security monitoring and clear video quality consistently over time․

Regular Maintenance and Updates

Regular maintenance ensures your KF 50․0009 PTZ camera operates optimally․ Check the lens for cleanliness and ensure the camera is free from dust or debris․ Additionally, the camera’s mechanical components, such as the pan-tilt mechanism, should be inspected periodically to ensure smooth operation․ Regularly updating the camera’s firmware is crucial for security patches, feature enhancements, and performance improvements․ Always follow the manufacturer’s instructions for updates to avoid any potential issues․ A well-maintained camera not only lasts longer but also delivers consistent, high-quality video performance․

Ensuring Optimal Performance and Longevity

To ensure the KF 50․0009 PTZ camera performs optimally and lasts long, install it in a stable environment with minimal exposure to extreme temperatures or moisture․ Regularly clean the lens to maintain video clarity and check for firmware updates to keep the camera’s software current․ Avoid overloading the camera’s mechanical components by not exceeding recommended usage limits․ Proper power supply and network configurations are also essential for smooth operation․ By adhering to these guidelines, you can maximize the camera’s performance and extend its lifespan, ensuring reliable security monitoring for years to come․

Manuals

ctek mxs 5.0 instruction manual

Welcome to the CTEK MXS 5.0 manual, your comprehensive guide to understanding and using this advanced battery charger. This manual provides detailed instructions for operating, maintaining, and troubleshooting the device, ensuring safe and effective use. Designed for both professionals and home users, it covers everything from initial setup to advanced charging modes, helping you maximize the performance of your CTEK MXS 5.0 charger.

1.1 Overview of the CTEK MXS 5.0 Battery Charger

The CTEK MXS 5.0 is a professional, fully automatic battery charger designed for 12V lead-acid batteries. Featuring an 8-step charging cycle, it ensures optimal charging and maintenance. Suitable for use in extreme temperatures (down to -30°C), this charger is versatile and reliable. It supports various battery types, including standard, AGM, and deep-cycle batteries. With its compact design and user-friendly interface, the MXS 5.0 is ideal for both professional and home use, providing efficient and safe battery management.

1.2 Key Features and Benefits

The CTEK MXS 5.0 is a fully automatic, 12V battery charger with an 8-step charging cycle for optimal performance. It supports various battery types, including standard, AGM, and deep-cycle batteries. Designed for efficiency, it operates in extreme temperatures (down to -30°C). The charger features a compact, durable design with LED indicators for clear status updates. Multiple charging modes cater to different needs, from quick charging to maintenance. Its advanced safety protections prevent overcharging, short circuits, and overheating, ensuring user safety and battery longevity. Ideal for both professional and home use, it offers reliable and versatile battery management.

Safety Instructions and Precautions

Always follow safety guidelines when using the CTEK MXS 5.0. Ensure good ventilation, avoid open flames, and keep the charger away from children. Connect the battery correctly to prevent sparks. Never modify the charger or use damaged cables. Read all precautions in the manual to ensure safe operation and avoid potential hazards.

2.1 General Safety Guidelines

Always ensure proper ventilation when using the CTEK MXS 5.0 to prevent hydrogen gas buildup. Keep the charger away from children and avoid touching electrical parts with wet hands. Do not modify the device or use damaged cables, as this can cause malfunctions. Use the charger only for 12V lead-acid batteries, as specified. Follow all instructions in the manual for correct connections and operation. Never leave the charger unattended during use and avoid exposure to extreme temperatures or moisture. Adhere to these guidelines to ensure safe and reliable operation.

2.2 Handling the Charger and Battery

When handling the CTEK MXS 5.0 and battery, always wear protective gloves and eyewear. Ensure the charger is placed on a stable, non-conductive surface. Connect the charger to the battery only as specified, avoiding reverse polarity. Check cables for damage before use and ensure they are securely attached. Never touch electrical components with bare hands. Store the battery in a well-ventilated area, away from flammable materials. Handle the charger and battery with care to prevent damage and ensure safe operation.

Getting Started with the CTEK MXS 5;0

Welcome to the CTEK MXS 5.0, a fully automatic 12V battery charger designed for ease of use and safety. This section guides you through initial setup and preparation.

3.1 Unpacking and Inventory

Begin by carefully opening the packaging and inspecting the contents. Ensure all components are included: the CTEK MXS 5.0 charger, user manual, connection cables, and clamps. Verify each item for any visible damage. Familiarize yourself with the charger’s controls and ports. This step ensures you have everything needed to start using your charger safely and effectively. If any items are missing or damaged, contact CTEK support immediately for assistance.

3.2 Initial Setup and Preparation

Start by placing the CTEK MXS 5.0 on a stable, flat surface away from direct sunlight and moisture. Connect the charger to a power source using the supplied cable. Ensure all cables and clamps are undamaged and securely connected. Before use, verify the charger’s settings match your battery type. For proper operation, avoid placing the charger near flammable materials or in damp environments. Refer to the manual for specific setup instructions tailored to your battery requirements.

Installation and Setup

Mount the CTEK MXS 5.0 securely on a stable surface, ensuring proper ventilation. Connect the charger to the battery, following the polarity guidelines. Tighten all connections firmly for safe and efficient charging. Ensure the device is placed away from flammable materials and moisture to prevent damage or hazards.

4.1 Mounting the Charger

Mount the CTEK MXS 5.0 on a stable, flat surface using suitable screws. Ensure the charger is positioned upright and securely fastened to prevent movement during operation. Avoid installing near flammable materials or in areas exposed to extreme temperatures or moisture. Proper mounting ensures optimal performance and safety. Refer to the manual for specific installation guidelines and torque specifications. Incorrect mounting may lead to device malfunction or damage. Always follow the manufacturer’s recommendations for a safe and reliable setup.

4.2 Connecting the Charger to the Battery

To connect the CTEK MXS 5.0 to the battery, first ensure the charger is turned off. Attach the positive (red) clamp to the positive terminal and the negative (black) clamp to the negative terminal or a suitable grounding point. Ensure the connections are secure and free from corrosion. The charger will automatically detect the battery type and begin charging. Avoid reversing the polarity, as this can damage the charger or battery. Always refer to the manual for specific connection guidelines and safety precautions.

Operating the CTEK MXS 5.0

Operating the CTEK MXS 5.0 is straightforward, utilizing its fully automatic, 8-step charging cycle. Use the MODE button to select specific programs tailored to your battery needs.

5.1 Understanding the Charging Modes

The CTEK MXS 5.0 features multiple charging modes to suit different battery types and conditions. Its 8-step automatic charging cycle includes desulfation, bulk charging, and maintenance. Select modes like RECOND for deeply discharged batteries or NORMAL for standard charging. The charger automatically detects and adjusts to the battery’s needs, ensuring optimal charging. Use the MODE button to cycle through available programs, tailored for specific applications. This intelligent system ensures safe, efficient, and adaptive charging for various battery requirements.

5.2 Using the Mode Button and Program Selection

Press the MODE button to cycle through available programs, selecting the desired charging mode. The MXS 5.0 offers programs like NORMAL, RECOND, and TEST, each tailored for specific battery needs. Use RECOND for deeply discharged batteries or TEST to diagnose battery health. The charger automatically adapts to the battery’s condition, ensuring optimal charging. The intuitive interface makes it easy to navigate and select the right program for your application, enhancing efficiency and safety during the charging process.

Monitoring the Charging Process

Monitor the charging process using the LED indicators. Each step in the 8-step cycle is displayed, ensuring you track progress efficiently. Battery readiness is indicated when STEP 4 lights up, and full charge is confirmed at STEP 7.

6.1 Interpreting the LED Indicators

The CTEK MXS 5.0 features LED indicators that provide real-time feedback on the charging process. Each LED represents a specific stage or status, such as charging progress, battery condition, or errors. For example, STEP 4 indicates the battery is ready for engine start, while STEP 7 signals a full charge. Additional LEDs may flash or glow steadily to denote testing phases, reconditioning modes, or fault detection. Refer to the indicator chart in this manual to understand each light’s meaning and ensure proper charging cycle interpretation.

6.2 Understanding the 8-Step Charging Cycle

The CTEK MXS 5.0 operates through an 8-step charging cycle, ensuring optimal battery care. Step 1: Desulfation (revitalizes deeply discharged batteries). Step 2: Soft Start (gently begins charging). Step 3: Bulk (rapidly charges to 80%). Step 4: Absorption (finishes charging at 100%). Step 5: Analysis (tests battery health). Step 6: Recondition (restores capacity if needed). Step 7: Float (maintains charge). Step 8: Pulse (prevents sulfation). Each step ensures safe, efficient charging and long-term battery health.

Maintenance and Troubleshooting

Regularly inspect and clean the charger’s cables. Troubleshoot issues like error lights or no power by checking connections and referring to the manual. Proper care ensures longevity.

7.1 Routine Maintenance Tips

Regularly inspect the charger for wear and tear, cleaning dirt or corrosion from clamps and connectors with a soft brush. Store it in a cool, dry place, away from sunlight and moisture to prevent damage. Check cables for cracks and replace if necessary. Disconnect the charger when not in use to conserve energy. Refer to the manual for specific tips on maintaining the MXS 5.0’s advanced features. This ensures optimal performance and longevity.

7.2 Common Issues and Solutions

If the charger does not turn on, check the power source and connections. Ensure the mains cable is securely plugged in. For charging issues, verify battery clamps are properly attached and free from corrosion. If the charger indicates an error, refer to the LED codes in the manual. For unexpected behavior, restart the device or reset the program. If problems persist, contact CTEK support for assistance. Regular maintenance and proper usage can prevent most issues, ensuring reliable performance.

Technical Specifications

The CTEK MXS 5.0 is a 12V, 5A fully automatic battery charger designed for professional use. It features advanced charging technology and compatibility with various battery types, ensuring efficient and safe charging solutions.

8.1 Detailed Product Specifications

The CTEK MXS 5.0 is a 12V battery charger with a 5A charging current, designed for professional use. It features an 8-step automatic charging cycle, ensuring optimal charging for various battery types. The charger operates in temperatures as low as -30°C and is IP44 rated for dust and water resistance. Constructed with durable materials, it weighs 2.2 kg and includes a 2-year warranty. Its compact design and robust casing make it ideal for both home and professional environments, providing reliable and efficient battery maintenance.

8.2 Compatibility and Applications

The CTEK MXS 5.0 is compatible with 12V lead-acid batteries, including Wet, MF, AGM, and Ca types. Ideal for cars, motorcycles, boats, and RVs, it supports maintenance charging for prolonged battery life. Its 5A charging capability ensures versatility, making it suitable for both professional workshops and home use. The charger’s robust design and wide temperature range allow it to perform effectively in various environments, catering to a broad range of automotive and marine applications with reliable and efficient charging performance.

Warranty and Support

The CTEK MXS 5.0 is backed by a comprehensive warranty, ensuring coverage for defects in materials and workmanship. For support, visit www.ctek.com or contact CTEK directly.

9.1 Warranty Terms and Conditions

The CTEK MXS 5.0 is covered by a 5-year warranty from the date of purchase, protecting against manufacturing defects. The warranty is valid only with a proof of purchase. Damages caused by misuse, unauthorized repairs, or normal wear and tear are not covered. For warranty claims, contact CTEK support via their official website or regional service centers. Ensure to register your product for extended support and verify warranty conditions for specific regions or applications. Proper documentation is required for all claims.

9.2 Contacting CTEK Support

For assistance with your CTEK MXS 5.0, visit the official CTEK website at www.ctek.com; Use the “Support” section to access FAQs, troubleshooting guides, and contact forms. You can also reach CTEK via email or phone through regional service centers listed on their website. Ensure to have your product serial number and purchase details ready for efficient support. CTEK’s dedicated team is available to address inquiries, provide technical guidance, and resolve issues promptly.

Manuals

th6110d1005 user manual

The Honeywell TH6110D1005 is a programmable digital thermostat from the FocusPro 6000 series‚ designed for residential HVAC systems․ It offers precise temperature control and energy efficiency․

With a user-friendly interface and battery-powered operation‚ this thermostat is known for its ease of installation and intuitive programming capabilities‚ making it a popular choice for homeowners․

Featuring a backlight display and pull-out instructions‚ the TH6110D1005 ensures seamless operation and customization‚ allowing users to optimize their heating and cooling preferences effortlessly․

1․1 Overview of the Honeywell FocusPro 6000 Series

The Honeywell FocusPro 6000 series includes programmable digital thermostats designed for residential HVAC systems․ Known for their ease of use and energy efficiency‚ these thermostats offer precise temperature control and customizable scheduling․ The series is battery-powered‚ ensuring reliable operation without hardwiring․ With a focus on simplicity and functionality‚ the FocusPro 6000 series is a popular choice for homeowners seeking efficient climate control solutions․

1․2 Key Features of the TH6110D1005 Model

The Honeywell TH6110D1005 features a large‚ backlit display for easy readability and a pull-out instruction manual for quick reference․ It offers adaptive intelligent recovery‚ ensuring programmed temperatures are reached on time․ With four programmable periods daily and separate settings for weekdays and weekends‚ this thermostat optimizes energy use and comfort․ Its battery-powered design simplifies installation and maintenance․

Technical Specifications of the TH6110D1005

Dimensions: 39․37 x 39․37 x 39․37 inches‚ weight: 0․05 kg․ Temperature ranges: Heat 40-90°F‚ Cool 50-99°F․ Operating ambient: 32-120°F․ Relative humidity: 5-90%․

2․1 Product Dimensions and Weight

The Honeywell TH6110D1005 has dimensions of 39․37 x 39․37 x 39․37 inches‚ making it a compact and space-efficient solution․ With a lightweight design of only 0․05 kilograms‚ it ensures easy installation and handling․ Its sleek dimensions allow it to blend seamlessly into any home decor while maintaining functionality and performance․

2․2 Temperature Ranges for Heating and Cooling

The Honeywell TH6110D1005 thermostat supports heating temperatures from 40°F to 90°F (4․5°C to 32°C) and cooling temperatures from 50°F to 99°F (10°C to 37°C)․ These ranges ensure precise control over your home’s climate‚ providing comfort while optimizing energy efficiency during both heating and cooling cycles․

2․3 Operating and Shipping Temperatures

The Honeywell TH6110D1005 operates effectively in ambient temperatures between 32°F and 120°F (0°C to 48․9°C)․ For shipping‚ it withstands temperatures from -20°F to 120°F (-28․9°C to 48․9°C)․ This ensures durability during transit and reliable performance in various environments‚ maintaining consistent functionality across different climate conditions․

2․4 Relative Humidity and Other Environmental Factors

The Honeywell TH6110D1005 operates optimally in environments with a relative humidity of 5% to 90% (non-condensing)․ It is recommended to avoid exposing the thermostat to direct sunlight‚ excessive moisture‚ or extreme temperatures to ensure reliable performance and longevity of the device․

Installation and Setup

The Honeywell TH6110D1005 is designed for straightforward installation and setup․ It comes pre-programmed with default settings‚ and the built-in pull-out instructions guide users through the process easily․

3․1 Pre-Installation Checklist

Before installing the Honeywell TH6110D1005‚ ensure the system is compatible with your HVAC setup․ Verify the wiring diagram matches your current thermostat connections․ Turn off the power at the circuit breaker and confirm the system is cool․ Check that the wall where the thermostat will be mounted is level and clear of obstructions․ Gather tools like a screwdriver and voltage tester for safe installation․ Review the user manual for specific requirements and ensure batteries are installed correctly․ Proper preparation ensures a smooth and successful installation process without any electrical risks․

3․2 Step-by-Step Installation Guide

Begin by turning off the power to your HVAC system at the circuit breaker․ Remove the old thermostat and disconnect the wires․ Mount the new base plate‚ ensuring it is level․ Connect the wires to the appropriate terminals as per the wiring diagram․ Attach the thermostat to the base plate and insert the batteries․ Turn the power back on and follow the on-screen prompts to complete the setup․ Refer to the pull-out instructions for additional guidance if needed․

3․3 Initial Settings and Configuration

After installation‚ the thermostat is pre-programmed with a default schedule․ Use the buttons to navigate through settings and customize temperature preferences․ Refer to the pull-out instructions for guidance․ Set your preferred temperature range and schedule for weekdays and weekends․ Enable features like adaptive recovery to optimize performance․ Ensure all settings are saved to maintain energy efficiency and personalized comfort․ Consult the manual for detailed configuration options․

Programming the Thermostat

Programming the Honeywell TH6110D1005 allows you to set temperature schedules for weekdays and weekends․ Use the pre-set programs or customize up to four periods daily for optimal comfort․

4․1 Understanding the Programming Schedule

The Honeywell TH6110D1005 allows you to program up to four temperature periods daily‚ with distinct settings for weekdays and weekends․ This feature ensures your home maintains optimal temperatures according to your schedule‚ enhancing comfort and energy efficiency․ The pre-set programs are designed to reduce heating and cooling expenses by up to 33%‚ making it both convenient and cost-effective․

4․2 Setting Up Time Periods for Weekdays and Weekends

The Honeywell TH6110D1005 allows you to customize temperature settings for up to four periods daily‚ distinguishing between weekdays and weekends․ This flexibility ensures your home stays comfortable while optimizing energy use․ You can adjust the default settings to match your lifestyle‚ with options to set specific temperatures for morning‚ day‚ evening‚ and night․

Weekday and weekend schedules can be programmed independently‚ providing tailored comfort for different routines․ The thermostat’s interface guides you through setting these periods‚ making it easy to adapt to your preferences and reduce energy consumption effectively․

4․3 Adaptive Intelligent Recovery Feature

The Honeywell TH6110D1005 features Adaptive Intelligent Recovery‚ which learns your HVAC system’s response time to reach the desired temperature․ This ensures the system starts heating or cooling just in time to meet the scheduled temperature‚ optimizing efficiency and comfort․ The feature automatically adjusts‚ eliminating the need for manual calculations and providing consistent results․

By understanding your system’s performance‚ the thermostat minimizes temperature fluctuations‚ ensuring your home reaches the setpoint precisely when needed․ This intelligent feature enhances energy savings and maintains a stable indoor climate‚ adapting seamlessly to your schedule and preferences․

Operating the Thermostat

The Honeywell TH6110D1005 operates with a large‚ easy-to-read display and intuitive controls; It features a pull-out instruction manual for quick guidance‚ ensuring straightforward temperature adjustments and scheduling․

5․1 Basic Operations and Controls

The Honeywell TH6110D1005 offers straightforward functionality with a user-friendly interface․ The thermostat features a pull-out instruction manual for quick reference‚ ensuring easy access to basic operations․ Users can adjust temperature settings using the up and down arrows‚ while the display screen provides clear feedback․ The system also includes a programmable schedule‚ allowing for customized temperature settings throughout the day․ Additionally‚ the adaptive intelligent recovery feature ensures the programmed temperature is reached precisely on time‚ enhancing efficiency and comfort․ Battery maintenance is simplified with low-battery alerts‚ and the thermostat is compatible with most HVAC systems‚ making it a versatile choice for home climate control․

5․2 Adjusting Temperature Settings

The Honeywell TH6110D1005 allows users to easily adjust temperature settings using the up and down arrows on the thermostat․ The display screen shows the current and set temperatures‚ ensuring clarity․ The system maintains temperature ranges of 40-90°F for heating and 50-99°F for cooling․ Users can adjust settings manually or rely on the programmable schedule for efficiency․ The adaptive intelligent recovery feature ensures the programmed temperature is reached on time‚ optimizing comfort and energy use․ The pull-out instructions provide step-by-step guidance for seamless operation․

5․3 Using the Built-In Pull-Out Instructions

The Honeywell TH6110D1005 features a convenient pull-out instruction manual‚ providing easy access to basic operating steps․ Simply grasp and pull the face of the thermostat to reveal the instructions․ This built-in guide offers quick reference for adjusting settings‚ programming schedules‚ and troubleshooting‚ ensuring users can operate the thermostat confidently without needing external documentation․

Troubleshooting Common Issues

The Honeywell TH6110D1005 manual provides solutions for common issues like display malfunctions or temperature inaccuracies‚ often resolved by resetting the thermostat or checking battery levels․

6․1 Common Errors and Solutions

Common issues with the Honeywell TH6110D1005 include display malfunctions‚ inaccurate temperature readings‚ and unresponsiveness․ These are often resolved by resetting the thermostat or replacing batteries․ Additionally‚ ensuring proper wiring connections and clearing any system errors can address most problems‚ restoring normal operation efficiently․

6․2 Resetting the Thermostat

To reset the Honeywell TH6110D1005‚ remove the batteries‚ wait 10 seconds‚ and reinsert them․ This restores factory settings without losing programmed schedules․ If issues persist‚ perform a hard reset by holding the “Menu” button while inserting batteries․ This clears all settings‚ requiring reconfiguration․ Resetting is a quick solution for display issues or connectivity problems․

6․3 Battery Maintenance and Replacement

The Honeywell TH6110D1005 operates on two AA alkaline batteries․ Replace them annually or when the display shows a low-battery indicator․ Ensure batteries are installed correctly‚ matching polarity․ Use high-quality batteries to avoid performance issues․ Remove old batteries promptly to prevent leakage․ Always check expiration dates for new batteries to maintain reliable operation․ Proper disposal is recommended for used batteries․

Advanced Features and Settings

The Honeywell TH6110D1005 offers advanced features like Adaptive Intelligent Recovery‚ which ensures the set temperature is reached on time․ It also includes energy-saving modes and customizable temperature preferences‚ allowing users to optimize comfort and efficiency․ The thermostat is compatible with various HVAC systems‚ providing versatile performance for different home setups․

7․1 Energy-Saving Features

The Honeywell TH6110D1005 includes energy-saving features like a programmable schedule that reduces heating and cooling expenses by up to 33%․ Adaptive Intelligent Recovery ensures the set temperature is reached on time‚ minimizing unnecessary energy use․ The thermostat also offers pre-set energy-saving settings‚ making it easy to optimize efficiency without sacrificing comfort․ These features help homeowners reduce their energy consumption and lower utility bills effectively․

7․2 Customizing Your Temperature Preferences

The Honeywell TH6110D1005 allows users to customize temperature preferences with a programmable schedule․ Set up to four time periods daily‚ with distinct settings for weekdays and weekends․ The user-friendly interface simplifies adjustments‚ ensuring optimal comfort and energy efficiency․ This feature enables tailored temperature control‚ aligning with your lifestyle and preferences for enhanced convenience and energy savings․

7․3 Compatibility with HVAC Systems

The Honeywell TH6110D1005 is compatible with most HVAC systems‚ including single-stage‚ multi-stage‚ and heat pump configurations․ Its universal design supports various wiring setups‚ ensuring reliable performance․ This thermostat seamlessly integrates with existing systems‚ providing precise temperature control and enhancing overall HVAC efficiency․

Maintenance and Care

Regularly clean the thermostat to ensure optimal performance․ Replace batteries as needed and refer to the built-in pull-out instructions for guidance on maintenance tasks․

8․1 Cleaning the Thermostat

Regular cleaning ensures the Honeywell TH6110D1005 operates efficiently․ Use a soft‚ dry cloth to wipe the display and exterior․ Avoid harsh chemicals‚ as they may damage the screen․ For deep cleaning‚ gently remove the faceplate and clean vents with compressed air․ This prevents dust buildup and maintains accuracy in temperature readings and functionality․

8․2 Regular Software Updates

Regular software updates are essential for optimal performance․ Check periodically for new firmware versions on Honeywell’s official website or through the thermostat’s interface․ Updates may enhance features‚ improve compatibility‚ and fix issues․ Follow the manual’s instructions to download and install updates‚ ensuring your thermostat remains up-to-date and functions efficiently․

8․3 Ensuring Optimal Performance

To ensure optimal performance‚ clean the thermostat regularly and avoid exposing it to direct sunlight or extreme temperatures․ Use the adaptive intelligent recovery feature to maintain consistent temperatures․ Proper installation and leveling are crucial for accurate readings․ Refer to the manual for maintenance tips and troubleshooting to keep your Honeywell TH6110D1005 functioning at its best․

User Manual and Additional Resources

The Honeywell TH6110D1005 user manual is available online as a free PDF download‚ providing detailed instructions‚ troubleshooting guides‚ and specifications for optimal use and maintenance․

9․1 Accessing the Full PDF Manual

Access the Honeywell TH6110D1005 manual at this link․ The 26-page PDF provides detailed setup‚ programming‚ and troubleshooting instructions‚ ensuring users can fully utilize their thermostat’s features․ Download to understand capabilities and optimize performance․

9․2 Online Support and Documentation

Honeywell offers comprehensive online support for the TH6110D1005‚ including troubleshooting guides and technical specifications․ Visit Honeywell’s website for detailed documentation‚ FAQs‚ and user guides․ Additional resources like setup instructions and promotional details are also available‚ ensuring users can resolve issues and optimize their thermostat’s performance with ease․

  • Access troubleshooting guides and FAQs․
  • Download user manuals and setup instructions․
  • Explore technical specifications and promotional details․

9․3 Frequently Asked Questions

Common questions about the Honeywell TH6110D1005 include programming schedules‚ temperature adjustments‚ and troubleshooting․ Users often inquire about resetting the thermostat‚ battery maintenance‚ and understanding adaptive recovery․ Additionally‚ questions arise about compatibility with HVAC systems and accessing the pull-out instruction manual․ For detailed answers‚ refer to the online manual․

  • How do I program the thermostat?
  • Why isn’t the thermostat responding?
  • Can I customize temperature settings?

The Honeywell TH6110D1005 thermostat offers a blend of simplicity‚ efficiency‚ and advanced features‚ making it an ideal choice for smart home temperature management and energy savings․

10․1 Summary of Key Takeaways

The Honeywell TH6110D1005 thermostat is a user-friendly‚ energy-efficient solution for home climate control․ It features programmable scheduling‚ adaptive recovery‚ and a pull-out instruction guide․ With its precise temperature management and compatibility with various HVAC systems‚ this thermostat is designed to optimize comfort and reduce energy costs․ Its intuitive design and comprehensive manual make it an excellent choice for homeowners seeking reliability and ease of use․

10․2 Final Tips for Effective Use

Regularly clean the display and sensors for accuracy․ Check batteries monthly to prevent malfunctions․ Program schedules for weekdays and weekends to optimize energy use․ Enable adaptive recovery for timely temperature adjustments․ Use the pull-out guide for quick reference․ Consult the manual for troubleshooting and settings․ Periodically review and adjust settings to maintain comfort and efficiency․ Ensure HVAC compatibility for optimal performance․

PDF

star frontiers rpg pdf

Star Frontiers is a classic sci-fi RPG originally published by TSR, offering a rich universe for space exploration and adventure. Remastered PDF versions are now available, combining the original Alpha Dawn and Knight Hawks rules into a comprehensive system for modern players. This PDF release ensures accessibility to both new and veteran fans, preserving the game’s legacy while introducing it to a new generation of role-players.

What is Star Frontiers?

Star Frontiers is a classic science-fiction role-playing game (RPG) created by TSR (now Wizards of the Coast). Originally published in the 1980s, it combines elements of space exploration, alien races, and futuristic combat. Players create characters from diverse species, each with unique abilities, and embark on adventures spanning interstellar travel and planetary discoveries. The game emphasizes storytelling, strategic combat, and character development, blending RPG mechanics with board game-like tactical elements for a unique experience.

The PDF versions of Star Frontiers include remastered rules, fan-made expansions, and original modules, making it accessible to both retro gaming enthusiasts and new players. Its legacy continues to inspire modern sci-fi RPGs, offering a timeless blend of adventure and strategy in a cosmic setting.

History of Star Frontiers RPG

Star Frontiers, created by TSR (now Wizards of the Coast), was first published in the 1980s. The PDF versions, released later, offer remastered rules for accessibility.

Original Publication and Development

Star Frontiers was first published in 1982 by TSR, Inc., with its core rulebook titled Alpha Dawn. Developed by a team led by renowned game designer Tom Moldvay, it introduced a sci-fi setting with a focus on exploration and adventure. The game’s mechanics were influenced by earlier TSR titles, offering a unique blend of role-playing and tactical combat. Its success led to expansions, including the Knight Hawks supplement, which added starship combat rules. The original print editions were later converted to PDF format, preserving the game’s legacy for modern players.

Impact on the RPG Community

Star Frontiers left a lasting mark on the RPG community, inspiring countless sci-fi themed games and mods. Its unique blend of exploration, trade, and combat resonated with fans, making it a beloved classic. The game’s PDF release has introduced it to new generations, sparking fresh interest in retro gaming. Fans and creators continue to expand its universe, ensuring its legacy endures. Its influence is evident in modern RPGs, proving its timeless appeal and importance in the evolution of tabletop gaming.

Core Rulebooks of Star Frontiers

Star Frontiers’ core rulebooks include Alpha Dawn and Knight Hawks. Alpha Dawn introduced the base game, while Knight Hawks expanded it with advanced rules and space combat. Both have been remastered into PDFs for modern accessibility, preserving the original gameplay while enhancing clarity and presentation for new and veteran players alike.

Alpha Dawn: The First Edition

Alpha Dawn, the first edition of Star Frontiers, was published by TSR in 1982. It introduced the core rules for character creation, including races like humans, Vrusk, and Dralasites, and skills that defined player abilities. The rulebook established the game’s sci-fi setting, focusing on exploration, trade, and combat. Remastered PDF versions of Alpha Dawn are now available, combining the original content with modern formatting and clarity, making it accessible to both retro enthusiasts and new players. These PDFs ensure the classic rules remain vibrant and playable today.

Knight Hawks: The Expanded Rules introduced advanced gameplay mechanics, including the Tactical Combat Simulator for detailed space battles. This expansion built upon Alpha Dawn, enhancing character development and adventure complexity. Now available as remastered PDFs, Knight Hawks combines original content with modern updates, offering fans a refined experience. Its strategic depth and expanded rules make it a cornerstone of the Star Frontiers RPG, beloved by both veteran players and newcomers.

Character Creation in Star Frontiers allows players to craft unique characters, selecting species, skills, and backgrounds. The PDF versions enhance this process with detailed customization options and streamlined rules.

Races and Species in the Game

In Star Frontiers, players can choose from a variety of unique races, each with distinct abilities and traits. The core species include Humans, Vrusk, Dralasites, S’ssri, and Yazirians. These races offer diverse gameplay experiences, from the Vrusk’s technical prowess to the Yazirians’ agility. The PDF versions of the game provide detailed descriptions, stats, and cultural backgrounds for each species, enhancing character customization and immersion in the sci-fi universe.

Skills and Character Development

In Star Frontiers, characters develop through a skill-based system where players assign points to skills like marksmanship, piloting, or engineering. These skills determine proficiency levels, influencing gameplay outcomes. Characters can improve skills as they gain experience, allowing for tailored development. The PDF rulebooks, such as Alpha Dawn, provide detailed rules for skill progression and task resolution, ensuring a balanced and strategic gameplay experience. This system emphasizes player choice and adaptability, making each character unique and integral to the story.

Equipment and Vehicles

In Star Frontiers, players can equip their characters with a wide variety of gear, from advanced energy weapons to durable armor. Spaceships are a core element, with detailed rules for their design, customization, and combat. The PDF rulebooks, such as the Star Frontiers Players Guide and Knight Hawks, provide extensive lists of equipment and vehicles, including starfighters, freighters, and ground vehicles. These resources allow players to outfit their characters for any mission, ensuring a dynamic and immersive sci-fi experience. The game’s focus on spacecraft and gear enhances its tactical depth and exploration themes.

Game Mechanics and Combat System

Star Frontiers features a tactical combat system with detailed rules for space and ground battles. The Tactical Combat Simulator offers precise mechanics, while skill checks and weapon stats enhance gameplay depth. Scalable from personal skirmishes to epic space battles, the system balances strategy and storytelling, appealing to both newcomers and experienced players. The PDF rules provide clear guidelines, ensuring immersive and dynamic combat encounters in the game.

Combat Rules and Tactical Combat Simulator

The Tactical Combat Simulator in Star Frontiers provides detailed rules for both space and ground battles. Players can engage in strategic combat, utilizing character skills and weapon stats.
The system balances complexity with accessibility, offering depth for veterans while remaining intuitive for newcomers. Ship-to-ship battles and personal skirmishes are equally dynamic, blending strategy and storytelling.
The PDF includes clear guidelines, making it easy to master the mechanics and immerse oneself in epic sci-fi conflicts.

Task Resolution and Skill Checks

Star Frontiers uses a percentile-based system for task resolution, where players roll two 10-sided dice to determine success or failure. Skills play a central role, with character proficiency levels influencing outcomes.
The system is intuitive, allowing for quick decisions during gameplay. Skill checks are integrated seamlessly into adventures, enabling players to solve problems creatively. This mechanic enhances storytelling and strategic thinking, making it a cornerstone of the game’s design and appeal in the PDF versions of the rulebooks.

Adventures and Modules

Star Frontiers offers a wide range of adventures and modules, from the iconic Volturnus series to standalone scenarios, providing endless possibilities for exploration, combat, and problem-solving in a vast sci-fi universe. These modules are now available as PDFs, ensuring accessibility for both new and veteran players to embark on thrilling journeys through space.

The Volturnus Series

The Volturnus Series is a iconic collection of adventures for Star Frontiers, concluding with the module Starspawn of Volturnus. These scenarios, including Crash on Volturnus and Volturnus, Planet of Mystery, offer epic storylines, challenging encounters, and detailed settings. Originally designed for the Alpha Dawn rules, they are now available as remastered PDFs, ensuring accessibility for modern players. This series remains a fan favorite, blending exploration, diplomacy, and combat in a rich sci-fi universe.

Other Notable Adventures and Scenarios

Beyond the Volturnus Series, Star Frontiers offers a variety of thrilling adventures that expand its sci-fi universe. Modules like Mutiny on the Eleanor and Into the Void provide unique storylines, challenging scenarios, and diverse settings. These PDF releases include detailed maps, NPCs, and gameplay mechanics, ensuring hours of immersive play. Fans also appreciate the Tactical Combat Simulator, which enhances battlefield experiences. These adventures showcase the game’s versatility, catering to both new players and seasoned veterans seeking fresh challenges in the Star Frontiers galaxy.

PDF Availability and Resources

Official Star Frontiers PDFs are available through platforms like DriveThruRPG, featuring remastered rules and classic adventures. Fan-made content, including updated guides and character sheets, expands gameplay options.

Official PDF Releases

Official Star Frontiers PDFs are available on platforms like DriveThruRPG, offering high-quality scans of original rulebooks and adventures. These releases include Alpha Dawn and Knight Hawks, ensuring compatibility with modern digital formats. Remastered versions incorporate errata and improved layouts, enhancing readability and gameplay. Fans can access classic modules, such as the Volturnus series, making these PDFs an invaluable resource for both new and veteran players seeking authentic Star Frontiers experiences.

Fan-Made Content and Remastered Rules

Fans have created extensive content for Star Frontiers, including remastered rules and adventures. The StarFrontiersman website offers updated rule sets, combining Alpha Dawn and Zeb’s Guide into a cohesive system. Fan-made PDFs often include new races, skills, and equipment, while maintaining the game’s original charm. Community-driven projects ensure the game stays fresh, with contributions like custom character sheets and scenarios. These efforts highlight the dedication of the Star Frontiers community in preserving and evolving this classic RPG.

Legacy and Community Support

Star Frontiers has left a lasting impact on sci-fi RPGs, inspiring modern games and fostering a dedicated fan base. Active community support continues through forums, remastered content, and new adventures, ensuring its enduring popularity and relevance in the RPG world.

Influence on Modern RPGs

Star Frontiers has significantly influenced modern RPGs, particularly in the sci-fi genre. Its open-world exploration and tactical combat systems have inspired developers. Games like Savage Worlds and Alternity drew from its mechanics. The remastered PDF releases have reintroduced its concepts to new designers, ensuring its legacy endures. Fans and creators continue to adapt its rules, proving its timeless appeal and innovative design in the evolution of role-playing games.

Community Contributions and Updates

The Star Frontiers community remains vibrant, with fans creating custom content and updates. Sites like Star Frontiersman offer remastered rules and new adventures. Players have developed additional races, skills, and vehicles, expanding the game’s depth. Fan-made PDFs and modules, such as the Volturnus Series, continue to inspire fresh stories. These contributions ensure the game stays relevant, blending nostalgia with modern innovations to attract both veteran players and newcomers to the Star Frontiers universe.

Star Frontiers RPG PDF remains a beloved classic, offering timeless sci-fi adventures. Its enduring appeal lies in its open-world exploration, customizable characters, and tactical combat. With official and fan-made PDFs widely available, players can easily immerse themselves in its rich universe. The active community ensures continuous updates and fresh content, making it a vibrant option for both veterans and newcomers. Whether you’re revisiting old memories or discovering it anew, Star Frontiers promises endless excitement in the vastness of space.

Guide

jessem stock guides

Jessem Stock Guides are innovative table saw accessories designed to enhance safety, precision, and control during woodworking. They replace multiple featherboards, providing a secure hold for smooth cuts and preventing kickback. Ideal for ripping wide stock and working with various materials, these guides are a versatile solution for woodworkers seeking consistent results.

1.1 What Are Jessem Stock Guides?

Jessem Stock Guides are innovative woodworking accessories designed to enhance precision and safety on table saws and router tables. These guides combine hold-down and hold-in functionality, eliminating the need for multiple featherboards. Featuring 5º angled wheels, they securely pull stock toward the fence, preventing kickback and ensuring smoother cuts. Available in models like the Clear-Cut TS and Clear-Cut FLEX, they are versatile tools for ripping wide stock, working with various materials, and maintaining consistent results in woodworking projects.

1.2 Purpose and Benefits of Using Stock Guides

The primary purpose of Jessem Stock Guides is to enhance safety and precision in woodworking by securely holding stock against the table saw fence. They prevent kickback, ensuring smoother cuts and protecting the user from potential injuries. These guides are versatile, accommodating various materials and thicknesses, and are cost-effective alternatives to multiple featherboards. By improving control and consistency, Jessem Stock Guides are essential for achieving professional-grade results in woodworking projects.

Key Features and Benefits of Jessem Stock Guides

Jessem Stock Guides offer dual-action hold-down and hold-in functionality, with angled wheels pulling stock toward the fence. They eliminate the need for multiple featherboards, improving safety and cut quality while reducing setup time. These guides are versatile, durable, and compatible with various table saw fences, making them an excellent investment for woodworkers seeking precision and efficiency in their work.

2.1 Design and Functionality Overview

Jessem Stock Guides feature a sleek, durable design with 5º angled wheels that simultaneously pull stock toward the fence and hold it down. This dual-action mechanism ensures consistent pressure, eliminating the need for multiple featherboards. The guides are constructed from high-quality materials, ensuring reliability and longevity. Their compact design allows for easy installation and integration with various table saw fences, making them a practical solution for woodworkers seeking precision and safety in their projects.

2.2 How They Replace Multiple Featherboards

Jessem Stock Guides effectively replace the need for multiple featherboards by combining hold-down and hold-in functionalities into one tool. Their dual-action design ensures stock is securely pulled toward the fence while being held firmly in place, eliminating the risk of kickback. This streamlined approach reduces setup time and enhances safety, making them a superior alternative to traditional featherboards for consistent and precise cuts in various woodworking applications.

2.3 Types of Jessem Stock Guides Available

Jessem offers a variety of stock guides to cater to different woodworking needs. The Clear-Cut TS Stock Guides are designed for table saws, providing dual-action hold-down and hold-in functionality. Additionally, there are models compatible with router tables, enhancing precision and safety for routing tasks. Each type is engineered to improve cut quality and user safety, ensuring versatility and adaptability across various woodworking projects and tools.

Safety Improvements with Jessem Stock Guides

Jessem Stock Guides significantly enhance safety by preventing kickback and securing stock firmly against the fence. This ensures smoother, injury-free cuts and improved control during operations.

3.1 Preventing Kickback and Injury

Jessem Stock Guides excel at preventing kickback and injury by securely holding stock against the fence. Their dual-action design ensures consistent control, reducing the risk of dangerous accidents. Unlike traditional featherboards, these guides maintain firm pressure, keeping the stock steady and preventing sudden movements. This enhanced stability is particularly beneficial for ripping wide or uneven materials, where kickback is most common. By minimizing stock shift, Jessem Stock Guides significantly improve workshop safety and confidence for woodworkers of all skill levels.

3.2 Secure Stock Holding for Smoother Cuts

Jessem Stock Guides ensure secure stock holding, enabling smoother cuts by maintaining consistent contact with the fence. Their dual-action design pulls stock firmly against the fence while holding it down, eliminating the need for multiple featherboards. This secure hold minimizes vibration and ensures precise cuts, especially when working with thick or difficult materials. The guides’ ability to keep stock steady enhances accuracy and reduces the likelihood of errors, making them invaluable for achieving professional-grade woodworking results consistently.

Installation and Setup Guide

Jessem Stock Guides are easy to install and set up, offering compatibility with various table saw fences. A step-by-step process ensures secure mounting, enhancing tool performance and safety.

4.1 Step-by-Step Installation Process

The installation of Jessem Stock Guides begins with aligning the T-Track rail according to your table saw’s fence system. Next, secure the rail using the provided screws, ensuring a flush fit. Attach the stock guide assembly to the rail, adjusting its position to match your cutting needs. Tighten all components firmly to prevent movement during operation. Finally, test the setup by making a few practice cuts to ensure proper alignment and functionality. This process ensures optimal performance and safety.

4.2 Compatibility with Different Table Saw Fences

Jessem Stock Guides are compatible with various table saw fences, including standard and specialized models. The T-Track rail system allows easy installation on most fences, ensuring secure stock guidance. While they work seamlessly with many setups, some fences like the Incra may require minor adjustments or additional accessories. This adaptability makes Jessem Stock Guides a versatile choice for enhancing safety and precision across different woodworking scenarios, making them a popular choice among woodworkers for their universal fit.

Using Jessem Stock Guides for Various Woodworking Tasks

Jessem Stock Guides excel in ripping wide stock and sheets, ensuring precise cuts and enhanced safety. They handle diverse materials and thicknesses with ease, improving overall woodworking efficiency.

5.1 Ripping Wide Stock and Sheets

Jessem Stock Guides are particularly effective for ripping wide stock and sheets, ensuring consistent and precise cuts. Their dual-action design securely holds material against the fence, preventing kickback and maintaining alignment. This makes them ideal for handling large or unwieldy panels. The guides’ ability to pull stock firmly against the fence ensures straight, smooth cuts, even with challenging materials like thick hardwoods or composite sheets. Proper alignment and adjustment of the guides are key to achieving optimal results in ripping tasks.

5.2 Working with Different Materials and Thicknesses

Jessem Stock Guides excel with various materials and thicknesses, offering exceptional versatility. Whether cutting hardwoods, softwoods, or composite sheets, the guides maintain consistent pressure and alignment. Their dual-action wheels adjust easily to accommodate different stock sizes, ensuring secure hold-down and anti-kickback performance. This adaptability makes them ideal for woodworking projects requiring precision across diverse materials, from thin veneers to thick panels, ensuring smooth and safe cutting operations every time.

Tips for Getting the Most Out of Jessem Stock Guides

Proper alignment, regular maintenance, and utilizing the dual-action wheels ensure optimal performance. Adjust guides for material thickness and keep them clean for consistent results and safety.

6.1 Proper Setup and Alignment

Proper setup and alignment are crucial for maximizing the effectiveness of Jessem Stock Guides. Ensure the guides are securely mounted to the table saw fence, aligning them parallel to the blade. Adjust the guides to accommodate the thickness of the material, maintaining consistent pressure to prevent kickback. A precise setup ensures smooth cuts and enhances safety, making the woodworking process more efficient and enjoyable. Regular checks and adjustments maintain optimal performance over time.

6.2 Maintenance and Care Tips

Regular maintenance ensures Jessem Stock Guides perform optimally. Clean the guides after each use to remove sawdust and debris, preventing buildup that could affect alignment. Lubricate moving parts periodically to maintain smooth operation. Store the guides in a dry place when not in use to prevent rust. Avoid exposing them to extreme temperatures, as this can alter their shape. Proper care extends the lifespan and maintains the precision of your Jessem Stock Guides, ensuring consistent performance for years.

Jessem Stock Guides vs. Other Stock Guides

Jessem Stock Guides offer superior quality, durability, and performance compared to other guides, providing long-term cost-effectiveness despite a higher initial investment.

7.1 Comparison with Woodstock Board Buddies

Jessem Stock Guides and Woodstock Board Buddies both aim to enhance table saw safety and accuracy, but Jessem stands out with its advanced design and durability. While Woodstock Board Buddies are more affordable and functional for basic tasks, Jessem offers superior performance, replacing multiple featherboards and providing a secure hold for various materials. Users often prefer Jessem for its long-term value, despite the higher cost, as it delivers consistent results and prevents kickback more effectively than its competitors.

7.2 Cost-Effectiveness and Value

While Jessem Stock Guides are priced higher than some alternatives, they offer exceptional value through their durability and versatility. Their ability to replace multiple featherboards and provide consistent performance makes them a cost-effective long-term investment. Users report reduced waste and improved safety, which further enhances their overall value. Despite initial costs, Jessem Stock Guides deliver lasting benefits, making them a worthwhile purchase for serious woodworkers seeking precision and reliability in their work.

User Reviews and Testimonials

Users praise Jessem Stock Guides for improving safety and precision. Woodworkers share glowing testimonials, with one impressed user giving a 10/5-star review for exceptional performance and value.

8.1 Customer Feedback and Experiences

Customers highly praise Jessem Stock Guides for their effectiveness in improving table saw safety and precision. Many users highlight their ease of installation and versatility, especially when working with thick materials like cherry. Woodworkers appreciate how the guides eliminate the need for multiple featherboards, simplifying the process of ripping wide stock. Some users have adapted them for router tables, further showcasing their utility. Overall, the strong testimonials reflect a high level of satisfaction with their performance and value.

8.2 Expert Opinions and Recommendations

Experts and professional woodworkers highly recommend Jessem Stock Guides for their ability to enhance both the safety and precision of table saw operations. Reviews highlight their effectiveness in maintaining consistent cuts and reducing kickback risks. Additionally, their durability and value make them a preferred choice over alternatives like Woodstock Board Buddies. Many consider them a worthwhile investment for improving workshop efficiency and overall woodworking results.

Jessem Stock Guides for Router Tables

Jessem Stock Guides are compatible with router tables, enhancing precision and safety for routing tasks and contributing to a better woodworking experience for various materials and projects.

9.1 Compatibility and Installation on Router Tables

Jessem Stock Guides are fully compatible with router tables, offering enhanced precision and control for routing tasks. They can be installed on various router table setups, including the TSO Router Table Extension for MFT. While they work seamlessly with most configurations, users with Incra fences may need to address slight compatibility issues due to the wider T Track rail. A custom jig can be created to avoid drilling into the fence, ensuring a secure and functional setup for precise routing operations.

9.2 Enhancing Precision and Safety for Routing

Jessem Stock Guides significantly enhance precision and safety during routing by securely holding stock against the fence, preventing kickback and ensuring consistent cuts. Their dual-action design pulls material toward the fence while maintaining downward pressure, reducing the risk of accidents and improving control. This feature is particularly beneficial for intricate cuts, allowing woodworkers to achieve accurate results with confidence. By minimizing stock movement and providing a stable workpiece, these guides elevate the safety and quality of routing operations for both novice and experienced users.

Jessem Stock Guides revolutionize table saw and router table operations by enhancing safety, precision, and control. Their innovative design ensures smooth cuts and prevents kickback, making them an essential tool for woodworkers seeking consistent results.

10.1 Final Thoughts on Jessem Stock Guides

Jessem Stock Guides are a game-changer for woodworkers, offering unparalleled safety, precision, and versatility. Their ability to secure stock firmly and prevent kickback ensures smoother cuts and enhanced control. With compatibility across various table saws and router tables, these guides prove indispensable for diverse woodworking tasks. Their durability and ease of use make them a worthwhile investment for professionals and hobbyists alike, consistently delivering exceptional results and earning high praise from users and experts.

10.2 Should You Invest in Jessem Stock Guides?

Investing in Jessem Stock Guides is a smart decision for any woodworker seeking enhanced safety, precision, and efficiency. These guides offer exceptional value by replacing multiple featherboards and ensuring secure stock holding. Their versatility across various materials and table saw setups makes them a practical choice. With positive feedback from professionals and hobbyists alike, Jessem Stock Guides are a worthwhile investment for improving the quality and safety of your woodworking projects.