PDF

cadette eating for you badge requirements pdf

The Cadette Eating for You Badge empowers girls to make informed food choices, promoting health and confidence through nutrition education, practical cooking skills, and healthy habits, fostering a lifetime of wellness.

Overview of the Cadette Eating for You Badge

The Cadette Eating for You Badge is designed to help girls develop a deeper understanding of nutrition and healthy eating habits. This badge focuses on equipping Cadettes with the skills to make informed food choices, prepare balanced meals, and understand the importance of nutrition for overall well-being. Through hands-on activities and interactive learning, participants explore topics such as meal planning, reading nutrition labels, and portion control. The badge encourages girls to take ownership of their health by setting personal goals and adopting sustainable eating practices. By completing the requirements, Cadettes gain confidence in their ability to nourish themselves and others, fostering a lifelong commitment to healthy living. This badge is a foundational step toward empowering girls to make positive choices that benefit their bodies and minds.

Importance of Nutrition Education for Cadettes

Importance of Nutrition Education for Cadettes

Nutrition education is crucial for Cadettes, as it empowers them with the knowledge to make informed decisions about their diets and lifestyles. Understanding the basics of healthy eating helps girls develop lifelong habits that promote physical and mental well-being. By learning about balanced meals, portion control, and the role of nutrition in energy levels, Cadettes can take charge of their health. This education also fosters an appreciation for the connection between food, culture, and community, encouraging girls to explore diverse culinary traditions. Additionally, nutrition education equips Cadettes with the skills to navigate the challenges of modern eating, such as deciphering food labels and avoiding unhealthy choices. By prioritizing nutrition, girls can build a strong foundation for a healthy, active, and confident life, setting them up for success in all areas of their lives.

Key Requirements for the Cadette Eating for You Badge

Earning the badge involves completing activities that promote healthy eating habits, understanding nutrition basics, meal planning, and the role of physical activity in maintaining overall well-being and energy levels.

Understanding the Basics of Healthy Eating

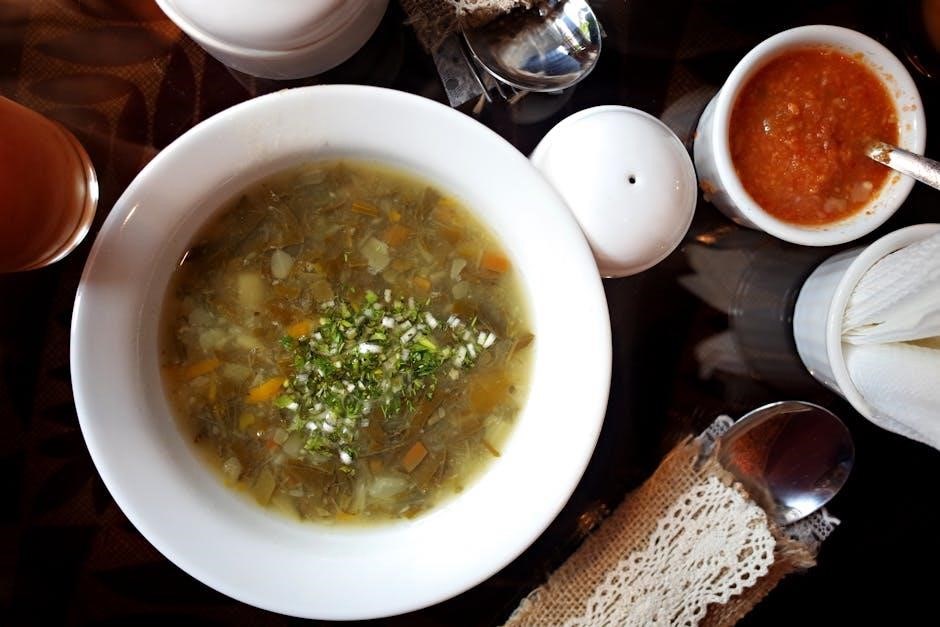
Understanding the basics of healthy eating is foundational for earning the Cadette Eating for You Badge. It involves learning about essential nutrients, such as carbohydrates, proteins, and fats, and how they fuel the body. Girls explore the importance of vitamins and minerals, like vitamin D for bone health and iron for energy. The role of fiber in digestion and overall well-being is also emphasized. Cadettes discover how to balance meals by incorporating a variety of food groups, including fruits, vegetables, whole grains, lean proteins, and healthy fats. They also learn about the significance of hydration and the impact of sugary or processed foods on health. This section encourages girls to recognize how cultural and personal preferences influence food choices and to adopt mindful eating habits that support long-term health and happiness. By mastering these principles, Cadettes gain the knowledge to make informed decisions about their diets.

Meal Planning and Preparation

Meal planning and preparation are essential skills for Cadettes to master as part of the Eating for You Badge. Girls learn to create balanced meals by considering nutritional needs, budget, and availability of ingredients. They practice reading recipes, measuring ingredients, and using basic cooking techniques. Cadettes also explore how to plan meals for different lifestyles, such as busy schedules or dietary restrictions. Understanding how to shop smart and prepare healthy snacks is emphasized. They discover the importance of kitchen safety and hygiene, ensuring meals are prepared safely. This step helps Cadettes develop practical skills to take control of their nutrition and make healthy, delicious meals for themselves and others. By mastering meal planning and preparation, they build confidence in the kitchen and foster healthy eating habits.

Exploring Nutritional Needs for Different Age Groups

Understanding the varying nutritional needs across different age groups is a key component of the Cadette Eating for You Badge. Girls learn how nutritional requirements change from childhood to adulthood, influenced by factors like growth, metabolism, and health conditions. For example, children require more calcium for bone development, while teenagers need sufficient iron to support rapid growth. Adults focus on maintaining energy levels and preventing chronic diseases, whereas seniors may require more vitamin D and fiber for bone and digestive health. Cadettes also explore how lifestyle, activity levels, and cultural preferences shape dietary needs. This knowledge helps them create personalized meal plans and support others in making informed food choices, fostering empathy and understanding of diverse nutritional requirements. By grasping these concepts, Cadettes gain a deeper appreciation for the importance of tailored nutrition.

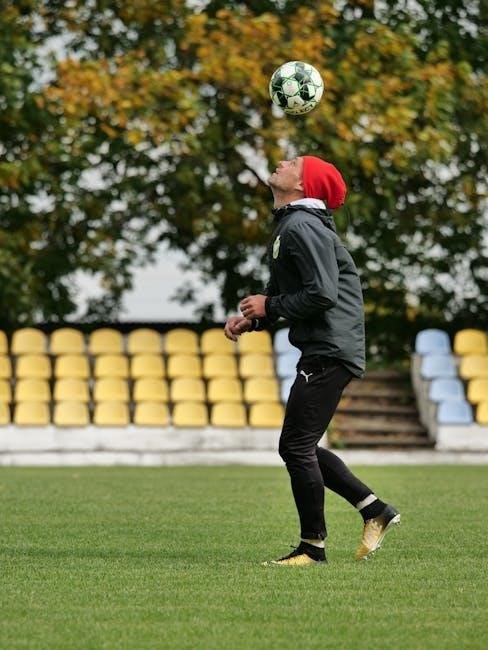
Physical Activity and Its Role in Healthy Living

Physical activity plays a vital role in maintaining overall health and well-being, complementing proper nutrition. Regular exercise helps burn calories, build strength, and improve cardiovascular health. It also enhances mental health by reducing stress and boosting mood. For Cadettes, understanding the connection between physical activity and nutrition is essential, as it supports energy levels and overall growth.

Engaging in activities like walking, cycling, or team sports can make exercise enjoyable and sustainable.Cadettes learn to balance physical activity with rest to maintain a healthy lifestyle. This knowledge empowers them to make informed choices, fostering lifelong habits that promote physical and mental well-being. By integrating exercise into daily routines, they can achieve optimal health and energy levels.

Step-by-Step Guide to Earning the Badge

Earning the Cadette Eating for You Badge involves setting personal health goals, creating balanced meal plans, learning to read nutrition labels, and understanding portion control effectively.

Setting Personal Health Goals

Setting personal health goals is the foundation of the Cadette Eating for You Badge. Girls are encouraged to reflect on their current habits and identify areas for improvement. This step helps them understand their unique nutritional needs and preferences, fostering a personalized approach to healthy eating. By creating specific, measurable, and achievable objectives, Cadettes can track their progress and stay motivated. Goals might include eating more fruits and vegetables, reducing sugary drinks, or preparing home-cooked meals. This process not only promotes physical health but also builds self-awareness and confidence, essential for maintaining lifelong healthy habits.

Creating a Balanced Diet Plan

Creating a balanced diet plan is a core component of the Cadette Eating for You Badge. Girls learn to design meals that include a variety of nutrient-rich foods, such as fruits, vegetables, whole grains, lean proteins, and healthy fats. The plan emphasizes moderation and diversity to ensure all nutritional needs are met. Cadettes are encouraged to consider their personal preferences, lifestyle, and dietary restrictions when developing their plan. By focusing on whole foods and limiting processed items, they can create a sustainable and enjoyable eating routine. This step helps build practical skills in meal planning and preparation, empowering girls to make healthier choices for themselves and their families. A balanced diet plan also serves as a tool for long-term health and wellness, fostering a positive relationship with food.

Learning to Read Nutrition Labels

Learning to read nutrition labels is a vital skill for Cadettes to make informed food choices. The label provides essential information, such as calories, macronutrients (carbohydrates, proteins, fats), and micronutrients (vitamins and minerals). Cadettes are taught to identify serving sizes and understand the percent daily value (DV) to assess nutrient intake. They also learn to recognize healthy and unhealthy ingredients, such as added sugars, sodium, and saturated fats. By comparing labels, girls can make smarter decisions to choose whole, nutrient-dense foods over processed options. This skill helps them prioritize their health and well-being, fostering a deeper understanding of how food impacts their bodies. Mastery of nutrition labels empowers Cadettes to take control of their diet and make conscious, balanced choices for a healthier lifestyle.

Understanding Portion Control

Understanding portion control is a cornerstone of healthy eating, helping Cadettes manage food intake and maintain a balanced diet. Portion control involves recognizing appropriate serving sizes and avoiding overeating, even of nutritious foods. It teaches girls to differentiate between portions (what they eat) and servings (standardized amounts on labels). Cadettes learn to use tools like measuring cups or scales and visualize portion sizes, such as comparing them to everyday objects (e.g., a deck of cards for protein). They also explore how emotions and environmental factors can influence eating habits. By practicing mindful eating and setting boundaries, Cadettes can develop self-regulation skills and a healthier relationship with food. This knowledge empowers them to make intentional choices, ensuring they nourish their bodies without overindulgence, fostering long-term wellness and self-care.

Additional Resources for Cadettes

Explore recommended books, websites, and interactive tools for nutrition education, offering practical guidance on meal planning, healthy recipes, and wellness strategies tailored to Cadettes’ needs and interests.

Recommended Books and Websites on Nutrition

Educational resources are essential for Cadettes to deepen their understanding of nutrition. Recommended books like “The Nutrition Bible” and “Healthy Eating for Teens” provide comprehensive insights into balanced diets and meal planning. Websites such as Academy of Nutrition and Dietetics (AND) and USDA’s ChooseMyPlate offer reliable information on nutrition basics, recipes, and wellness strategies. Interactive tools like meal planners and calorie counters on these platforms make learning engaging. Additionally, online courses and blogs focused on adolescent nutrition can help Cadettes explore topics tailored to their age group. These resources empower them to make informed decisions and develop lifelong healthy habits, supporting their journey to earn the Eating for You Badge.

Interactive Tools for Meal Planning

Interactive tools for meal planning are invaluable for Cadettes to practice healthy eating habits. Websites like MyFitnessPal and Yummly offer customizable meal planners, allowing girls to track their food intake and explore balanced recipes. Apps such as Mealime and Plan to Eat simplify grocery shopping and meal prep, teaching time management and organization. These tools also provide nutritional insights, helping Cadettes understand portion sizes and dietary needs. Platforms like ChooseMyPlate Kids feature interactive games and quizzes to make learning fun. By using these resources, Cadettes can create personalized meal plans, stay accountable, and develop a deeper understanding of nutrition. These tools align perfectly with the badge requirements, making the learning process engaging and effective. They empower girls to take control of their health while fostering creativity and responsibility in the kitchen.

Workshops and Events Focused on Healthy Eating

Workshops and events focused on healthy eating provide Cadettes with hands-on learning experiences to explore nutrition and meal preparation. These interactive sessions often feature cooking demonstrations, guest speakers, and group activities designed to educate and engage participants. Many events emphasize the importance of balanced diets, portion control, and mindful eating, aligning with the badge’s core objectives. Workshops may also include activities like meal planning challenges, grocery store tours, and discussions about cultural foods, fostering a deeper understanding of diverse eating habits. By participating in these events, Cadettes gain practical skills and confidence in preparing healthy meals, while also learning how to make informed food choices. These experiences are invaluable for completing the badge requirements and developing lifelong healthy eating habits.

Common Challenges and Solutions

Overcoming challenges like junk food cravings, lack of motivation, and food allergies requires creative strategies, such as mindful eating, setting realistic goals, and seeking professional guidance to ensure success.

Overcoming Junk Food Cravings

Managing junk food cravings is a common challenge for many, especially when striving to maintain a healthy diet. One effective strategy is to identify triggers, such as stress or boredom, and replace unhealthy snacking habits with nutrient-dense alternatives. For instance, reaching for fruits or nuts instead of chips can satisfy cravings while providing essential vitamins and minerals. Additionally, staying hydrated often curbs unnecessary snacking, as thirst can masquerade as hunger. Planning meals and snacks in advance also helps reduce impulse choices. Mindful eating practices, such as savoring each bite and eating slowly, can further enhance self-control. By gradually changing habits and setting achievable goals, individuals can overcome junk food cravings and develop a healthier relationship with food.

Staying Motivated on a Healthy Eating Journey

Staying motivated on a healthy eating journey requires a combination of strategies to maintain enthusiasm and commitment. Celebrating small victories, such as trying new recipes or resisting unhealthy temptations, can boost confidence and encourage persistence. Setting realistic and achievable goals helps avoid feelings of overwhelm, while tracking progress through a journal or app provides a sense of accomplishment. Surrounding oneself with supportive friends or family who share similar goals can also foster motivation. Engaging in fun physical activities and exploring creative, nutritious recipes keeps the journey exciting. Rewarding oneself for milestones, such as non-food treats, adds an extra incentive. Most importantly, reminding oneself of the long-term benefits, like increased energy and improved health, helps stay focused and committed to healthier habits.

Addressing Food Allergies and Restrictions

Addressing food allergies and dietary restrictions is crucial for ensuring everyone can enjoy healthy, safe meals. Understanding common allergens like peanuts, gluten, dairy, and shellfish is the first step in accommodating diverse needs. Always read food labels carefully to identify potential allergens and cross-contamination risks. For individuals with specific restrictions, such as vegetarian or vegan diets, meal planning should focus on alternative protein sources and nutrient-rich options; Communication is key—ask about allergies or preferences before preparing meals. Substitute ingredients creatively to maintain flavor and nutrition, and educate others about the importance of inclusivity in eating. By being mindful and proactive, you can create a welcoming environment where everyone feels safe and supported in their dietary choices. This fosters a culture of respect and understanding, making healthy eating accessible to all.

Earning the Cadette Eating for You Badge empowers girls with essential nutrition knowledge, fostering lifelong healthy habits and confidence in making informed food choices for themselves and others.

Reflecting on the Learning Experience

Reflecting on the journey to earn the Cadette Eating for You Badge allows girls to evaluate their growth in understanding nutrition and healthy eating. This process encourages self-awareness and personal development, helping them identify areas of improvement and celebrate achievements. By documenting their experiences, cadettes can track how their knowledge and habits have evolved, fostering a sense of accomplishment and responsibility for their health. This reflective practice also reinforces the importance of mindful eating and the role of nutrition in overall well-being, providing a strong foundation for making informed decisions in the future.

Sharing Healthy Habits with the Community

Sharing healthy habits with the community is a vital part of earning the Cadette Eating for You Badge, fostering leadership and teamwork. Cadettes can organize workshops, create educational materials, or host events to spread awareness about nutrition and wellness. By sharing their knowledge, they inspire others to adopt healthier lifestyles, creating a positive ripple effect. Encouraging others to make informed food choices not only strengthens community bonds but also empowers individuals to take control of their health. This step reinforces the importance of giving back and highlights the value of healthy living for everyone. Through these efforts, Cadettes develop confidence and a sense of responsibility, knowing they are making a meaningful impact.

PDF

soccer practice drills pdf

Discover the ultimate guide to improving soccer skills with structured practice drills. This comprehensive PDF offers detailed exercises, from warm-ups to advanced techniques, ensuring effective skill development for players of all levels.

Overview of Soccer Practice Drills

Soccer practice drills are structured activities designed to enhance player skills, teamwork, and game readiness. These drills cover essential areas like dribbling, passing, shooting, and defense, catering to all skill levels and ages. From basic cone exercises to advanced game-like scenarios, they provide a progressive approach to skill development. Drills are often categorized into warm-ups, technical exercises, and competitive games, ensuring a balanced and engaging training experience. Coaches can adapt these drills to match player abilities, fostering improvement and fun while preparing teams for real-game situations.

Importance of Structured Practice Plans

Structured practice plans are vital for maximizing player development and efficiency. They provide clear objectives, ensuring each session focuses on specific skills and progression. By organizing drills logically, coaches can address technical, tactical, and physical aspects of the game. These plans also allow for adaptability, enabling adjustments based on player feedback and skill levels. A well-structured approach ensures a balanced mix of individual and team activities, fostering a dynamic and productive training environment that prepares players for game scenarios while maintaining engagement and enjoyment.

Benefits of Using PDF Guides for Soccer Drills

PDF guides for soccer drills offer a comprehensive and accessible way to enhance player development. They provide structured, easy-to-follow plans that cover technical, tactical, and physical skills. Coaches can quickly organize practices, ensuring efficient use of time. These guides are versatile, catering to various skill levels and game scenarios. PDF formats are convenient for digital access, allowing coaches to adapt drills based on team needs. They also serve as valuable resources for players seeking to improve independently, making them essential tools for effective soccer training.

Warm-Up and Basic Drills

A proper warm-up is essential to prepare players for practice, reducing injury risks and enhancing performance. Dynamic stretches and light cardio set the foundation for effective training.

Dynamic Stretching and Light Cardio

Begin with dynamic stretching to prepare muscles for action, focusing on high knees, leg swings, and arm circles. Light cardio, such as jogging or jumping jacks, increases heart rates and loosens muscles. Incorporate soccer-specific movements, like dribbling through cones, to transition smoothly into drills. End with static stretches for flexibility. Keep the warm-up engaging by adding interactive games like soccer tennis to maintain focus and enthusiasm, ensuring players are ready for the practice ahead.

Cone Dribbling Exercises

Cone dribbling exercises enhance ball control and agility. Set up cones in straight lines, zig-zag patterns, or circles. Players weave through cones using different parts of their feet, focusing on precision and speed. Start with slow, controlled movements, then gradually increase difficulty by adding variations like cone arrangements or using both feet. Regular practice builds confidence and mastery in tight spaces, preparing players for game-like scenarios where quick changes of direction and precise control are essential.

Figure-8 Dribbling Patterns

Figure-8 dribbling exercises refine ball control and precision. Set up cones in a figure-8 pattern, and players navigate the ball through the course, alternating feet and maintaining close contact. This drill enhances agility, balance, and the ability to dribble in tight spaces. Encourage players to focus on quick changes of direction and smooth transitions. Gradually increase speed as skill improves, ensuring mastery of both feet. This exercise is ideal for developing confidence and composure in possession, preparing players for game-like scenarios where precise control is crucial.

Zig-Zag Dribbling Patterns

Zig-zag dribbling patterns are excellent for improving ball control and agility. Set up cones in a zig-zag formation, and players weave through them using different parts of their foot. This drill challenges players to maintain possession while changing direction quickly. Encourage small, precise touches and balanced movement. Gradually increase the speed and complexity of the course as players gain confidence. This exercise is ideal for developing the ability to navigate tight spaces and maintain control under pressure during games, enhancing overall dribbling proficiency and composure in competitive situations.

Dribbling and Ball Control Drills

Master essential dribbling skills with drills designed to improve precision, agility, and confidence. These exercises focus on ball control, footwork, and navigating tight spaces effectively during games.

Shielding the Ball

Shielding the ball is a vital skill for maintaining possession under pressure. Players practice using their body to protect the ball while controlling it with their feet. In pairs, one player shields while the other applies gentle pressure. Emphasize proper body positioning, using the inside of the foot, and keeping the ball close. This drill improves balance, strength, and the ability to retain possession in tight spaces. Gradually increase intensity to simulate game-like scenarios, ensuring players can shield effectively while moving, enhancing their confidence and composure during matches.

Center of Town Dribbling Drill

The Center of Town Dribbling Drill focuses on improving ball control and agility in tight spaces. Players dribble through a central area marked by cones, navigating around others while maintaining possession. This exercise enhances close-ball control, quick decision-making, and spatial awareness. Encourage players to use different parts of their feet and vary their speed. Gradually add defenders or obstacles to increase difficulty, simulating game-like scenarios. Regular practice builds confidence and composure, preparing players for competitive situations where precise dribbling is essential.

Musical Balls Dribbling Game

The Musical Balls Dribbling Game is a fun and engaging drill that combines ball control with music. Players dribble a ball to the rhythm of music, focusing on maintaining close control and precision. When the music stops, players must quickly stop their ball or perform a specific move, such as a step-over or drag-back. This drill enhances dribbling technique, reaction time, and concentration. It also adds an element of fun, keeping players motivated and engaged while improving their skills in a dynamic and interactive way.

Passing and Receiving Drills

Master the art of precise passing and confident receiving with these drills. Improve accuracy, field awareness, and teamwork through structured exercises designed to enhance technical and tactical skills.

Short-Rage Passing Exercises

Enhance accuracy and rhythm with short-range passing drills. Players form small grids or lines, passing the ball in sequences while maintaining movement. Begin with stationary passes, then progress to moving scenarios, emphasizing ball control and quick decision-making. Incorporate turns and one-touch passes to simulate game-like situations. These drills improve first-touch quality, spatial awareness, and teamwork, ensuring smooth transitions during matches. Coaches can add pressure or time constraints to elevate the challenge and prepare players for competitive play.

Long-Range Passing Accuracy

Improve field vision and strength with long-range passing drills. Set up two 33-yard squares, 15 yards apart, each player starting with a ball. Begin with a pass and control sequence, gradually increasing pass length and distance. Players alternate roles to practice both sending and receiving. Incorporate movement to simulate game-like scenarios, ensuring proper technique and focus. This drill enhances field vision, strength, and teamwork, essential for effective long ball strategies in competitive play. Coaches can modify setups to suit different skill levels, ensuring engagement and skill development.

Passing and Moving Drills

Enhance teamwork and coordination with drills that focus on passing while maintaining constant motion. Players work in pairs or small groups, emphasizing accurate one-touch passes and quick decision-making. Incorporate cone setups or directional commands to simulate game-like scenarios. As players advance, add defenders to increase pressure, encouraging sharper movements and precise ball control. These exercises ensure smooth transitions and effective communication, preparing teams for dynamic match situations. Coaches can adapt drills to suit different skill levels, ensuring engagement and skill development.

Shooting and Finishing Drills

Master shooting techniques with drills that enhance accuracy and composure under pressure. Improve precision with exercises like Pressure Shots and Knock Down the Flags, simulating game-like scenarios.

Pressure Shots

Pressure Shots simulate game-like intensity, helping players refine their shooting technique under defensive pressure. Set up cones or markers to create shooting lanes at varying angles. Players approach the ball from different directions, focusing on quick decision-making and accurate strikes. A goalkeeper or defender applies pressure to mimic real-game scenarios. Emphasize proper ball striking, body positioning, and follow-through. This drill enhances composure, shooting technique, and the ability to perform under stress, making it ideal for intermediate to advanced players seeking to refine their finishing skills.

Knock Down the Flags

Knock Down the Flags enhances shooting accuracy by targeting small flags or cones placed at varying angles and distances. Players take turns shooting from different spots, aiming to knock down specific flags. The setup includes a series of flags arranged in a zig-zag or circular pattern. Emphasize proper ball striking, body alignment, and follow-through. Gradually increase difficulty by moving flags farther away or adding movement before the shot. This exercise builds confidence and precision, simulating game situations where accurate shooting is crucial for scoring opportunities. Track progress to motivate improvement and competition among players.

Shoulder to Shoulder Shooting

Shoulder to Shoulder Shooting is designed for young players to build confidence and accuracy in front of the goal. Set up small cones or flags as targets, and have players shoot from varying angles. Focus on proper ball striking and body positioning, encouraging controlled shots over power. Gradually add movement or light defensive pressure to increase difficulty. This drill is ideal for U6 to U10 players, fostering composure and precision in scoring situations. Maintain a positive atmosphere to boost confidence and passion for the game.

Defensive Drills

Master defensive techniques with drills focused on positioning, tackling, and teamwork. These exercises simulate game-like scenarios, helping players anticipate opponents’ moves and protect the goal effectively.

1v1 Defensive Positioning

Improve defensive instincts with 1v1 drills, focusing on anticipation and reaction. Players practice proper stance, balance, and timing in confined spaces. A coach or teammate attempts to dribble past the defender, who must maintain positioning and protect the goal. Progress by adding game-like scenarios, such as limited dribbling options or passive attackers. This drill enhances defensive confidence, reaction time, and the ability to contain opponents effectively in one-on-one situations, preparing players for real-game challenges.

2v1 Defensive Scenarios

Enhance defensive teamwork with 2v1 scenarios, simulating game-like challenges. Defenders practice coordinating to protect the goal against an attacker. This drill focuses on communication, positioning, and anticipation. Players learn to anticipate opponents’ moves, close down space, and work together to regain possession. The exercise builds defensive strategies, reaction time, and adaptability. Gradually increase difficulty by adding movement or varying attack angles. This prepares players for real-game defensive challenges, improving their ability to defend effectively in high-pressure situations while maintaining composure and coordination.

Guard the Castle Defensive Drill

Guard the Castle is a dynamic defensive drill that emphasizes teamwork and spatial awareness. Players defend a designated zone, working together to protect their “castle” from opponents. This exercise fosters communication, quick decision-making, and strategic positioning. Attackers attempt to breach the defensive line, challenging the guards to adapt and maintain their structure. Coaches can vary the difficulty by adding more attackers or reducing the defensive zone. This drill builds resilience, reaction time, and the ability to defend cohesively in high-pressure game scenarios, preparing players for real-match defensive challenges.

Goalkeeping Drills

Enhance reflexes, footwork, and decision-making with specialized drills for goalkeepers. These exercises simulate game-like scenarios, focusing on breakaway saves, handling, and distribution to build confidence and precision.

Breakaway Saves

Breakaway saves are crucial for goalkeepers to master, as they often determine the outcome of a match. This drill simulates one-on-one situations where a striker attempts to score, and the goalkeeper must react quickly to make a save. Coaches can set up scenarios where the striker approaches from different angles, forcing the goalkeeper to stay low, cut down angles, and use proper diving techniques. Varying the speed and direction of the attack enhances realism. This exercise improves reflexes, decision-making, and confidence in high-pressure situations, ensuring goalkeepers are prepared for critical moments in games.

Handling and Distribution

Handling and distribution are vital skills for goalkeepers, ensuring they can confidently manage the ball and initiate attacks. This drill focuses on improving how goalkeepers catch, throw, and pass the ball accurately. Players strike shots from various angles and distances, simulating game-like scenarios. Goalkeepers practice proper footwork, body positioning, and decision-making to distribute the ball effectively to teammates. Incorporating both short and long passes enhances their ability to start counterattacks. Varying the difficulty by adding pressure from attackers sharpens reflexes and game awareness, making them a reliable last line of defense and a playmaker.

1v1 Goalkeeper Scenarios

1v1 goalkeeper scenarios simulate real-game situations, testing reflexes and decision-making. Goalkeepers face breakaways, prioritizing positioning and footwork to minimize scoring chances. Players attack with speed, forcing goalkeepers to react swiftly, while defenders apply pressure to disrupt. Coaches emphasize proper body positioning, diving techniques, and quick recoveries. This drill enhances a goalkeeper’s ability to read opponents, anticipate moves, and maintain composure under pressure. Regular practice builds confidence and sharpens instincts, ensuring they excel in critical one-on-one defensive moments during matches.

Fitness and Agility Drills

Enhance speed, endurance, and agility with specialized drills. Agility ladder exercises improve footwork, while endurance training builds stamina. Change-of-direction drills simulate game-like explosive movements, boosting overall performance.

Agility Ladder Drills

Agility ladder drills are essential for improving foot speed, balance, and coordination. Players perform high knees, lateral shuffles, and carioca drills through the ladder. These exercises enhance quick directional changes and overall agility. Coaches can vary patterns to challenge players and simulate game-like movements. Proper technique ensures maximum benefit. Progress gradually to more complex drills to build confidence and adaptability. Agility ladder exercises are versatile, making them a cornerstone of soccer training, preparing players for the fast-paced demands of the game.

Endurance and Stamina Building

Endurance and stamina are vital for soccer players to maintain performance over 90 minutes. Drills like interval runs, long-distance jogs, and high-intensity shuttle runs are effective. Incorporate game-specific scenarios, such as repeated sprints and recovery periods, to mimic match demands; Players can also engage in laps around the field or suicides to boost cardiovascular fitness. Ensure adequate rest periods to avoid fatigue. Progressively increase intensity and duration to enhance stamina. Proper hydration and recovery are essential to maximize results and prevent overtraining.

Change of Direction Exercises

Change of direction exercises enhance agility and quick reaction skills, crucial for soccer. Drills like cone weaving, ladder drills, and figure-8 patterns challenge players to shift direction rapidly. Set up cones in zig-zag or circular formations for players to navigate using precise footwork. Incorporate sudden stops, starts, and turns to simulate game-like scenarios. These exercises improve balance, acceleration, and the ability to outmaneuver opponents. Gradually increase speed and complexity to build confidence and mastery in dynamic movements, ensuring players can excel in fast-paced match situations.

Scrimmage and Game-Like Activities

Engage players with small-sided games and realistic scenarios like 4-on-3 attacks and Space Wars. These drills simulate match conditions, fostering skill application, teamwork, and decision-making under pressure.

Small-Sided Games

Small-sided games, such as 3v3 or 4v4, are essential for simulating real-game scenarios. These drills promote decision-making, teamwork, and skill application in condensed spaces. Players improve ball control, passing accuracy, and spatial awareness while maintaining engagement. Coaches can adapt the size and rules based on skill levels, ensuring a challenging yet fun environment. Incorporating variations like “Space Wars” adds excitement and tests tactical awareness. These games are ideal for developing match-ready skills while fostering teamwork and competitive spirit in a dynamic setting.

4-on-3 Attack Scenarios

4-on-3 attack scenarios create a challenging yet balanced environment for offensive players to develop their decision-making and teamwork. Attacking players focus on quick passes, spatial awareness, and exploiting defensive gaps. Defenders practice communication, positioning, and recovery under pressure. Coaches can modify the field size and rules to suit skill levels, ensuring a productive and engaging drill. This exercise bridges the gap between individual skills and game-like situations, fostering adaptability and creativity in both attackers and defenders during competitive play.

Space Wars Game

Space Wars is an engaging game that simulates tight-space scenarios, fostering creativity and quick decision-making. Players are divided into small groups, competing to maintain possession while navigating confined areas. Emphasizing accurate passing, sharp movements, and spatial awareness, this drill encourages teamwork and adaptability. Coaches can add variations, such as time constraints or defenders, to increase intensity. Space Wars replicates real-game pressures, helping players refine their skills in dynamic, competitive environments while keeping practices fun and challenging.

Structured Practice Plans

Structured plans optimize training efficiency, ensuring progressive skill development through clear objectives and adaptable drills. They keep sessions engaging while addressing player needs and skill levels effectively.

Sample Practice Sessions

Sample practice sessions provide coaches with detailed, ready-to-use plans, covering warm-ups, skill drills, and game-like scenarios. These sessions are designed to improve technical, tactical, and physical abilities. They include drills for dribbling, passing, shooting, and defense, as well as fitness exercises like agility ladder workouts and small-sided games. Each session is structured to adapt to different skill levels, ensuring players stay engaged and challenged. Coaches can follow these plans to create balanced and productive training environments, helping teams progress effectively throughout the season.

Progressive Skill Development

Progressive skill development ensures players build a strong foundation before advancing to more complex drills. Coaches start with basic techniques like ball control and gradually introduce game-like challenges. This structured approach enhances technical, tactical, and physical abilities, allowing players to adapt to increasing demands. By integrating varied exercises and adapting drills to player progress, coaches can foster continuous improvement and prepare teams for competitive play effectively. This method keeps practices engaging and ensures steady growth throughout the season.

Adapting Drills to Skill Levels

Adapting drills to skill levels ensures every player benefits from practice. Coaches can modify exercises by adjusting difficulty, adding defenders, or incorporating game-like scenarios. For younger or less experienced players, focus on foundational skills like dribbling and passing. As players progress, introduce more complex drills that challenge their abilities. Incorporating feedback and observing player development allows coaches to tailor activities effectively. This approach ensures drills remain engaging, educational, and suited to the team’s needs, fostering growth and enjoyment for all players involved.

Selecting the Right Drills

Selecting the right drills involves matching exercises to player age, skill, and specific needs. Ensure drills are engaging, challenging, and balanced between skill-focused and game-like activities for optimal development.

Matching Drills to Player Age and Skill

Drills should be tailored to players’ age, skill level, and specific needs. Start with foundational skills for younger or less experienced players, such as basic dribbling and passing exercises. As players progress, introduce more complex drills like cone weaving or game-like scenarios. Ensure activities are engaging and challenging, balancing technical development with fun. This approach fosters growth, keeps players motivated, and ensures drills are relevant to their developmental stage, promoting a well-rounded skill set and long-term improvement.

Ensuring Fun and Engagement

Keeping practices engaging is key to maintaining player motivation and enjoyment. Incorporate interactive games like soccer tennis or small-sided matches to add excitement. Vary drills to avoid repetition and include activities that promote teamwork and camaraderie. Positive reinforcement and encouragement from coaches help build confidence. Allow players to explore creativity and try new skills in a supportive environment. Balancing structure with fun ensures players stay focused and eager to improve, making each session productive and enjoyable for everyone involved. This approach fosters a love for the game while developing skills effectively.

Incorporating Teamwork and Real-Game Scenarios

Incorporate drills that mimic real-game situations to enhance teamwork and decision-making. Small-sided games and 4-on-3 scenarios encourage players to work together and adapt to dynamic conditions. Activities like “Space Wars” foster competition and problem-solving, preparing players for match-like intensity. These exercises improve communication, tactical awareness, and the ability to execute strategies under pressure. By simulating game scenarios, players develop the instincts and coordination needed for cohesive team play, making practices both challenging and rewarding.

Guide

boxing gloves sizes guide

Boxing gloves sizes guide: Proper fit ensures protection, comfort, and performance. Gloves vary by weight (6-18oz) and size (Small to 4XL), catering to different needs and preferences;

Importance of Choosing the Right Glove Size

Choosing the right boxing glove size is crucial for safety, performance, and comfort. Properly fitted gloves protect hands from injury, absorb impact, and improve technique. Ill-fitting gloves can lead to discomfort, reduced control, and increased risk of harm. Tight gloves may restrict movement, while overly loose ones can cause imbalance. Measuring hand circumference and considering fighter weight are key steps in selecting the right size. Referencing size charts ensures a tailored fit. Gloves designed for specific activities, like training or competition, also play a role in size selection. Prioritizing the right size enhances overall boxing experience and prevents long-term damage. Always consult size guides to make an informed decision.

Overview of Boxing Glove Weight Categories

Boxing gloves are categorized by weight, ranging from 6oz to 18oz, with each weight serving specific purposes. Lighter gloves (6-8oz) are ideal for youth, speed training, and technique drills, while medium weights (10-12oz) suit most adult fighters for general training and sparring. Heavier gloves (14-16oz) are recommended for heavyweight fighters and prolonged sparring sessions to ensure maximum hand and wrist protection. The 18oz gloves are typically used by larger or heavier athletes for intense training. The weight reflects the padding thickness, with heavier gloves offering more cushioning and shock absorption. Choosing the right weight ensures optimal performance, safety, and comfort, tailored to the fighter’s size, skill level, and activity type.

Understanding Boxing Glove Sizes

Boxing gloves sizes combine numerical (Small, Medium, Large) and weight-based (6oz, 8oz, 10oz, etc.) systems to ensure proper fit, comfort, and protection for various training and competition needs.

Numerical Sizing (Small, Medium, Large, etc.)

Numerical sizing for boxing gloves refers to sizes labeled as Small, Medium, Large, and extra sizes like XL, 2XL, etc. These sizes correspond to the fit of the glove around the hand, ensuring comfort and dexterity. A proper fit is crucial for performance, as ill-fitting gloves can hinder movement or cause discomfort during training or sparring.

Size charts often vary by brand, but generally, Small sizes suit smaller hands, while larger sizes accommodate bigger hands. Hand circumference measurements are key to determining the correct size. For example, a hand circumference of 7-7.5 inches typically fits a Medium, while 8-8.5 inches aligns with a Large.

When choosing numerical sizes, consider the activity—training, sparring, or competition—and personal comfort preferences. Proper sizing ensures optimal protection and grip, enhancing overall performance in the ring or during workouts.

Ounce-Based Sizing (6oz, 8oz, 10oz, etc.)

Ounce-based sizing refers to the weight of boxing gloves, ranging from 6oz to 18oz, with common sizes being 8oz, 10oz, 12oz, 14oz, and 16oz. The weight determines the padding and protection level, making it crucial for safety and performance.

  • Lighter gloves (6-8oz) are ideal for youth, lightweight fighters, or speed training.
  • 10-12oz gloves are versatile, suitable for most training and sparring needs.
  • Heavier gloves (14-16oz) provide maximum protection, often used by heavyweight fighters or for intense sparring.

The weight should align with the fighter’s weight category and purpose of use, ensuring a balance between protection and mobility. Proper sizing enhances safety and effectiveness during training or competition.

Factors Influencing Glove Size

Glove size depends on fighter weight, hand circumference, and purpose of use, ensuring proper fit, protection, and performance during training or competition.

Weight of the Fighter

A fighter’s weight significantly influences the choice of boxing glove size. Lighter fighters (under 100 lbs) often use 6-8 oz gloves, while those between 100-125 lbs prefer 10-12 oz. Heavier fighters (over 125 lbs) typically opt for 14 oz or more. This correlation ensures proper protection and performance. The weight range helps determine the appropriate padding and fit, balancing comfort and impact absorption during training or competition. Measuring hand circumference alongside weight provides a more accurate size selection, ensuring optimal grip and support. This approach guarantees a tailored fit for varying body sizes and fighting styles, enhancing both safety and effectiveness in the ring.

Hand Circumference Measurement

Measuring hand circumference is crucial for determining the correct boxing glove size. To measure, wrap a flexible tape or string around the palm, just below the knuckles, ensuring a snug fit. Record the measurement in centimeters or inches. This method helps ensure the gloves fit comfortably while providing adequate support and protection. Proper fit prevents hand movement within the glove, reducing the risk of injury. Most size charts provide hand circumference ranges for each glove size, making it easier to select the right fit. For accuracy, measure your dominant hand, as it may be slightly larger. Always consult the brand’s size chart, as measurements can vary slightly between manufacturers. This step is essential for optimal performance and safety in training or competition.

Purpose of Use (Training, Sparring, Competition)

The purpose of use significantly influences boxing glove size selection. Training gloves (10-12oz) are ideal for bag work and pad drills, offering durability and cushioning. Sparring gloves (12-14oz) prioritize protection for both the wearer and opponent, ensuring safety during intense sessions. Competition gloves (8-10oz) are lighter, designed for speed and precision, meeting official regulations. Each activity demands specific weight and padding to balance performance and safety. Choosing the right glove for its intended use enhances effectiveness and minimizes injury risks. Always match glove weight to the activity, as lighter gloves may lack padding for heavy bag work, while heavier gloves can hinder speed during matches. Proper selection ensures optimal performance and safety across all boxing disciplines.

Boxing Glove Size Recommendations

Boxing glove size recommendations vary by weight, activity, and fighter type. Proper fit ensures safety, comfort, and performance for training, sparring, and competition.

Size Chart Based on Fighter Weight

A size chart based on fighter weight helps determine the appropriate glove size for training or competition. Fighters under 100 lbs typically use 6-8 oz gloves, while those between 101-125 lbs opt for 10 oz. Fighters weighing 126-150 lbs usually prefer 10-12 oz gloves, and those between 151-175 lbs often choose 12-14 oz. Heavyweight fighters over 175 lbs generally use 14-16 oz gloves. This guide ensures proper protection and performance, aligning glove weight with the fighter’s strength and training needs. Always consult brand-specific charts for precise sizing, as variations may occur.

Size Chart Based on Activity Type

A size chart based on activity type tailors glove selection to specific training or competition needs. For training, 10-12 oz gloves are ideal, offering both protection and padding. Sparring requires heavier gloves, typically 14-16 oz, to ensure safety during intense drills. Bag and pad work often use lighter gloves, such as 8-10 oz, for speed and precision. Competition gloves vary by regulations, with amateur fighters using 10-12 oz and professionals opting for 8-10 oz. Youth and lightweight fighters may use 6-8 oz gloves for reduced weight and improved dexterity. Always consider the activity’s demands when selecting glove size to maximize performance and safety.

Size Chart for Men, Women, and Youth

A size chart for men, women, and youth ensures a tailored fit for different demographics. Men typically use 10-16 oz gloves, with sizes ranging from Small to 4XL. Women often prefer 8-12 oz gloves, with sizes designed to fit smaller hands. Youth sizes start at 6-8 oz, accommodating younger fighters. Hand circumference and weight guide the selection, ensuring comfort and protection. Proper sizing prevents injuries and enhances performance. Always refer to the specific brand’s chart for accurate fitting, as sizes may vary. This approach ensures optimal fit and functionality for all fighters, regardless of age or gender.

How to Measure Hand Size for Gloves

Measuring hand size involves wrapping a flexible tape around the palm’s widest part, excluding the thumb, to determine circumference and ensure a proper fit.

Measuring Hand Circumference

To determine the correct boxing glove size, measuring hand circumference is essential. Wrap a flexible tape measure or string snugly around the palm at the widest point, just below the knuckles. Ensure the measurement is not too tight or loose. For accuracy, keep the hand flat and fingers extended. Record the circumference in inches or centimeters. This measurement helps match your hand size to the glove’s dimensions, ensuring a proper fit. A well-fitting glove provides adequate protection, comfort, and support during training or sparring. Refer to size charts for guidance, as most gloves are sized based on hand circumference and weight categories.

Measuring Hand Length

Measuring hand length is another crucial step in determining the right boxing glove size. To measure hand length, extend your dominant hand with fingers together and flat. Place a ruler or tape measure from the tip of the middle finger to the base of the wrist. This measurement helps determine the glove’s length, ensuring fingers fit comfortably without bunching. Hand length varies, and gloves are designed to accommodate different sizes. For example, smaller hands may require shorter gloves, while larger hands need more room. Accurate measurement ensures optimal fit, preventing discomfort or restricted movement during training or competition. This, combined with hand circumference, provides a comprehensive fit assessment for boxing gloves.

Choosing the Right Glove Weight

Measuring hand length is essential for ensuring a proper fit. Extend your dominant hand with fingers together and flat. Measure from the tip of the middle finger to the base of the wrist. This provides the glove’s ideal length, ensuring fingers fit comfortably without bunching. Hand length varies, and gloves are designed to accommodate different sizes. Smaller hands may require shorter gloves, while larger hands need more room. Accurate measurement ensures optimal fit, preventing discomfort or restricted movement during training or competition. This, combined with hand circumference, provides a comprehensive fit assessment for boxing gloves.

6-8oz Gloves for Youth or Lightweight Fighters

6-8oz boxing gloves are ideal for youth fighters and lightweight athletes, typically under 100 lbs (45 kg). These gloves are lightweight, allowing for faster hand speed and better technique development. They are commonly used for training and sparring among younger boxers or those with smaller hand sizes. The reduced weight ensures less strain on wrists and hands while providing adequate protection for lighter training sessions. Gloves in this range are also recommended for beginners to focus on form and agility without the bulk of heavier gloves. Always check size charts and try them on if possible to ensure a proper fit for comfort and performance.

10-12oz Gloves for Medium-Weight Fighters

10-12oz boxing gloves are designed for medium-weight fighters, typically weighing between 101-150 lbs (46-68 kg); These gloves offer a balance between protection and mobility, making them suitable for both training and sparring. They provide adequate cushioning for hands while allowing for precise punches. Fighters in this weight category often prefer 10-12oz gloves for their versatility, as they are neither too light nor too heavy. The size chart recommendations suggest these gloves are ideal for regular training sessions and are commonly used by adult fighters. Proper fit is crucial, so measuring hand circumference and referring to size charts can ensure optimal comfort and performance during workouts.

14-16oz Gloves for Heavyweight Fighters

14-16oz boxing gloves are designed for heavyweight fighters, typically weighing over 150 lbs (68 kg). These gloves provide maximum padding and protection, making them ideal for heavy sparring and intense training sessions. The increased weight ensures better shock absorption, reducing the impact on both the fighter’s hands and their opponent. They are commonly used by professional boxers and larger athletes for their durability and comfort during prolonged workouts. The size chart recommendations align these gloves with heavyweight categories, ensuring a secure fit for larger hands. Proper sizing is crucial to maintain dexterity and support, making 14-16oz gloves a preferred choice for heavy hitters seeking optimal performance and safety in the ring.

Material and Fit Considerations

Boxing gloves are made from leather or synthetic materials, each offering durability and comfort. Proper fit ensures wrist support and hand alignment, crucial for performance and injury prevention.

Difference Between Leather and Synthetic Gloves

Leather and synthetic gloves are the two primary materials used in boxing gloves, each offering distinct benefits. Leather gloves are known for their durability, breathability, and superior feel, making them a popular choice among professional fighters. They often provide a more natural fit and are easier to break in. Synthetic gloves, while more affordable, are lightweight, easy to clean, and hypoallergenic, making them ideal for beginners or those with material sensitivities. However, synthetic gloves may lack the longevity and premium feel of leather. Both options are viable, with the choice depending on personal preference, budget, and training intensity. Proper material selection ensures optimal performance and comfort during training or competition.

Importance of Wrist Support

Wrist support in boxing gloves is crucial for preventing injuries and ensuring stability during punches. A secure fit around the wrist helps absorb impact, reducing strain on joints and muscles. Proper wrist support enhances technique by maintaining alignment and control. Inadequate support can lead to sprains or fractures, especially during heavy bag work or sparring. High-quality gloves feature reinforced wrist cuffs, offering both flexibility and protection. Leather and synthetic gloves often include additional padding or design elements to bolster wrist stability. A well-supported wrist not only safeguards against injury but also improves overall performance, making it a key factor in glove selection for fighters of all levels.

Popular Brands and Their Size Charts

Leading brands like Ego, MMA, and BJJ offer detailed size charts, ensuring precise fit. Their charts include weight categories, hand measurements, and size options for men, women, and youth.

Ego Boxing Gloves Size Chart

Ego Boxing Gloves offer a detailed size chart to ensure a perfect fit for all fighters. Sizes range from Small to 4XL, catering to various hand sizes and preferences. The chart provides measurements in both centimeters and inches, making it universally accessible. For instance, a Small size typically fits hands measuring 16.5-17.8 cm (6.5-7 inches), while an Extra-Large fits hands up to 22.9 cm (9 inches). Ego gloves are also categorized by weight, aligning with fighter weight classes to optimize performance and safety. For example, lighter gloves (6-8oz) are recommended for youth or lightweight fighters, while heavier options (14-16oz) suit heavyweight athletes. The chart also includes guidance on material choices, such as leather or synthetic, ensuring durability and comfort. Always refer to Ego’s size chart in product images for precise fitting.

MMA Gloves Size Chart

MMA gloves size chart varies slightly from boxing gloves, focusing on fit and protection for mixed martial arts. Sizes typically range from Small to 2XL, with specific measurements for hand circumference and length. A Small size might fit hands measuring 6-7 inches in circumference, while an Extra-Large accommodates up to 9 inches. Gloves are also categorized by weight, such as 6oz for youth or lightweight fighters, and 10-12oz for medium-weight athletes. The chart often includes guidelines for different activities, ensuring proper fit for training, sparring, or competition. Materials like leather or synthetic are considered, with leather offering durability and synthetic options being more affordable. Always consult the MMA gloves size chart provided in product images for accurate sizing and material selection.

BJJ and Training Gloves Size Chart

BJJ and training gloves size charts ensure a secure fit for grappling and martial arts training. Sizes range from XS to XL, with hand measurements in both metric and imperial units. For example, XS fits hands measuring 16.5-17.8 cm (6.5-7 inches), while XL accommodates 21.6-22.9 cm (8.5-9 inches). These charts often include guidelines for material preferences, such as leather for durability or synthetic for affordability. The focus is on comfort and dexterity, allowing for proper grip and movement during training. Always refer to the specific BJJ gloves size chart provided in product images for accurate sizing, ensuring optimal performance and protection during martial arts sessions.

Tips for First-Time Buyers

First-time buyers should check size charts, measure hand circumference, and consider glove purpose. Choose between leather or synthetic based on durability and comfort preferences for optimal fit.

How to Ensure a Proper Fit

To ensure a proper fit for boxing gloves, measure your hand circumference and length. Try gloves with hand wraps to simulate training conditions. Choose gloves that snugly wrap your fingers without restricting movement. Ensure the thumb is securely positioned to prevent injury. Opt for adjustable wrist straps for added support. Test the padding to guarantee adequate hand protection. Consider the material—leather or synthetic—to suit your comfort preferences. Proper fit enhances performance and safety, so take time to select the right size and style for your training or competition needs.

Understanding Size Variations Across Brands

Size variations across brands can make selecting boxing gloves challenging. Brands like Ego, MMA, and BJJ offer distinct size charts, with differences in numerical sizing (S, M, L) and ounce-based options (6oz, 8oz, etc.). Some brands cater to specific demographics, such as youth or women, with tailored sizing. Material quality and padding thickness also vary, affecting the overall fit. Always refer to the brand’s size chart and product descriptions to ensure accuracy. Comparing reviews and product images can help reconcile discrepancies. Understanding these variations ensures a better fit and optimal performance, whether for training or competition.

Proper sizing is crucial for safety, comfort, and performance in boxing. Choosing the right glove ensures optimal protection and effectiveness during training and competition, tailored to individual needs.

Final Thoughts on Selecting the Right Boxing Gloves

Selecting the right boxing gloves is crucial for both performance and safety. Proper fit ensures optimal protection, comfort, and control during training or competition. Consider your weight, hand size, and activity type when choosing gloves. Lighter gloves (6-10oz) suit youth or lightweight fighters, while heavier options (14-16oz) are ideal for heavier individuals or sparring. Always refer to size charts and measure hand circumference for accuracy. Prioritize high-quality materials and wrist support for durability and stability. Lastly, consult brand-specific guides, as sizes may vary. Investing time in selecting the perfect pair will enhance your boxing experience and prevent injuries.

Importance of Proper Sizing for Performance and Safety

Proper sizing of boxing gloves is essential for both performance and safety. Ill-fitting gloves can lead to discomfort, reduced control, and increased risk of injury. Gloves that are too small may restrict hand movement, while oversized gloves can impair precision and balance. Correct sizing ensures adequate padding to protect hands and wrists during impact, minimizing the risk of fractures or sprains. Proper fit also enhances grip and stability, allowing for more effective punches and better overall performance. Prioritizing the right size contributes to a safer and more efficient training or competition experience. Always measure hand circumference and refer to size charts to ensure the best fit for optimal protection and performance.

Manuals

cuisinart bread maker cbk 100 manual

The Cuisinart CBK-100 is a compact, programmable bread maker designed for home use, offering versatility and ease in baking fresh bread with minimal effort.

With a 13-hour delay start timer and customizable settings, it allows users to create a variety of bread types, from basic white to gluten-free options effortlessly.

1.1 Overview of the CBK 100 Model

The Cuisinart CBK-100 is a compact and automatic bread maker designed for home use, capable of producing up to 2-pound loaves. It features a stainless steel exterior, a 13-hour delay start timer, and customizable settings for crust color and loaf size. The machine includes a removable baking pan for easy cleaning and a user-friendly control panel. Its programmable options allow for versatility in preparing various types of bread, making it a convenient addition to any kitchen. The CBK-100 is known for its durability and ease of use, offering a perfect balance of functionality and design.

1.2 Importance of the Manual for Optimal Usage

The manual is essential for understanding the CBK-100’s features and ensuring safe operation. It provides detailed instructions for assembly, initial setup, and daily use, helping users maximize the machine’s potential. Without the manual, users may miss key safety precautions and operational tips, potentially leading to improper use or damage. The manual also includes troubleshooting guides and maintenance tips, which are crucial for extending the product’s lifespan. Reading it thoroughly ensures a smooth and enjoyable bread-making experience, making it indispensable for both beginners and experienced users.

Safety Precautions and Warnings

Always read the manual carefully before using the CBK-100. Avoid touching hot surfaces, and ensure proper electrical connections to prevent accidents and machine damage.

2.1 General Safety Guidelines

Always read the manual thoroughly before operating the CBK-100. Ensure the bread maker is placed on a stable, heat-resistant surface. Keep children away from hot surfaces and moving parts. Avoid touching the baking pan or lid during operation, as they may be extremely hot. Use oven mitts or tongs when handling the pan. Never immerse the unit in water or expose it to excessive moisture. Ensure proper electrical connections and avoid overloading circuits. Follow all safety warnings to prevent accidents and ensure safe, efficient operation of your Cuisinart CBK-100 bread maker.

2.2 Handling Hot Surfaces and Parts

Always use oven mitts or tongs when handling the removable baking pan or lid, as they become extremely hot during operation. Avoid touching any hot surfaces with bare hands. Never insert metal objects into the bread maker, as this can cause damage or injury. Keep children away from hot parts to prevent burns. Allow the unit to cool down completely before cleaning or storing. Proper handling ensures safe operation and prolongs the lifespan of your Cuisinart CBK-100 bread maker.

2.3 Electrical Safety Considerations

Ensure the Cuisinart CBK-100 is placed on a stable, heat-resistant surface away from water sources. Never submerge the unit in water or expose it to excessive moisture, as this can cause electrical hazards. Use the provided power cord and avoid using damaged cords or overloaded outlets. Keep the bread maker unplugged when not in use or during cleaning. Electrical safety is crucial to prevent shocks, fires, or machine damage, ensuring safe and reliable operation of your bread maker.

Key Features of the Cuisinart CBK 100

The Cuisinart CBK-100 features a programmable timer, removable baking pan, and customizable settings for loaf size and crust color, offering versatility for perfect bread-making results every time.

3.1 Programmable Timer and Delay Start

The Cuisinart CBK-100 features a programmable timer with a 13-hour delay start, allowing users to set the bread-making process in advance. This feature ensures that fresh bread is ready exactly when needed, making it ideal for busy households. The timer can be easily programmed using the control panel, providing precise control over the baking schedule. Additionally, the delay start function enables users to add ingredients in the morning and come home to freshly baked bread in the evening, enhancing convenience and flexibility in meal preparation.

3.2 Removable Baking Pan and Ease of Cleaning

The Cuisinart CBK-100 features a removable baking pan, designed for effortless bread release and straightforward cleaning. This non-stick pan ensures that loaves come out perfectly without sticking, reducing the risk of damage during removal. Cleaning is further simplified as the pan is dishwasher-safe, allowing for quick and hassle-free maintenance. Additionally, the exterior and interior surfaces of the bread maker can be wiped down with a damp cloth, making overall upkeep convenient and efficient. This design ensures the appliance remains in great condition for long-term use.

3.4 Customizable Settings for Loaf Size and Crust Color

The Cuisinart CBK-100 offers customizable settings to tailor your bread-making experience. Users can choose from three loaf sizes—1, 1;5, or 2 pounds—and select crust color preferences ranging from light to dark. This feature ensures that each loaf meets individual preferences, whether you prefer a soft crust or a crispy one. The machine’s intuitive control panel allows for easy adjustment of these settings, providing flexibility and precision in every batch of bread. This customization enhances the overall baking experience, making it ideal for both beginners and experienced bakers. The ability to personalize loaf size and crust color adds versatility to the bread maker’s functionality.

Assembly and Initial Setup

The Cuisinart CBK-100 requires careful unpacking and checking of all components. Place it on a stable, flat surface away from heat sources for optimal performance.

4.1 Unpacking and Checking Components

When unpacking the Cuisinart CBK-100, carefully remove all components from the box and inspect for any damage or missing parts. Ensure the bread maker, baking pan, paddle, and power cord are included. Before first use, thoroughly clean the pan and paddle with warm soapy water. Rinse and dry them thoroughly to prevent any residue. Familiarize yourself with the control panel and handles to ensure proper operation. Always refer to the manual for specific instructions to avoid mishandling or damaging the appliance.

4.2 Placement and Stability Requirements

Place the Cuisinart CBK-100 on a stable, flat surface to ensure proper operation and prevent vibration. Avoid positioning it near water sources or in areas exposed to direct sunlight or moisture. Ensure the surface is heat-resistant, as the bread maker generates heat during use. Keep the appliance away from flammable materials and maintain adequate space around it for airflow. Always follow the manual’s guidelines for placement to ensure safety and optimal performance. Proper positioning helps maintain balance and prevents accidental tipping during the baking cycle.

Basic Operations and Usage

The Cuisinart CBK-100 operates by adding ingredients, selecting a program, and starting the machine. It handles mixing, kneading, rising, and baking, ensuring fresh bread with minimal effort and consistent results.

5.1 Understanding the Control Panel

The CBK-100’s control panel features intuitive buttons for selecting programs, crust color, and loaf size.
The LCD display shows the current cycle and remaining time.
Users can easily navigate to adjust settings or pause the process.

5.2 Adding Ingredients and Selecting Programs

Add ingredients to the baking pan in the order specified: liquids first, followed by dry ingredients, and yeast last.
Choose from 12 pre-programmed settings, including basic, French, whole wheat, and gluten-free options.
Select loaf size (1 or 2 lbs) and crust color (light, medium, or dark) using the control panel.
Use the delay start feature to schedule baking up to 13 hours in advance.
Ensure the lid is closed before starting the cycle for proper operation.

5.3 Starting and Monitoring the Baking Process

Once ingredients are added and settings are selected, press the Start button to begin the cycle.
The machine will handle mixing, kneading, rising, and baking automatically.
Monitor the process through the viewing window to ensure even baking.
Avoid opening the lid during operation to maintain consistent temperature and prevent dough collapse.
After completion, let the bread cool before slicing for optimal texture and flavor.

Customizing Your Bread Making Experience

Explore various recipes and adjust settings to create personalized bread, enhancing flavor with yeast, salt, flour types, and additional ingredients for unique results.

6.1 Adjusting Yeast and Salt Levels

Yeast and salt levels can be adjusted to achieve the perfect rise and flavor. Use active dry yeast for best results, and reduce salt for low-sodium options. Always measure accurately to avoid dough issues.

6.2 Using Different Types of Flour

The Cuisinart CBK-100 allows experimentation with various flours, such as whole wheat, rye, or gluten-free. Adjust settings based on flour type, as denser flours may require more water or longer kneading. For gluten-free baking, ensure the recipe includes xanthan gum for structure. Always measure flour accurately to maintain dough consistency. Experimenting with different flours can expand your bread-making repertoire and cater to dietary preferences. Monitor the dough during the first mix cycle to adjust liquid levels if needed for optimal results.

6.3 Incorporating Additional Ingredients

The Cuisinart CBK-100 allows you to enhance your bread with additional ingredients like nuts, seeds, herbs, or cheese. Use the machine’s delay start feature to add ingredients mid-cycle, ensuring even distribution. For best results, measure ingredients accurately and adjust settings if needed. The machine handles mix-ins effortlessly, creating unique and flavorful loaves. Experiment with different combinations to personalize your bread-making experience and explore new recipes with ease.

Troubleshooting Common Issues

Common issues with the Cuisinart CBK-100 include bread not rising, uneven crust, and machine noise. Check yeast expiration, adjust settings, and ensure proper cleaning for optimal performance.

7.1 Bread Not Rising Properly

If your bread isn’t rising properly, check the yeast expiration date and ensure it’s stored correctly. Verify that ingredients are at room temperature and measurements are precise. Overmixing can also hinder rise, so avoid excessive blending. Additionally, make sure the baking pan is properly aligned and the machine is set to the correct program. If issues persist, refer to the manual for diagnostic guides or reset the machine to default settings for troubleshooting.

7.2 Uneven or Burnt Crust

An uneven or burnt crust can occur due to improper placement of the baking pan or incorrect ingredient measurements. Check that the pan is securely locked and level. Ensure the crust color setting matches your preference. Avoid overfilling the pan, as this can cause uneven baking. If the crust is burnt, verify that the oven temperature is not too high or adjust the crust color setting to a lighter option. Always follow the manual’s guidelines for ingredient ratios and program settings to achieve consistent results.

7.3 Machine Noise or Malfunction

If your Cuisinart CBK-100 bread maker is making unusual noises or malfunctioning, check for loose parts or improper assembly. Ensure the baking pan is securely locked and free from obstructions. If the machine stops working, verify that it is properly plugged in and the outlet is functioning. Consult the manual for troubleshooting steps or reset the machine by unplugging it for 30 minutes. Persistent issues may require contacting Cuisinart customer support for assistance or replacement parts. Always follow the manual’s guidelines for proper maintenance and operation.

Maintenance and Cleaning

Regularly clean the Cuisinart CBK-100 by wiping the exterior with a damp cloth and washing the removable baking pan with mild soap. Avoid harsh cleaners to maintain its finish and functionality.

8.1 Cleaning the Baking Pan and Interior

Regular cleaning is essential for maintaining the performance of your Cuisinart CBK-100. The removable baking pan should be washed with mild soap and warm water after each use. Avoid using harsh chemicals or abrasive cleaners, as they may damage the non-stick coating. For tough dough residue, soak the pan before scrubbing gently. The interior can be wiped clean with a damp cloth, but ensure it is dry to prevent rust. Never submerge the machine in water, and avoid using metal scourers that could scratch surfaces.

8.2 Storing the Bread Maker Properly

After cleaning, store the Cuisinart CBK-100 in a dry, cool place away from direct sunlight. Ensure the machine is upright to prevent internal components from shifting. The baking pan and paddle should be stored separately to maintain their condition. Avoid exposing the bread maker to moisture, as it may lead to rust or electrical issues. Always unplug the machine when not in use and wrap the power cord neatly around the unit for organized storage. Proper storage will help preserve the bread maker’s functionality and extend its lifespan.

Recipes and Programming Options

The Cuisinart CBK-100 offers versatile programming for various bread recipes, including basic, French, and gluten-free options. Customizable settings allow users to experiment with ingredients and crust preferences easily.

9.1 Basic White Bread Recipe

The Cuisinart CBK-100 simplifies making classic white bread with its programmable features. Simply add 3 cups of bread flour, 1 teaspoon of salt, 1 tablespoon of sugar, 1 packet of active dry yeast, and 1 cup of warm water to the baking pan. Select the basic bread program and choose your preferred crust color. The machine handles mixing, kneading, rising, and baking, ensuring a fresh, homemade loaf with minimal effort. This straightforward recipe is perfect for beginners and highlights the CBK-100’s ease of use and reliability.

9.2 French Bread and Specialty Programs

The Cuisinart CBK-100 excels at crafting French bread with its crispy crust and soft interior. Use 3 cups of bread flour, 1 teaspoon of salt, 1 tablespoon of sugar, 1 packet of yeast, and 1 ½ cups of water. Select the French bread program and choose your crust color preference. The machine’s extended rise time ensures authenticity. For added variety, explore specialty programs like herb-infused or whole-grain bread by adjusting ingredients. This versatility makes the CBK-100 ideal for both traditional and creative bakers, offering perfect results every time with minimal effort.

9.3 Gluten-Free and Custom Recipes

For gluten-free options, the CBK-100 offers a dedicated setting, ensuring optimal results. Use 2 cups of gluten-free flour, 1 teaspoon of xanthan gum, 1 teaspoon of salt, 1 tablespoon of sugar, 1 packet of gluten-free yeast, and 1 ¼ cups of warm water. The machine’s precise temperature control aids in proper rise. Customize further by adding nuts, seeds, or herbs. Experiment with various combinations to create unique bread recipes tailored to your taste preferences, making the CBK-100 a versatile tool for both traditional and gluten-free baking needs, ensuring delicious outcomes every time.

Frequently Asked Questions (FAQs)

  • Q: Can I use this bread maker for non-bread recipes? Yes, it can make dough, cakes, and jams with specific settings.
  • Q: How do I reset the machine? Unplug, wait 30 seconds, then plug back in to restore default settings.
  • Q: Where can I find replacement parts? Visit the official Cuisinart website or authorized retailers for genuine parts.

10.1 Can I Use This Bread Maker for Non-Bread Recipes?

The Cuisinart CBK-100 is versatile and can be used for non-bread recipes, such as preparing dough, baking cakes, and even making jams. For dough, use the “dough” setting to knead and rise. For cakes, select the “cake” program and adjust ingredients accordingly. Jams can be made using the “jam” setting. Always refer to the manual for specific guidelines and ensure ingredients are compatible with the machine’s functions. This feature adds flexibility to your baking experience, allowing you to explore beyond traditional bread recipes.

10.2 How Do I Reset the Machine?

To reset the Cuisinart CBK-100, start by unplugging it from the power source. Wait for about 30 seconds to allow any residual power to drain. Plug it back in and ensure all settings are restored to default. If issues persist, refer to the manual or contact Cuisinart support for further assistance. This process helps resolve minor malfunctions and restores the machine’s default settings effectively.

10.3 Where Can I Find Replacement Parts?

Replacement parts for the Cuisinart CBK-100 can be found through Cuisinart’s official website or authorized retailers. Visit the Cuisinart support page, where you can search for specific parts by model number. Additionally, contact Cuisinart customer service for assistance in locating or ordering replacement components. Ensure to reference your model number (CBK-100) for accurate results. Always purchase parts from reputable sources to maintain the machine’s performance and warranty validity.

The Cuisinart CBK-100 is a versatile and user-friendly bread maker that simplifies homemade bread baking. With its advanced features and ease of use, it offers a rewarding experience.

11.1 Maximizing Your Bread Maker’s Potential

To maximize your Cuisinart CBK-100’s potential, explore its customizable settings, experiment with diverse ingredients, and maintain it regularly. This ensures optimal performance and a variety of delicious bread options.