Australia

nullarbor golf course map pdf

The Nullarbor Golf Course Map PDF is your essential guide to the world’s longest 18-hole, par 72 course, spanning 1,365 km across SA and WA. It includes synthetic greens, rugged terrain, and participating towns, providing a unique golfing experience.

Overview of the Nullarbor Links Golf Course

The Nullarbor Links Golf Course is a unique 18-hole, par 72 golfing experience spanning 1,365 kilometers across South Australia and Western Australia. It features synthetic greens, rugged outback terrain, and holes located in participating towns and roadhouses along the Eyre Highway. This iconic course offers a challenging and scenic adventure for golf enthusiasts.

Unique Features of the Nullarbor Links Golf Course

The Nullarbor Links Golf Course is renowned for being the world’s longest golf course, spanning 1,365 kilometers. It features synthetic greens and rugged outback terrain.

World’s Longest Golf Course

The Nullarbor Links Golf Course is the world’s longest, spanning 1,365 kilometers. This 18-hole, par-72 course stretches from Ceduna in South Australia to Kalgoorlie in Western Australia. Each hole is situated in different towns and roadhouses along the Eyre Highway, offering synthetic greens and rugged outback terrain, making it a quintessential Australian golfing experience.

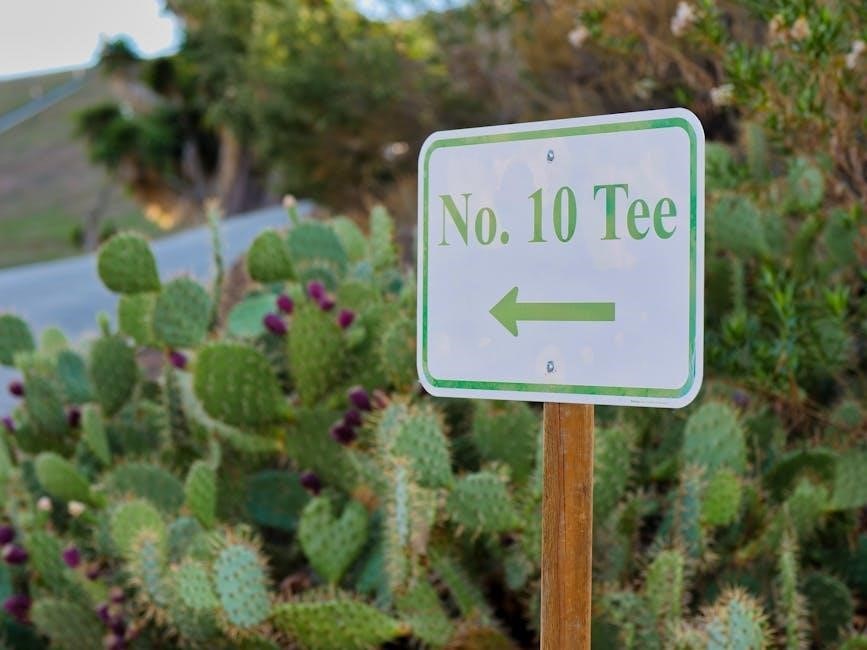
18-Hole, Par 72 Course Spanning 1,365 Kilometers

The Nullarbor Links Golf Course features an 18-hole, par-72 layout stretched across 1,365 kilometers. Each hole is located in a different town or roadhouse along the Eyre Highway, from Ceduna in South Australia to Kalgoorlie in Western Australia. The course combines synthetic greens with natural, rugged outback terrain, offering a unique and challenging golfing adventure across two states.

synthetic Greens and Rugged Outback Terrain

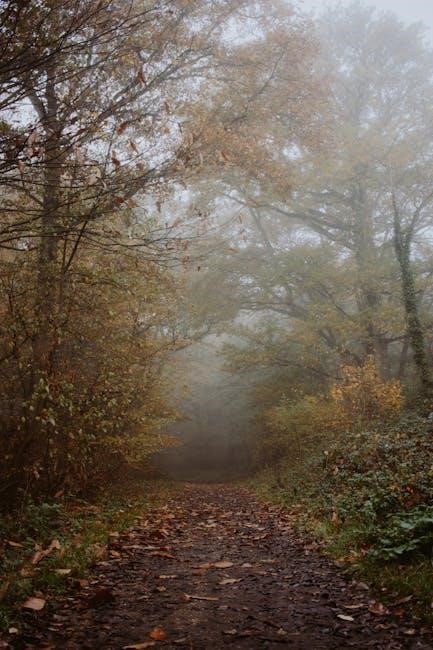
The Nullarbor Links Golf Course features synthetic greens at each hole, designed to withstand the harsh outback conditions. The fairways blend seamlessly with the natural, rugged terrain, offering a unique challenge. Players navigate through arid landscapes, rocky outcrops, and native vegetation, creating a true Australian golfing adventure that tests skill and adaptability.

Locations and Participating Towns

The Nullarbor Links Golf Course spans across South Australia and Western Australia, with holes located in towns and roadhouses along the Eyre Highway.

Towns and Roadhouses in South Australia

The Nullarbor Links Golf Course in South Australia features holes in towns like Ceduna, Penong, Nundroo, and Fowlers Bay. These locations offer a mix of coastal views, farming districts, and outback charm, providing unique experiences for golfers traveling along the Eyre Highway. Each town and roadhouse adds character to the world’s longest golf course.

Towns and Roadhouses in Western Australia

The Nullarbor Links Golf Course in Western Australia includes holes in towns like Eucla, Madura, Mundrabilla, Cocklebiddy, Balladonia, Fraser Range, and Kalgoorlie. These locations offer diverse experiences, from coastal views to inland landscapes. Each town provides synthetic greens and rugged terrain, ensuring an unforgettable adventure for golfers exploring the Outback.

Environmental Considerations

Protecting the Nullarbor Links’ natural terrain is vital. Rules prohibit vehicles on fairways and encourage teeing on designated areas to preserve the environment for future golfers.

Protecting the Fairways and Natural Terrain

Conserving the Nullarbor Links’ unique environment is crucial. Players are asked to avoid driving vehicles on fairways and tee up on designated areas to safeguard the natural terrain and synthetic greens, ensuring the course remains pristine for future golfers while preserving its rugged outback charm.

Rules for Vehicles and Teeing

To preserve the Nullarbor Links’ natural terrain, vehicles must not drive on fairways, and players are asked to tee up on designated areas only. This ensures the course remains in excellent condition while protecting its unique outback environment for future golfers. Adhering to these rules is essential for maintaining the integrity of this iconic golfing experience.

How to Play the Course

To play the Nullarbor Links Golf Course, obtain a scorecard from visitor centers in Ceduna, Norseman, or Kalgoorlie. Use the Nullarbor Map App for GPS navigation and course details, ensuring a seamless experience across the 1,365 km journey.

Obtaining a Scorecard

A scorecard for the Nullarbor Links Golf Course can be purchased at visitor centers in Ceduna, Norseman, or Kalgoorlie. It provides essential details about each hole, par scores, and local rules. The scorecard is a must-have for navigating the course and ensuring a smooth experience across the 1,365 km journey.

Best Times to Play

The ideal time to play the Nullarbor Links Golf Course is during the cooler months, from March to November. Early mornings and late afternoons offer the most comfortable conditions, avoiding the midday heat. Check local weather forecasts and course resources for up-to-date information to ensure optimal playing conditions and ease of travel along the Eyre Highway.

Using the Nullarbor Map App

The Nullarbor Map App is a GPS-enabled planner designed for smartphones and tablets, providing detailed course visualization. It offers 2D and 3D views, real-time navigation, and hole-specific data. Download the app to access interactive satellite imagery, scorecard tools, and essential course information, ensuring a seamless and enjoyable experience across the 1,365 km layout.

Visualizing the Course

The course offers advanced tools like 2D and 3D planners and GPS-enabled mobile apps, providing detailed layouts and interactive satellite imagery to help players navigate and plan their game effectively.

2D and 3D Planners

The 2D and 3D planners provide detailed visualizations of each hole, enabling players to strategize effectively. Designed for laptops and workstations, these tools offer precise layouts, elevations, and hazard placements, ensuring a comprehensive understanding of the course before each shot. They complement the mobile app, enhancing the overall planning experience for golfers tackling the world’s longest course.

GPS-Enabled Mobile Planner

The GPS-enabled mobile planner is a versatile tool designed for smartphones and tablets, offering real-time navigation and course visualization. It provides precise hole layouts, distance measurements, and hazard locations, allowing golfers to plan their shots effectively while on the move. This feature enhances the unique experience of playing the world’s longest golf course, ensuring accuracy and convenience.

Interactive Satellite Imagery

The Nullarbor Golf Course Map PDF features interactive satellite imagery, allowing golfers to explore each hole in stunning detail. This tool provides a bird’s-eye view of fairways, greens, and hazards, helping players strategize their approach. It brings the vast, rugged terrain to life, offering a unique perspective on the world’s longest golf course, enhancing both planning and the overall playing experience.

The Chasing the Sun Golf Tournament

The Chasing the Sun Golf Tournament is a 7-day golfing adventure across the Nullarbor Links, starting in Ceduna and ending in Kalgoorlie. It offers a unique blend of golf, scenic drives, and cultural experiences along the Eyre Highway, celebrating the spirit of Australian outback golfing.

Overview of the Tournament

The Chasing the Sun Golf Tournament is a 7-day golfing journey across the Nullarbor Links, starting in Ceduna and ending in Kalgoorlie. It combines golf with scenic drives and cultural experiences, showcasing Australia’s outback. Players visit iconic spots like Ceduna’s oyster beds, Fowlers Bay, and Eucla Beach, with stops at working sheep stations and historical sites like Skylab’s remains. The tournament concludes in Kalgoorlie, celebrating golf and adventure.

Key Stops and Experiences

The Chasing the Sun Golf Tournament features iconic stops like Ceduna’s oyster beds, Fowlers Bay, and Eucla Beach. Players explore the 90 Mile Straight, visit Skylab’s remains in Balladonia, and experience Indigenous culture in Norseman. The journey includesKalgoorlie’s goldfields, offering a mix of golf, scenic landscapes, and cultural richness, with a pirate-themed treasure hunt adding a fun twist to the adventure.

Duration and Itinerary

The Chasing the Sun Golf Tournament spans seven days, starting with champagne in Ceduna and concluding in Kalgoorlie. The itinerary includes stops at Fowlers Bay, Eucla Beach, and Norseman, with activities like whale watching and a pirate-themed treasure hunt. Players also explore a nickel mine in Kambalda and experience Indigenous culture, ending with a grand finale in Kalgoorlie’s goldfields.

Key Attractions Along the Route

The Nullarbor route features stunning natural landmarks like the Nullarbor Plain and the Great Australian Bight, as well as cultural sites such as Eucla Beach and Indigenous art in Norseman.

Natural Landmarks and Scenic Views

The Nullarbor route boasts breathtaking natural landmarks, including the vast Nullarbor Plain and the iconic Great Australian Bight. Players can enjoy stunning coastal views, spot whales, and explore the dramatic cliffs along the Eyre Highway. The scenic beauty of Eucla Beach and the unique limestone formations add to the unforgettable experience of this expansive golfing journey.

Historical and Cultural Sites

The Nullarbor Links journey offers insights into Australia’s rich history and culture. Explore Indigenous art and dance of the Ngandju people in Norseman, visit the Skylab remnants at Balladonia, and discover historic sheep stations like Fraser Range. These sites, along with coastal towns, provide a deeper connection to the region’s heritage and community, enriching your golfing adventure.

Preparing for Your Trip

Essential items include water, food, fuel, and a reliable vehicle. Book accommodations in advance and plan for rugged terrain conditions to ensure a smooth journey.

Essential Items to Bring

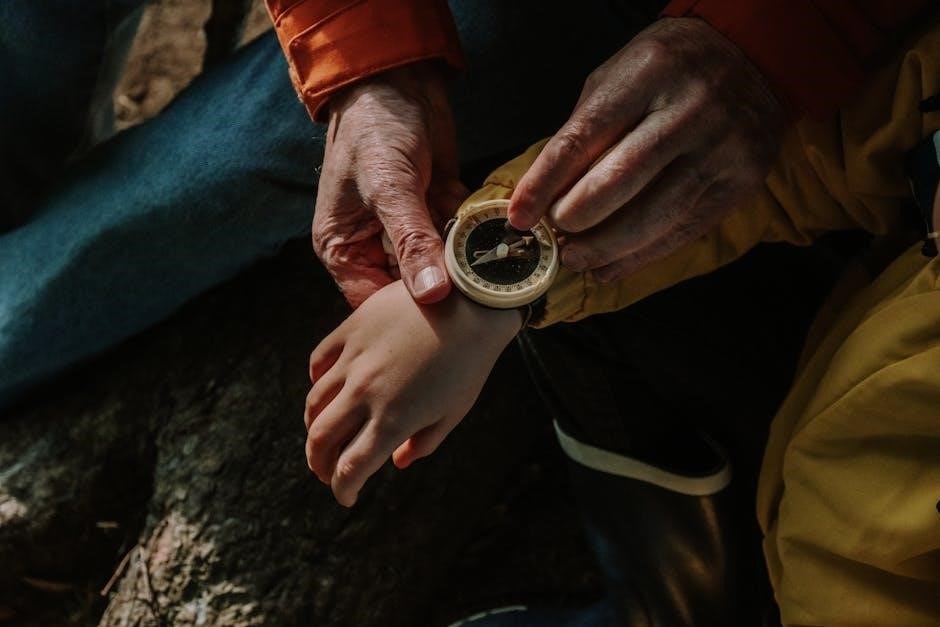
Pack ample water, non-perishable food, and fuel for the long journey. Bring sturdy clothing, sunscreen, and a first-aid kit. Carry a reliable GPS device, maps, and a vehicle suitable for rugged terrain. Ensure your car is serviced, and include emergency supplies like a spare tire and flashlight. Don’t forget golf gear, including clubs and tees, for the unique experience. Plan meticulously for remote travel.

Accommodation Options

Accommodation options along the Nullarbor Links Golf Course include convenient roadside motels and roadhouses. Towns like Ceduna, Kalgoorlie, and Norseman offer comfortable stays. Fraser Range Station and Eucla Motel provide unique outback experiences. Book in advance, especially during peak travel seasons, to ensure availability. Plan your lodging to align with your golfing itinerary across the vast, scenic route.

Transportation Recommendations

A reliable vehicle is essential for traversing the Nullarbor Links Golf Course. A 4WD or SUV is recommended due to rugged terrain. Carry extra fuel, as petrol stations are limited. Download the Nullarbor Map App for GPS navigation. Plan stops at roadhouses and towns for supplies. Consider guided tours for convenience and local insights.

Course Records and Achievements

The Nullarbor Links Golf Course holds records for its unique 1,365 km layout. Notable achievements include the fastest completion times and the most holes played in a day.

Notable Scores and Achievements

The Nullarbor Links Golf Course boasts impressive records, including the fastest completion of its 1,365 km layout. Notable scores highlight players’ resilience and skill across its 18 holes. Achievements include the first-ever hole-in-one at Eucla Beach and the lowest overall score recorded during the annual Chasing the Sun Tournament. These feats showcase the course’s unique challenge and allure.

Challenges and Unique Experiences

The Nullarbor Links Golf Course presents unique challenges, such as vast distances between holes and rugged outback terrain. Players face isolation, extreme weather, and wildlife encounters. The course’s sheer scale demands resilience and strategic thinking. Its remote locations and synthetic greens add to the adventure, offering a one-of-a-kind golfing experience that tests both skill and endurance across Australia’s iconic landscape.

Community Impact and Tourism

The Nullarbor Links Golf Course has become a significant tourist attraction, boosting local economies and creating jobs across SA and WA. It highlights remote communities, fostering cultural exchange and promoting regional development through golf tourism.

Role in Local Tourism

The Nullarbor Links Golf Course plays a vital role in promoting local tourism, attracting golf enthusiasts and adventurers worldwide. It showcases remote towns and roadhouses, boosting regional economies and fostering cultural exchange. This unique attraction draws visitors, supporting local businesses and putting the region on the global tourism map.

Economic Benefits

The Nullarbor Links Golf Course generates significant economic benefits for remote communities, boosting local businesses through increased tourism. It creates jobs and attracts visitors who spend on accommodations, food, and services, injecting revenue into regional economies. This unique attraction supports sustainable growth in remote areas, fostering development and prosperity.

User Reviews and Testimonials

Golfers praise the Nullarbor Links for its unique challenge and breathtaking scenery, calling it a once-in-a-lifetime experience. Players highlight the rugged terrain and synthetic greens as memorable features.

Player Experiences

Players describe the Nullarbor Links as a unique and unforgettable adventure, blending challenging holes with stunning outback scenery. Many highlight the camaraderie and thrill of playing across vast distances, while others praise the synthetic greens and rugged terrain for adding to the course’s distinctive charm.

Feedback on Course Conditions

Players often praise the Nullarbor Links for its unique blend of synthetic greens and rugged outback terrain, though some note the challenges of playing in remote, isolated conditions. Feedback highlights the need to adapt to variable weather and basic facilities, while many commend the course’s environmental practices and scenic beauty;

The Nullarbor Golf Course Map PDF offers a unique, unforgettable experience, blending challenging play with breathtaking Australian landscapes, making it a must-try for adventurous golf enthusiasts worldwide.

Final Thoughts on the Nullarbor Links Golf Course

The Nullarbor Links Golf Course is a must-play for adventurous golfers, offering a unique blend of challenging terrain and scenic beauty. Its 1,365 km span across Australia creates an unparalleled experience, combining sport with breathtaking landscapes. Synthetic greens and rugged outback terrain add to its charm, making it a memorable journey for players seeking both golf and exploration.

Australia

sharp inverter sensor microwave manual

Welcome to the Sharp Inverter Sensor Microwave manual․ This guide provides essential information to help you understand and utilize your microwave’s advanced features․

Discover how to harness Inverter Technology and Genius Sensor for precise cooking‚ ensuring perfect results every time while maintaining safety and efficiency in your kitchen․

1․1 Overview of the Microwave Oven and Its Features

The Sharp Inverter Sensor Microwave is a cutting-edge appliance designed for efficient and precise cooking․ It features advanced Inverter Technology‚ ensuring even heat distribution for consistent results․

The Genius Sensor automatically adjusts cooking time and power levels‚ while multiple preset programs cater to various cooking needs․ With a spacious interior‚ it accommodates family-sized meals effortlessly‚ combining innovation and practicality for everyday use․

1․2 Importance of Reading the Manual Before Use

Reading the Sharp Inverter Sensor Microwave manual is crucial for safe and effective operation․ It provides detailed instructions on using advanced features like Inverter Technology and the Genius Sensor․

Understanding the guidelines helps prevent accidents‚ ensures optimal performance‚ and enables troubleshooting common issues like error codes․ Proper maintenance and cleaning procedures are also outlined to extend the appliance’s lifespan․ By following the manual‚ you can maximize efficiency and enjoy a seamless cooking experience with your microwave․

Key Features of the Sharp Inverter Sensor Microwave

The Sharp Inverter Sensor Microwave offers advanced cooking with Inverter Technology for even heating and a Genius Sensor for automatic cooking precision․

It features multiple modes‚ preset programs‚ and a large capacity‚ making it ideal for family-sized meals․ This microwave combines efficiency with innovative design․

2․1 Inverter Technology for Even Cooking

The Sharp Inverter Sensor Microwave utilizes advanced Inverter Technology to deliver precise and consistent cooking results․ This technology adjusts power levels continuously‚ ensuring even heating and preventing hotspots․

It cooks food more uniformly compared to traditional microwaves‚ which often cycle on and off․ This innovation is particularly beneficial for delicate dishes‚ as it maintains moisture and flavor․

The Inverter Technology also helps in defrosting and reheating‚ making it a versatile feature for everyday cooking needs․ It ensures that your dishes are cooked thoroughly and evenly‚ every time․

2․2 Genius Sensor for Automatic Cooking

The Genius Sensor in your Sharp microwave automatically detects the moisture levels of your food and adjusts cooking time and power for optimal results․

This intelligent feature ensures that dishes are cooked perfectly without constant monitoring․ It eliminates guesswork‚ making cooking easier and more efficient․

Whether reheating‚ defrosting‚ or cooking fresh meals‚ the Genius Sensor adapts to your needs‚ providing convenience and precision in every use․ This technology enhances your cooking experience‚ delivering consistent outcomes effortlessly․

2․3 Multiple Cooking Modes and Preset Programs

Your Sharp Inverter Sensor Microwave offers a variety of cooking modes and preset programs designed to cater to different cooking needs․

From defrosting to reheating‚ and specialized modes for popcorn‚ baked potatoes‚ and more‚ these preset options simplify meal preparation․

The AUTO MENU feature allows you to select from a range of pre-programmed settings‚ ensuring dishes are cooked to perfection with minimal effort․

This versatility makes it easy to achieve consistent results‚ whether you’re cooking fresh meals or reheating leftovers‚ enhancing your overall cooking experience․

2․4 Large Capacity and Family-Sized Cooking

The Sharp Inverter Sensor Microwave boasts a spacious interior‚ perfect for cooking large meals for the whole family․

With models offering up to 1․2 cubic feet of capacity‚ you can easily accommodate big dishes or multiple items at once․

This feature is ideal for households needing to prepare hearty meals without sacrificing cooking performance or efficiency․

Whether it’s roasted vegetables or family-sized casseroles‚ the large capacity ensures everyone is served promptly and evenly cooked․

Control Panel and Navigation

The Sharp Inverter Sensor Microwave features an intuitive control panel with a user-friendly design․

Easily navigate through cooking options and settings using the touch controls and LED display․

This seamless interface ensures efficient operation and quick access to advanced features․

3․1 Physical Layout of the Control Panel

The control panel is designed for ease of use‚ featuring a touchscreen interface and an LED display․

Key components include a numeric keypad for precise cooking times‚ sensor cooking buttons‚ and a start/stop option․

A rotating dial allows easy adjustment of power levels and cooking modes․

The panel’s intuitive layout ensures quick access to all functions‚ making navigation straightforward for users of all skill levels․

3․2 Navigating Through Menu Options

Navigating the menu options is straightforward with the Sharp Inverter Sensor Microwave․

Press the Menu button to access various cooking settings and advanced features․

Use the navigation arrows to scroll through options‚ and the LED display will guide you through selections․

Confirm your choices with the Start button‚ and cancel or adjust using the Stop/Reset option․

This intuitive system ensures easy customization of cooking settings for optimal results every time․

Operating the Sharp Inverter Sensor Microwave

Operate your Sharp Inverter Sensor Microwave by selecting from basic cooking functions‚ sensor cooking‚ and defrosting modes․

Use the control panel to set power levels‚ cooking times‚ and specialized programs for optimal results․

4․1 Basic Cooking Functions

Your Sharp Inverter Sensor Microwave offers intuitive basic cooking functions‚ including Start‚ Stop‚ and Cancel buttons for easy operation․

Use the dial to set cooking times and power levels‚ with options for 100% to 10% power․

The microwave automatically adjusts cooking cycles for consistent results․

For reheating‚ simply enter the weight or time‚ and the oven will handle the rest․

These functions ensure efficient and straightforward cooking for everyday use․

4․2 Using the Sensor Cooking Feature

The Genius Sensor automatically detects moisture levels in food‚ adjusting cooking time and power for optimal results․

For sensor cooking‚ press the Sensor button and select the food type using the menu․

The microwave will monitor cooking progress and turn off when done‚ preventing overcooking․

This feature is ideal for vegetables‚ fish‚ and frozen meals‚ ensuring perfectly cooked dishes every time․

Refer to the manual for specific sensor settings and guidelines․

4․3 Defrosting with Inverter Technology

The Sharp Inverter Sensor Microwave offers advanced defrosting capabilities using Inverter Technology․

This feature ensures even power distribution‚ preventing hot spots and undercooked areas․

To defrost‚ select the defrost mode and enter the food weight or time manually․

The inverter adjusts power levels to thaw food safely and efficiently without overheating․

This method is ideal for meats‚ poultry‚ and frozen meals‚ maintaining nutrients and texture․

Always check progress halfway and flip food for consistent results․

Consult the manual for specific defrosting guidelines to achieve the best outcomes․

4․4 Advanced Cooking Modes

The Sharp Inverter Sensor Microwave offers advanced cooking modes designed for versatility and precision․

These modes include multi-stage cooking‚ allowing you to combine defrosting‚ cooking‚ and reheating in one cycle․

The inverter technology ensures consistent power levels‚ preventing overcooking and preserving nutrients․

Specialized settings for vegetables‚ meats‚ and frozen meals optimize cooking results․

Use the sensor and preset programs for hands-free operation‚ adjusting automatically based on food type․

For custom recipes‚ manual controls let you fine-tune power and time for perfect outcomes․

Refer to the manual for detailed instructions on exploring these advanced features effectively․

Troubleshooting Common Issues

Identify and resolve common issues with your Sharp microwave‚ such as error codes‚ sensor malfunctions‚ or inverter problems․

Check door switches‚ power supply‚ and control panel functionality․

Consult the manual for solutions or contact Sharp support for assistance․

5․1 Understanding Error Codes (e․g․‚ E5)

Error codes like E5 indicate specific issues with your Sharp microwave․

E5 often points to a stuck key on the control pad or a problem with the inverter or magnetron․

Refer to the manual for a list of codes and their meanings․

If an error occurs‚ unplug the microwave‚ check for key obstructions‚ and restart․

For persistent issues‚ contact Sharp customer support for professional assistance․

Regular maintenance can help prevent errors and ensure optimal performance․

5․2 Resolving Issues with the Inverter or Magnetron

If you encounter issues with the inverter or magnetron‚ start by checking for stuck keys or loose connections․

Power cycle the microwave by unplugging it for 30 seconds to reset internal systems․

If the problem persists‚ avoid DIY repairs‚ as these components require professional attention․

Contact Sharp customer support or a certified technician to diagnose and fix the issue․

Never attempt to service the inverter or magnetron yourself‚ as this can cause further damage or safety hazards․

5․3 Addressing Sensor Malfunctions

If the Genius Sensor malfunctions‚ ensure no food residue or splatters obstruct the sensors․

Clean the interior and sensor area with a damp cloth to restore functionality․

Check for loose connections or blockages near the sensor․

If issues persist‚ reset the microwave by unplugging it for 30 seconds․

For unresolved problems‚ contact Sharp customer support or a certified technician for assistance․

Avoid DIY repairs‚ as sensor components require specialized expertise to fix correctly․

5․4 General Maintenance Tips

Regularly clean the microwave cavity‚ door seals‚ and exterior with a soft cloth and mild detergent to prevent food residue buildup․

Check and ensure all vents are unobstructed for proper airflow․

After each use‚ wipe down surfaces to avoid splatter accumulation․

Inspect the turntable and support ring for damage; replace if necessary․

Update firmware periodically if available to optimize performance․

Avoid using abrasive cleaners or metal scrubbers‚ as they may damage surfaces․

By following these tips‚ you can maintain your microwave’s efficiency and extend its lifespan․

Safety Precautions and Guidelines

Always follow essential safety guidelines to avoid hazards during operation․ Keep children away and ensure proper cleaning to maintain efficiency and prevent potential risks in the kitchen․

6․1 Essential Safety Information

Always follow safety guidelines to ensure safe operation of your Sharp Inverter Sensor Microwave․ Never attempt repairs yourself‚ as this can be hazardous․ Keep children away from the microwave while it is in use․ Ensure proper cleaning to prevent food residue buildup‚ which could cause malfunctions․ Avoid overheating or using metal utensils‚ as they can spark․ Familiarize yourself with error codes like E5‚ which may indicate issues with the inverter or control pad․ Follow all precautions to maintain efficiency and safety in your kitchen․

6․2 Avoiding Hazards During Operation

To ensure safe operation‚ always keep children away from the microwave while it is running․ Avoid using metal utensils or dishes‚ as they can cause sparks․ Never leave cooking unattended‚ especially when heating liquids‚ to prevent overheating․ Keep the microwave clean to avoid food residue buildup‚ which could lead to malfunctions․ If you notice unusual smells or sparks‚ stop use immediately․ Always refer to the manual for proper usage and troubleshooting guidance to maintain a safe cooking environment․

6;3 Proper Cleaning and Maintenance

Regularly clean the microwave’s interior and exterior with a damp cloth to remove food spills and splatters․ Avoid using abrasive cleaners or metal scrubbers‚ as they can damage surfaces․ Wash the turntable and accessories in warm soapy water․ Ensure the waveguide cover is clean to maintain even cooking․ Check and clean the microwave’s vents to ensure proper airflow․ Never use the microwave until it is completely dry after cleaning to prevent damage or electrical issues․ Routine maintenance ensures optimal performance and longevity of your appliance․

Mastering your Sharp Inverter Sensor Microwave enhances cooking convenience and efficiency․ By following this manual‚ you’ll unlock its full potential‚ ensuring delicious meals and long-term satisfaction․

7․1 Maximizing the Potential of Your Sharp Microwave

To maximize your microwave’s potential‚ explore its advanced features like Inverter Technology and Genius Sensor for precise cooking․ Regularly update your cooking techniques and utilize preset programs for various dishes․

Maintain your appliance by cleaning it frequently and referring to the troubleshooting guide for any issues․ By doing so‚ you ensure optimal performance and extend the lifespan of your microwave‚ making it a reliable companion in your kitchen for years to come․

Australia

breeze air evaporative cooler manual

Breezair evaporative coolers are high-quality, energy-efficient solutions designed for effective cooling in dry climates, offering eco-friendly operation and advanced features like remote control and timer functionality.

Overview of the Breezair Evaporative Cooler Manual

The Breezair evaporative cooler manual is a comprehensive guide designed to help users understand, install, and maintain their cooling systems effectively. It provides detailed step-by-step instructions for installation, operation, and troubleshooting, ensuring optimal performance. The manual includes diagrams, parts lists, and maintenance schedules to keep the cooler running efficiently. Topics range from basic setup to advanced features like remote control and timer functionality. Additionally, it covers energy-efficient practices and eco-friendly design principles. Available in PDF format online, the manual is user-friendly and accessible, making it an essential resource for both new and experienced users to maximize their cooling experience.

Key Features and Benefits of Breezair Coolers

Breezair evaporative coolers are known for their energy efficiency, remote control functionality, and timer features, making them a convenient and eco-friendly cooling solution. They utilize advanced technologies like the WaterMiser system to minimize water usage while maximizing cooling effectiveness. These coolers are designed for quiet operation, ensuring a peaceful environment even on high settings. With features like fan-only and cool modes, they offer versatility for different comfort needs. The remote control allows easy adjustment of settings without moving, enhancing user convenience. Additionally, their eco-friendly design aligns with modern sustainability goals, making them a cost-effective and environmentally responsible choice for cooling homes and spaces efficiently.

How Breezair Evaporative Coolers Work

Breezair evaporative coolers operate by drawing hot air through water-soaked cooling pads, reducing temperatures naturally without harmful refrigerants, providing an efficient and eco-friendly cooling solution.

The Principle of Evaporative Cooling

Evaporative cooling works by drawing hot air through water-soaked cooling pads, causing the water to evaporate and cool the air naturally. This process occurs as the hot air passes over the damp pads, lowering its temperature through evaporation. The cooled air is then circulated into the space, providing a refreshing and energy-efficient cooling solution. This method is environmentally friendly, as it uses water evaporation rather than refrigerants, making it ideal for dry climates where humidity is low. The natural cooling process not only reduces energy consumption but also ensures a healthier indoor environment by continuously introducing fresh air.

Components of the Breezair Cooler System

The Breezair cooler system comprises essential components designed for optimal performance. These include the cooling pads, which are saturated with water to facilitate evaporation, and the fan, which circulates air through the system. The water pump ensures a steady supply of water to the pads, while the distribution system ensures even water flow. The control panel, often accompanied by a remote, allows users to adjust settings like fan speed and timer. Additionally, the unit may feature a water reservoir and a drainage system to manage excess water. These components work together to provide efficient and effective cooling, tailored for dry climates.

Installation and Setup

Proper installation ensures optimal performance. Position the unit correctly, connect to a water supply, and ensure electrical connections are safe and meet local regulations for efficiency.

Step-by-Step Installation Guide

Begin by preparing the installation site, ensuring it is level and well-ventilated. Position the Breezair evaporative cooler according to the manufacturer’s instructions, typically near a window or external wall. Connect the water supply line to the unit, ensuring it is securely attached to avoid leaks. Next, install the electrical connections, making sure they meet local safety standards. Mount the control panel and remote sensor in an accessible location. Finally, test the system by running it in manual mode to ensure proper function. Refer to the manual for specific model requirements and safety precautions to complete the setup successfully.

Connecting the Cooler to Water Supply

To connect the Breezair evaporative cooler to the water supply, first locate the water inlet valve on the unit; Attach the provided water supply hose to the inlet, ensuring it is tightly secured with the included fittings. Turn on the water supply and check for leaks around the connections. Adjust the flow rate as needed using the valve on the unit. Ensure the water distribution system is evenly saturated for optimal cooling performance. Regularly inspect the water pads for mineral buildup and clean them as recommended in the manual to maintain efficiency and prevent issues. Proper connection is crucial for effective operation.

Maintenance and Troubleshooting

  • Regularly inspect and clean water-soaked pads to ensure proper water flow and cooling efficiency.
  • Check for dry pads or low water levels, which may indicate solenoid or communication issues.
  • Inspect the water supply line for leaks or blockages and replace if necessary.
  • Ensure proper drainage to prevent mineral buildup and maintain optimal performance.

Regular Maintenance Tips for Optimal Performance

Regular maintenance is essential to ensure your Breezair evaporative cooler operates efficiently. Start by inspecting and cleaning the water-soaked cooling pads monthly to prevent mineral buildup and bacterial growth. Check the water supply line for leaks or blockages and ensure proper drainage to avoid standing water. Replace worn-out pads annually and clean the fan and motor to maintain airflow. Additionally, inspect the thermostat and remote control for proper functionality. If issues arise, such as dry pads or low water levels, consult the user manual or contact a professional technician to address potential solenoid or communication problems. Regular servicing ensures years of trouble-free cooling.

Common Issues and Solutions

Common issues with Breezair evaporative coolers include low airflow or reduced cooling efficiency. This can often be resolved by cleaning clogged filters or ensuring proper water supply. If the pads are dry, check the solenoid valve for faults and ensure it’s functioning correctly. In cases of excess humidity, consider using a dehumidifier alongside the cooler. For persistent issues, resetting the unit by turning off the mains power and restarting can resolve fault codes. Always refer to the user manual for specific troubleshooting steps. If problems persist, contact a professional technician to ensure optimal performance and extend the cooler’s lifespan. Regular maintenance helps prevent these issues.

Advanced Features of Breezair Coolers

Breezair coolers feature remote control, timer functionality, and energy-efficient designs, ensuring convenient operation and eco-friendly performance for optimal cooling solutions in various environments.

Remote Control and Timer Functionality

The Breezair evaporative cooler comes equipped with a convenient remote control, allowing users to adjust settings from up to 16.4 feet away. This feature enables easy control of cooling modes, fan speeds, and timer functions without leaving your seat. The timer functionality lets you program the cooler to turn off after a specific duration, optimizing energy use and ensuring uninterrupted sleep. With a simple click, you can activate the night light or adjust settings, making it ideal for bedtime use. This advanced feature enhances user convenience, providing a seamless and efficient cooling experience tailored to your lifestyle and comfort needs.

Energy Efficiency and Eco-Friendly Design

Breezair evaporative coolers are crafted from high-quality materials, ensuring durable and energy-efficient performance. Designed with eco-friendly principles, these units use significantly less energy compared to traditional air conditioning systems. By leveraging natural evaporation, they minimize environmental impact while providing effective cooling. The systems are optimized for low power consumption, making them a cost-effective and sustainable choice. Additionally, their design promotes trouble-free operation for years, reducing the need for frequent repairs and replacements. This eco-conscious approach aligns with modern environmental goals, offering users a responsible and efficient cooling solution for their homes and spaces.

Breezair evaporative coolers offer a perfect blend of efficiency, comfort, and eco-friendliness, making them an excellent choice for cooling needs in dry climates with low humidity levels effectively.

Why Choose Breezair Evaporative Coolers?

Breezair evaporative coolers are a top choice for efficient and eco-friendly cooling solutions. They offer advanced features like remote control, timer functionality, and quiet operation, ensuring maximum comfort. Designed with high-quality materials, these coolers provide long-lasting performance and are ideal for dry climates. Their energy-efficient design reduces power consumption while maintaining effective cooling. Additionally, Breezair coolers are easy to maintain and come with comprehensive manuals for user convenience. With their innovative technology and user-friendly design, Breezair coolers are a reliable and cost-effective option for home cooling needs, providing both comfort and environmental benefits.

Final Thoughts on Performance and Value

Breezair evaporative coolers deliver exceptional performance and value, offering efficient cooling solutions for dry climates. Their energy-efficient design minimizes power consumption while providing effective temperature control. With features like remote control and timer functionality, these coolers enhance convenience and comfort. Built from high-quality materials, they ensure durability and long-term reliability. Maintenance is straightforward, and comprehensive manuals guide users through upkeep. Overall, Breezair coolers are a cost-effective choice, balancing eco-friendly operation with superior performance, making them an excellent investment for home cooling needs.

Australia

enduring power of guardianship wa pdf form

An Enduring Power of Guardianship (EPG) in Western Australia allows individuals to appoint a trusted person to make personal, lifestyle, and treatment decisions on their behalf․ It ensures continuity of care and respect for their wishes, even when they lose mental capacity․ This legal framework provides peace of mind and clarity for families and guardians, aligning with WA’s legal requirements and safeguarding the principal’s autonomy․

1․1․ Definition and Purpose

An Enduring Power of Guardianship (EPG) in Western Australia is a legal document that allows individuals to appoint a trusted person (a guardian) to make decisions on their behalf․ It is designed to ensure that the principal’s wishes are respected and their well-being is protected, even when they lose mental capacity․ The purpose of an EPG is to provide clarity and continuity in decision-making, covering personal, lifestyle, and treatment decisions․ It is a vital tool for safeguarding autonomy and ensuring care aligns with the principal’s values and preferences․

1․2․ Importance of the EPG in WA

The Enduring Power of Guardianship (EPG) holds significant importance in Western Australia as it ensures that a trusted individual can make decisions on behalf of the principal when they lose mental capacity․ This legal document provides peace of mind, safeguarding the principal’s autonomy and well-being․ It also offers clarity and direction for families and healthcare providers, reducing potential conflicts․ By appointing a guardian, individuals can maintain control over their personal, lifestyle, and medical choices, aligning with Western Australia’s legal framework for protecting vulnerable individuals․

Legal Requirements for Creating an EPG in WA

Creating an EPG in WA requires the principal to be 18+ years old with full legal capacity, ensuring they can make informed decisions and appoint a trusted guardian․

2․1․ Eligibility Criteria

To create an EPG in WA, the principal must be at least 18 years old and possess full legal capacity to understand the nature and consequences of the document․ This means they must be capable of making informed decisions and communicating their wishes clearly․ The principal must also be a resident of Western Australia or have a clear connection to the jurisdiction․ Additionally, the appointed guardian must be willing and capable of fulfilling their responsibilities, ensuring the principal’s best interests are upheld․

2․2․ Capacity to Make an EPG

To create an EPG, the principal must have the mental capacity to understand the nature and consequences of the document․ This includes being able to comprehend the powers being granted and make informed decisions․ The principal must be able to communicate their wishes clearly and voluntarily, free from coercion or undue influence․ If there is any doubt about the principal’s capacity, a medical or legal assessment may be required to confirm their ability to execute the EPG effectively․

The Role of the Guardian

The guardian is responsible for making personal, lifestyle, and treatment decisions on behalf of the principal, ensuring their wishes and best interests are upheld with respect and care․

3․1․ Powers and Responsibilities

The guardian holds the authority to make decisions regarding the principal’s personal, lifestyle, and medical affairs, as outlined in the EPG document․ They must act in the principal’s best interests, respecting their autonomy and previously expressed wishes․ The guardian’s responsibilities include managing daily care, healthcare decisions, and ensuring the principal’s well-being․ They are legally obligated to avoid conflicts of interest and act with integrity․ The scope of their powers is defined by the principal in the EPG form, ensuring clarity and boundaries in their decision-making role․

3․2․ Decision-Making Authority

A guardian appointed under an EPG has the authority to make decisions about the principal’s personal, lifestyle, and medical affairs․ This includes decisions regarding accommodation, healthcare, and daily living arrangements; The guardian must act in the principal’s best interests, respecting their autonomy and any prior wishes expressed․ The decision-making authority is broad but must align with the principal’s values and legal requirements․ The principal can also specify limitations on the guardian’s authority in the EPG form, ensuring their preferences are upheld․ This authority becomes effective when the principal loses mental capacity, as defined by law․

Completing the EPG Form

The EPG form is a legal document that must be filled out accurately to appoint a guardian․ It is available as a PDF in Western Australia and requires detailed personal and guardian information to ensure validity and clarity in decision-making authority․

4․1․ Where to Find the EPG WA PDF Form

The Enduring Power of Guardianship (EPG) form in Western Australia can be accessed online through official government or legal aid websites․ It is often available as a downloadable PDF, specifically Form 9, which includes detailed instructions․ Additionally, resources like the Enduring Power of Guardianship explanatory guide by the Office of the Public Advocate provide comprehensive information․ Individuals can also obtain the form in person from legal aid offices or public advocacy services, ensuring easy access for those preparing their EPG․

4․2․ Filling Out the Form Correctly

Filling out the EPG WA PDF form requires careful attention to detail․ Start by reading the form thoroughly to understand the information needed․ Use the Enduring Power of Guardianship explanatory guide for clarification․ Ensure all sections are completed accurately, including the appointment of guardians and any specific powers granted․ Avoid crossing out sections unless intentional․ Seek assistance if needed to ensure compliance with legal requirements․ Proper completion is crucial for the document to be valid and enforceable, reflecting the principal’s true wishes․ Accuracy ensures clarity and avoids future disputes․

4․3․ Key Sections of the Form

The EPG WA PDF form includes several critical sections; The appointment section requires details of the principal and their chosen guardian․ Powers and authority must be clearly defined, specifying if they are enduring or substitute․ The form also includes a section for witness signatures, ensuring the document is legally valid․ Additional pages may cover special directions or modifications to powers․ Each section must be completed accurately to reflect the principal’s wishes and comply with legal standards, ensuring the EPG is both effective and enforceable․

Appointment Process

The appointment process involves selecting a trusted guardian, discussing their responsibilities, and formally nominating them in the EPG form, ensuring they understand and accept the role․

5․1․ Choosing the Right Guardian

Selecting the right guardian is crucial for ensuring your wishes are respected․ They must be at least 18 years old, have legal capacity, and be someone you trust implicitly․ Consider their ability to make decisions in your best interest, communicate effectively, and manage responsibilities․ It’s important to discuss your expectations and values with them beforehand to align their actions with your preferences․ Avoid appointing individuals with conflicts of interest or those who may face challenges in fulfilling the role․

5․2․ Responsibilities of the Guardian

A guardian appointed under an Enduring Power of Guardianship in WA has specific responsibilities․ They must act in your best interest, making decisions about your personal, lifestyle, and treatment matters as outlined in the form․ The guardian must respect your autonomy and consult with relevant parties, such as healthcare providers or family members, when necessary․ They are also required to avoid conflicts of interest and fulfill their duties with care and honesty․ Regular communication with you, if possible, ensures your wishes remain central to their decision-making process․

5․3․ Formalizing the Appointment

Formalizing the appointment of a guardian under an EPG in WA involves completing the form accurately and signing it in the presence of two independent witnesses․ The principal and the guardian must both sign the document, with witnesses attesting to the principal’s capacity and voluntary consent․ A notary may also be required to authenticate the signatures, ensuring the document’s validity․ Once formalized, the EPG is legally binding, and the guardian is authorized to act as outlined in the document, with a copy retained for future reference․

When Does the EPG Take Effect?

An EPG takes effect when the principal loses mental capacity, ensuring decisions are made in their best interests․ It remains legally binding upon activation․

6․1․ Activation of the EPG

The EPG is activated when the principal loses mental capacity, confirmed by a medical professional․ This assessment ensures the guardian can make decisions aligned with the principal’s best interests․ Once activated, the EPG remains in effect until revoked or the principal passes away․ It safeguards the principal’s autonomy by ensuring their wishes are respected even when they can no longer make decisions themselves․ This legal mechanism provides clarity and continuity in care and personal matters․

6․2․ Mental Capacity and Decision-Making

Mental capacity is a critical factor in the EPG, as it determines when the guardian can step in․ The principal must have the capacity to understand the nature and consequences of the document when creating it․ Capacity assessments are typically conducted by medical professionals to confirm the principal’s ability to make decisions․ Once the EPG is activated due to incapacity, the guardian makes decisions aligned with the principal’s best interests and previously expressed wishes, ensuring their autonomy is respected and protected․

Legal Formalities

Legal formalities for an EPG in WA include proper signing, witnessing, and notarization to ensure validity․ These steps confirm the principal’s intent and compliance with WA law․

7․1․ Signing and Witnessing the Document

Signing and witnessing the EPG form are critical steps to ensure its validity․ The principal must sign the document in the presence of an eligible witness, who verifies their identity and capacity․ The witness cannot be a guardian appointed in the document․ This process confirms the principal’s understanding and voluntary consent, adhering to Western Australia’s legal requirements․ Proper execution safeguards the document’s enforceability and upholds the principal’s wishes․ Attention to detail is essential to avoid potential legal challenges․

7․2․ Notarization Requirements

Notarization of an EPG in Western Australia is not typically mandatory but can be beneficial for authenticity․ A notary public can certify that the principal and witnesses signed the document voluntarily․ This step adds an extra layer of credibility, especially if the document’s validity is ever questioned․ While not required by law, notarization can provide peace of mind and prevent potential disputes․ It is a precautionary measure to ensure the document’s enforceability and acceptance by relevant authorities or institutions․

7․3․ Registration with Relevant Authorities

Registration of an EPG with relevant authorities in Western Australia is not typically required unless the guardian needs to manage real estate or specific financial transactions․ However, it is recommended to lodge a copy with institutions or bodies involved in the principal’s affairs, such as banks or healthcare providers, to ensure smooth implementation of the guardian’s authority․ This step helps verify the document’s authenticity and facilitates decision-making processes without delays or disputes․

Revocation and Termination

An Enduring Power of Guardianship can be revoked if the principal still has mental capacity, requiring a formal, written notice․ Termination occurs upon the principal’s death or if the guardian resigns․ The revocation must be communicated to the guardian and relevant authorities, such as the Office of the Public Advocate, to ensure legal validity․

8․1․ How to Revoke an EPG

To revoke an Enduring Power of Guardianship in Western Australia, the principal must have mental capacity․ A written notice of revocation is required, signed and witnessed․ The guardian must be informed, and a copy of the revocation should be provided․ The Office of the Public Advocate may also need to be notified․ Use Form 6 for this purpose․ Ensure all steps are followed to avoid legal complications․ The revocation takes effect once the guardian acknowledges it, restoring the principal’s decision-making authority․

8․2․ Circumstances Leading to Termination

An Enduring Power of Guardianship (EPG) in Western Australia may terminate if the principal passes away or regains mental capacity․ It can also end if the guardian resigns, becomes incapacitated, or is removed by the court due to misconduct or failure to act in the principal’s best interests․ Additionally, the EPG may terminate if the guardian’s actions conflict with the principal’s wishes or if the court deems it necessary to protect the principal’s rights․ Proper documentation and legal processes are required to formalize the termination․

An Enduring Power of Guardianship in Western Australia is a vital legal tool ensuring your personal and lifestyle decisions are respected if you lose mental capacity․ By appointing a trusted guardian, you maintain control over your future, providing peace of mind for you and your family․ This document, guided by WA’s legal framework, safeguards your autonomy and ensures decisions align with your values and wishes, offering a secure and organized approach to future planning․

Australia

pdf goldilocks and the three bears

Discover the beloved fairy tale of Goldilocks and the Three Bears in a convenient PDF format․ This classic story, filled with engaging visuals and moral lessons, is perfect for readers of all ages․ The PDF version offers an easy-to-read layout, making it ideal for storytelling sessions or educational purposes․ Download and enjoy this timeless adventure today!

Overview of the Fairy Tale

Goldilocks and the Three Bears is a timeless fairy tale that captivates readers with its simple yet engaging storyline․ The story revolves around a curious girl named Goldilocks who stumbles upon the cozy home of three bears: Papa Bear, Mama Bear, and Baby Bear․ While the bears are away, Goldilocks explores their house, sampling their porridge, sitting in their chairs, and eventually falling asleep in Baby Bear’s bed․ When the bears return, they discover the intrusion, leading to a dramatic confrontation․ This classic tale teaches valuable lessons about respect for others’ property and the consequences of curiosity․ Its universal appeal makes it a favorite among children and adults alike, ensuring its place as a beloved story for generations․

Importance of the PDF Version

The PDF version of “Goldilocks and the Three Bears” offers a convenient and accessible way to enjoy this classic tale․ With its clear formatting and engaging visuals, the PDF ensures a pleasant reading experience for both children and adults․ It is ideal for educators seeking to incorporate the story into lesson plans, as it can be easily shared and viewed on various devices․ Additionally, the PDF format preserves the story’s original charm, making it a great resource for families to read together․ Its portability and readability make it a valuable tool for promoting literacy and a love for storytelling․ The PDF version also allows for interactive features in some editions, enhancing the learning experience for young readers;

The Story of Goldilocks and the Three Bears

A curious girl named Goldilocks encounters a cozy house belonging to Papa Bear, Mama Bear, and Baby Bear․ Her adventurous nature leads her to sample their porridge, sit in their chairs, and sleep in Baby Bear’s bed, sparking a surprising confrontation when the bears return home․

Okay, so I need to generate a text under the subheading “

The Three Bears and Their House

” for the topic “pdf goldilocks and the three bears․” The user has given me specific instructions, so I need to make sure I follow them carefully․

Looking at the provided information from the internet, I see details about the three bears: Papa Bear, Mama Bear, and Baby Bear․ They live in a little house in the forest․ Papa Bear is huge, Mama Bear is medium-sized, and Baby Bear is small․ They have porridge for breakfast, which is a key element in the story․

I need to structure this information into a coherent paragraph․ I should introduce the bears, describe their house, and mention their routine, especially the porridge, since it’s a significant part of the story․ I also need to ensure that I don’t include any information that will be covered in other subheadings, like Goldilocks’ arrival or the bears’ reaction․
Let me draft it:

The three bears—Papa Bear, Mama Bear, and Baby Bear—lived in a charming little house in the forest․ Papa Bear, being the largest, had a deep voice and a hearty appetite․ Mama Bear was of medium size and often took care of the household chores․ Baby Bear, the smallest, was playful and full of energy․ Their cozy home was neatly organized, reflecting their tidy nature․ Every morning, Mama Bear would prepare porridge for breakfast․ The porridge was left to cool, which became a crucial element when an unexpected visitor arrived․ The bears’ house was a place of warmth and routine, setting the stage for the events that would unfold․

Now, I need to check the word count․ Let me count each word:

The
three
bears—Papa
Bear,
Mama
Bear,
and
Baby
Bear—lived
in
a
charming
little
house
in
the
forest․
Papa
Bear,
being
the

largest,
had
a
deep
voice
and
a
hearty
appetite․
Mama
Bear
was
of
medium
size
and
often

took
care
of
the
household
chores․
Baby
Bear,
the
smallest,
was
playful
and
full
of
energy․

Their
cozy
home
was
neatly
organized,
reflecting
their
tidy
nature․
Every
morning,
Mama
Bear
would
prepare
porridge
for
breakfast․
The
porridge
was
left
to
cool,
which
became
a
crucial
element
when
an
unexpected
visitor
arrived․
The
bears’
house

was
a
place
of
warmth
and
routine,
100․ setting
101; the
102․ stage
103․ for
104․ the
105․ events
106․ that
107․ would
108․ unfold․

Hmm, that’s ․ I need to reach 137․ I must expand on some details without overlapping with other subheadings․ Maybe add more about their daily routine or the setup of the house․

Let me add more:

The three bears—Papa Bear, Mama Bear, and Baby Bear—lived in a charming little house nestled in the heart of the forest․ Papa Bear, the largest, had a booming voice and a voracious appetite for hearty meals․ Mama Bear, of medium size, skillfully managed the household, ensuring everything was spotless and in order․ Baby Bear, small and lively, was always full of energy, eager to explore and play․ Their home was a picture of warmth and comfort, with a cozy living area and a kitchen where Mama Bear lovingly prepared their meals․ Every morning, she would make porridge for breakfast, carefully portioning it into three bowls to cool․ The porridge was a family favorite, with each bear having a preference for its temperature․ Papa Bear liked his porridge piping hot, Mama Bear preferred hers lukewarm, and Baby Bear enjoyed his cool․ This daily routine set the scene for an unexpected visit that would change their day forever․

Now, let me count again:

The
three
bears—Papa
Bear,
Mama
Bear,
and
Baby
Bear—lived
in
a
charming
little
house
nestled
in
the
heart
of
the
forest․
Papa
Bear,

the
largest,
had
a
booming
voice
and
a
voracious
appetite
for
hearty
meals․
Mama
Bear,
of
medium
size,
skillfully
managed
the
household,
ensuring
everything
was
spotless
and
in
order․
Baby
Bear,
small
and
lively,
was
always
full
of
energy,
eager
to
explore
and
play․
Their
home
was
a
picture
of
warmth
and
comfort,
with
a
cozy
living
area
and
a
kitchen
where
Mama
Bear
lovingly
prepared
their

meals․
Every
morning,
she
would
make
porridge
for
breakfast,
100․ carefully
101․ portioning
102․ it
103․ into
104․ three
105․ bowls
106․ to
107․ cool․
108․ The
109․ porridge
110․ was
111․ a
112․ family
113․ favorite,
114․ with
115․ each
116․ bear
117․ having
118․ a
119․ preference
120․ for
121․ its
122․ temperature․
123․ Papa
124․ Bear
125․ liked
126․ his
127․ porridge
128․ piping
129․ hot,
130․ Mama
131․ Bear
132․ preferred
133․ hers
134․ lukewarm,
135․ and
136․ Baby
137․ Bear
138․ enjoyed
139․ his
140․ cool․
141․ This
142․ daily
143․ routine
144․ set
145․ the
146․ scene
147․ for
148․ an
149․ unexpected
150․ visit
151․ that
152․ would
153․ change
154․ their
155․ day
156․ forever․

Oops, that’s , which is over the limit․ I need to be more concise․ Let me try to condense it without losing essential details․

The three bears—Papa Bear, Mama Bear, and Baby Bear—lived in a charming house in the forest․ Papa Bear, large and with a deep voice, had a hearty appetite․ Mama Bear, medium-sized, managed the household, keeping everything tidy․ Baby Bear, small and lively, was always energetic․ Their home was cozy with a kitchen where Mama Bear made porridge each morning, portioned into three bowls to cool․ Papa Bear liked his porridge hot, Mama Bear preferred hers lukewarm, and Baby Bear liked his cool․ This routine set the stage for an unexpected visitor who would disrupt their peaceful day․

Let me count this:

The
three
bears—Papa
Bear,
Mama
6

Goldilocks’ Arrival and Curiosity

Goldilocks, a curious and adventurous girl, wandered into the forest and stumbled upon the three bears’ cozy cottage․ Intrigued by the inviting aroma of porridge wafting from the house, she decided to take a peek inside․ Finding the door unlocked, she let herself in, her curiosity getting the better of her․ Once inside, she noticed the neatly arranged furniture and the three bowls of porridge on the table․ Her eyes widened with excitement as she spotted the tempting porridge, and she couldn’t resist the urge to taste it․ With a sense of wonder and a touch of mischief, Goldilocks embarked on a journey of discovery within the bears’ home, unaware of the events her curiosity would set in motion․

Tasting the Porridge

Goldilocks’ curiosity led her to the table where three bowls of porridge sat․ She picked up the first spoon and tasted the porridge from the largest bowl․ “Too hot!” she exclaimed, quickly moving to the next bowl․ The second porridge, from the medium-sized bowl, was “too cold” for her liking․ Undeterred, she sampled the third bowl, which belonged to Baby Bear․ “Just right!” she said with a smile, savoring the perfect temperature and flavor․ Goldilocks enjoyed the entire contents of Baby Bear’s bowl, unaware of the mess she was creating․ Her actions set the stage for further exploration of the bears’ home, blending curiosity with a touch of naivety․ This moment highlights her impulsive nature, driving the story toward its climactic confrontation․

Sitting in the Chairs

After tasting the porridge, Goldilocks’ curiosity led her to the living room, where she spotted three chairs․ She decided to test them, starting with Papa Bear’s large, sturdy chair․ It felt “too hard” for her comfort․ Next, she sat in Mama Bear’s chair, but it was “too soft․” Unsatisfied, she moved to Baby Bear’s chair, which was “just right․” She rocked gently at first but soon lost her balance, causing the chair to break․ This mishap added to the chaos she had already created with the porridge․ Goldilocks’ impulsive nature and lack of hesitation in testing the chairs showcased her adventurous yet careless demeanor․ Her actions, though seemingly harmless, prepared the stage for the bears’ eventual discovery of her presence․

Sleeping in Baby Bear’s Bed

Feeling tired after her adventures, Goldilocks decided to rest․ She discovered three beds upstairs and couldn’t resist trying them․ Papa Bear’s bed was “too hard,” and Mama Bear’s was “too soft․” Baby Bear’s bed, however, felt “just right․” She quickly fell asleep, unaware of the chaos she had caused․ Meanwhile, the three bears returned home, exhausted from their walk, only to find their porridge had been tasted, their chairs had been sat in, and someone was sleeping in Baby Bear’s bed․ This discovery set the stage for a dramatic confrontation, highlighting the consequences of Goldilocks’ curious and impulsive actions․ The scene captures the essence of the tale, blending humor with a moral lesson about respecting others’ property․

The Bears’ Return and Reaction

The three bears returned home after their walk, tired and looking forward to rest․ They were shocked to find their porridge had been tasted, their chairs had been sat in, and a stranger was asleep in Baby Bear’s bed․ Papa Bear growled angrily, Mama Bear gasped in disbelief, and Baby Bear cried out in distress․ Goldilocks, startled by their voices, woke up to find the bears staring at her․ Terrified, she quickly jumped out of the window and ran away into the forest․ The bears, though upset, were relieved that the chaos had ended․ They decided to be more cautious in the future, ensuring their home was secure․ This dramatic conclusion teaches a valuable lesson about respecting others’ property and the consequences of one’s actions․

Key Elements of the PDF Version

The PDF version of Goldilocks and the Three Bears features vibrant illustrations, interactive elements, and moral lessons․ It enhances readability with clear fonts and layouts, making it engaging for young readers and educators alike․

Illustrations and Visual Appeal

The PDF version of Goldilocks and the Three Bears is enriched with vibrant and detailed illustrations that bring the story to life․ Each page features colorful depictions of the three bears, their cozy cottage, and Goldilocks’ curious adventures․ The visuals capture key moments, such as Goldilocks tasting the porridge, sitting in the chairs, and sleeping in Baby Bear’s bed․ These illustrations not only enhance the storytelling experience but also help young readers visualize the characters and their actions․ The visual appeal makes the PDF engaging for children, while the clear and crisp images ensure readability on various devices․ The combination of art and text creates a captivating experience, making the PDF a delightful resource for both entertainment and educational purposes․

Downloading and Sharing the PDF

Interactive Features for Readers

The PDF version of Goldilocks and the Three Bears incorporates interactive features designed to enhance reader engagement․ These include clickable elements that allow children to navigate through the story, zoom in on illustrations, and access additional content․ Some versions feature animations, such as Goldilocks moving around the bears’ house or the porridge bowls reacting when clicked․ Interactive quizzes and puzzles are also embedded, encouraging children to participate actively․ These features make the story more immersive and educational, fostering a deeper connection with the narrative․ The interactivity is particularly beneficial for young learners, as it stimulates their curiosity and keeps them engaged․ This modern twist on the classic tale ensures that the PDF remains a valuable and entertaining resource for both children and educators․